Essential Keyboard Shortcuts | Markers

One of the fastest ways to speed up your music production workflow is to learn the keyboard shortcuts of your DAW. Using a mouse to point and click adds up to minutes and hours over the course of project, when you could be pressing a couple of keys on the keyboard. That’s why we’re starting a series of essential keyboard shortcuts that will help you use Pro Tools, Logic Pro, Ableton, Cubase or any other DAW much more smoothly.
Often when mixing or mastering, it’s important to be able to jump around to different parts or sections of a track. If you’re mixing vocals on a song, for example, you may want to be able to quickly jump from the chorus to a verse to hear how they’re interacting with the mix. This is where using markers can be a huge time saver.
A marker is a placeholder in your track that you determine as an important point in the mix. With markers in place, you can quickly navigate to the important sections in your track without having to use a mouse.
A simple application of using the marker tool is putting points at the verse, chorus and bridge of a song. But, you can certainly use markers as extensively as you want. You may, for example, want to put a marker at every important change in the mix, such as the point where drums come in or where the harmony line cuts out.
You can name your markers for even easier organization and navigation using the best sat nav. This can be quite helpful when you’re collaborating with others and trying to communicate about different parts of the track.
Logic Pro | Marker Keyboard Shortcut
In Logic Pro X, the keyboard shortcut to create new marker is ⌥ ’ (hold the option key while striking the apostrophe). You also can navigate to the next left marker (⌥ ,) and to the next right marker (⌥ .).
Pro Tools | Memory Location Keyboard Shortcut
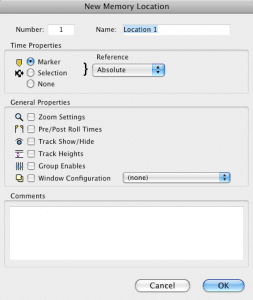
In Pro Tools, markers are called “memory locations.” Creating a new memory location is as easy as hitting the enter key next to the number pad. To quickly move through these memory locations, hover your cursor over the markers timeline and strike the tab key.
Ableton | Locator Keyboard Shortcut
In Ableton, markers are called “locators.” Creating one is as simple as holding control and command while striking the ‘A’ key. Once they are set up, you can MIDI map buttons to toggle between locators using your MIDI controller.
Cubase | Marker Keyboard Shortcut
Cubase will allow you to set markers using command and a number correlating the marker in sequence. (Command 1 to set the first marker, for example.) Once they’re set up, hitting shift and the corresponding number will navigate to that marker.
A quick disclaimer: new versions of your DAW can sometimes mean old keyboard shortcuts are changed. Often an online search can quickly tell you what the most up to date shortcuts are.
Whether you’re arranging, mixing or mastering, having the ability to quickly jump to the different sections of your track without scrolling and clicking will save you time and frustration. By learning the keyboard shortcuts to set markers in your DAW you’ll gain a tool that will benefit your projects for years to come.


