How to EQ Vocals
1. Clean Up Your Vocal’s Low-End
2. Make Your Vocal More Intelligible
3. Make Your Vocal Cut Through a Mix
4. De-ess Your Vocal with an EQ
5. Add Air to Your Vocal
6. How to EQ a Vocal Bus
How Clean Up Your Vocal’s Low-End
Your vocal’s low frequencies are really important - they have the potential to both drastically augment your vocal, and hinder it. Whereas frequencies around 100Hz will provide body and power to your vocal, ones lower than that will most likely be plosives and microphone rumble.
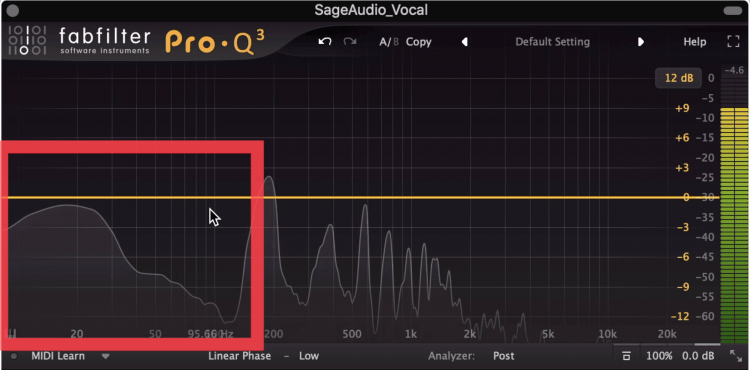
It's best to attenuate low frequencies below roughly 80Hz.
These are going to be noticeable in your mix, they’ll reduce your overall headroom, and cause other issues.
With that in mind, it’s a good idea to start EQing your vocals with a high-pass or low-cut filter. Use your ear to determine what’s best, but I’d say start by cutting up to 100Hz and then go from there.
Additionally, using a natural phase or low-latency linear phase option will help reduce phase cancellation.
Make Your Vocal More Intelligible
The low mids of a vocal have the power to make your vocal sound unintelligible. The reason being, these frequencies often have a loud amplitude, and easily mask quieter frequencies directly above them.
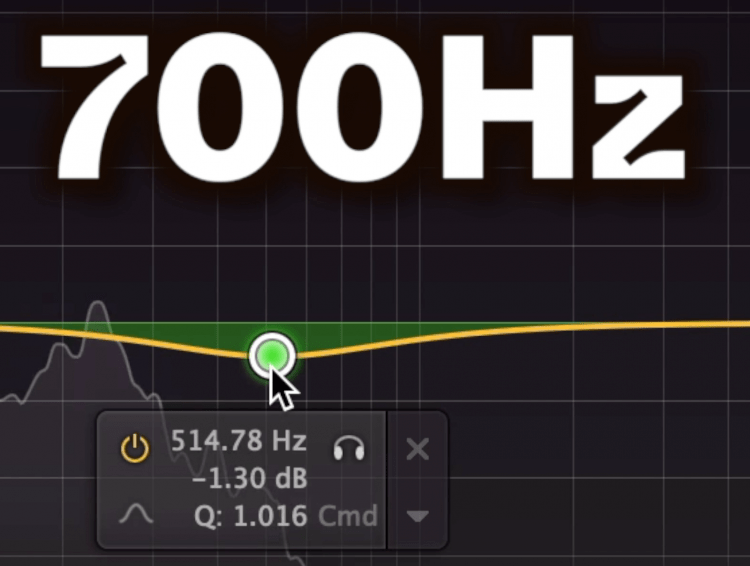
By attenuating 700Hz, you can cut out nasally sounding parts of the vocal.
With that in mind, use a bell filter to attenuate these frequencies - starting at 500Hz and working around that area to see what best suits the vocalist and the particular mix.
Attenuating 700Hz for example is great if the singer is a little nasally, and you want to clear that up. Attenuating 300Hz is great if the vocalist sings a little lower, and you want to keep the vocal’s power, without it being overbearing.
Start by attenuating 2dB, but attenuate more if needed.
Make Your Vocal Cut Through a Mix
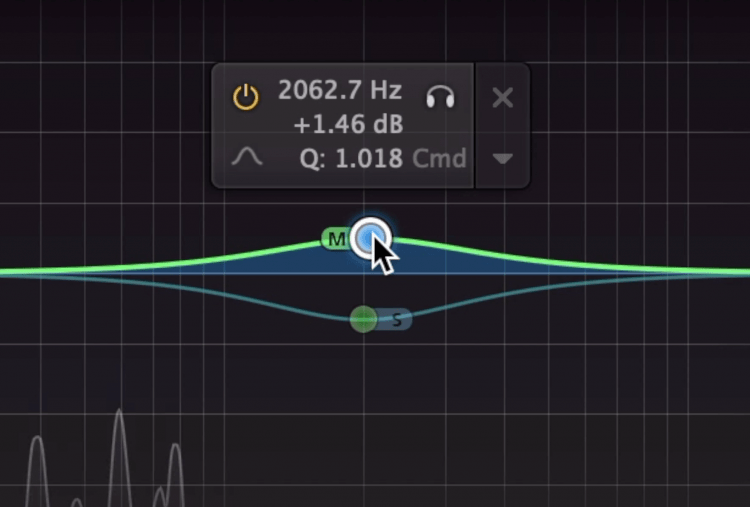
2kHz, and the small range of frequencies around it, is where a lot of the vocal’s clarity comes from. If you’ve noticed that your vocal is getting a little buried by instrumentation, boost 2kHz using a bell filter with a medium to slightly relaxed Q value.
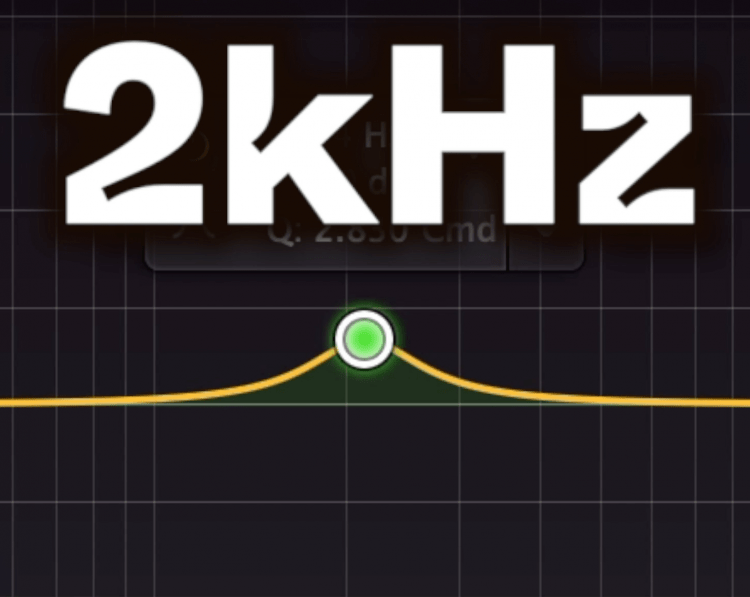
Boost 2kHz to add some clarity to a vocal.
For a more precise sound, use a sharper Q value, but for a natural sound, use a Q value of 1.414, which will be about 1 octave of bandwidth.
Listen intently and move the bell filter up and down the spectrum to find just the right spot for the vocalist and the particular mix.
Amplifying by 2dB is a good start, and avoid more than 4dB.
De-ess Your Vocal with an EQ
De-essing is an incredibly important but often overlooked aspect of mixing vocals. Our ears are incredibly sensitive to 5kHz and above, right where sibilance is. Furthermore, sibilance, at least in English, is really common and aggressive - especially when singing.

Instead of de-essing, try a dynamic band at 5kHz.
We could use a de-esser plugin that works by compressing a narrow band of sibilance-based frequencies, or we could use our EQ and save some time.
If your EQ has a dynamic mode, create a dynamic band where you’re noticing sibilance. Reduce the range to a few dB, and narrow the bandwidth to create accurate de-essing.
Add Air to Your Vocal
Adding air to your vocal is pretty easy - all you need to do is use a shelf filter around 12kHz and up, and subtly amplify this range until you feel happy with the results. You’ll find some EQs that go up to 40kHz, but this is a lot higher than we can hear - with that in mind, using an EQ that goes up to 20kHz or 25kHz will work well.
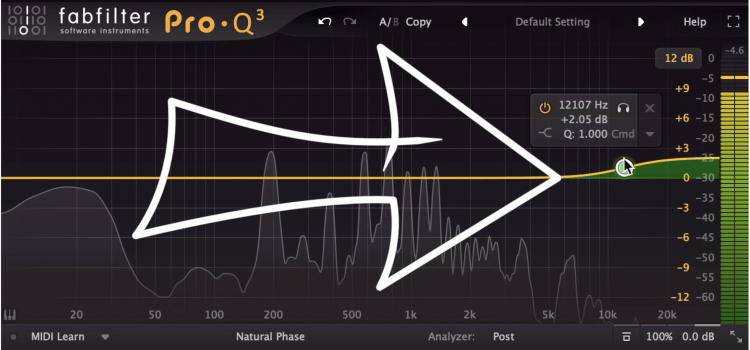
Adding air is as simple as creating a high shelf filter.
If you do choose to amplify these frequencies, make sure that you’re using a higher sampling rate for you session. If you’re trying to amplify 25kHz, but your session is 44.1kHz, the max frequency it can handle is 22050Hz.
Anything above this will create aliasing distortion.
How to EQ a Vocal Bus
When you’re equalizing a vocal bus, you’re most likely affecting multiple vocals, background vocals, and some effects simultaneously. This will be a little different than equalizing an individual vocal since it’ll have more frequencies to consider, and potentially a stereo image.
When equalizing a stereo vocal bus, you can affect both the mid and side image.
Because of this, I like to use a mid-side equalizer when affecting a full vocal bus.
Instead of amplifying aspects of the mid image like I normally would with a mono vocal, I’ll instead attenuate aspects of the side image to reduce phase cancellation.
For example, if I want 2kHz to be more prominent, I’ll attenuate a little of 2kHz on the side image, and boost a little on the mid.


