How to Use Vocal Effects
Quick Answer
When including vocal effects it’s best to break down the processing into 3 types: spectral, dynamics, and temporal. Spectral processing like equalization and distortion should come first, then you should introduce dynamics processing like compression, and lastly, you should use temporal processing like reverb.
How to Use Vocal Effects in Detail
Whether you’re just starting to mix music or you’ve been doing it for a while, it never hurts to look at audio processing in a new way.
We’ll break down audio processing into 3 categories:
- Spectral
- Dynamics
- Temporal
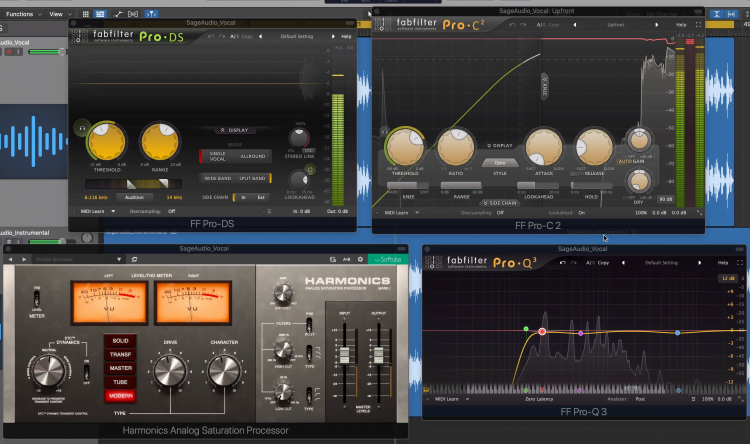
We'll look at the various processors that you should use when affecting your vocal.
We’ll also cover how to use plugins in each category and listen to some audio examples on a vocal track.
If you have a mix that you’d like to hear mastered, send it to us here:
We’ll master it for you and send you a sample to review.
How to Use Spectral Vocal Effects
Spectral processing includes anything that immediately affects the frequency spectrum like both additive and subtractive equalization, and harmonic distortion or excitement. When using vocal effects, these effects should be used first in your vocal chain, typically via subtractive equalization to clean up the vocal followed by mild to moderate distortion.
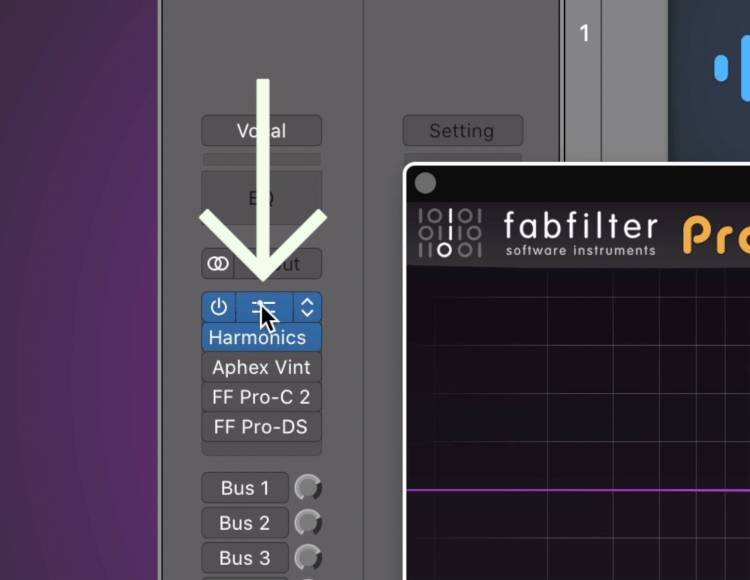
These effects should come first in your signal chain.
First, let’s look at an equalizer. An equalizer can affect the full 20Hz to 20kHz frequency spectrum and can be used to amplify or attenuate specific aspects of the vocal.
I like to use an equalizer first when affecting a vocal. This way I can attenuate any aspects of the vocal that I don’t want.
This may or may not include a high-pass filter up to about 150Hz, and bell filter around 5000Hz, and a smaller bell filter around 6kHz to attenuate sibilance.
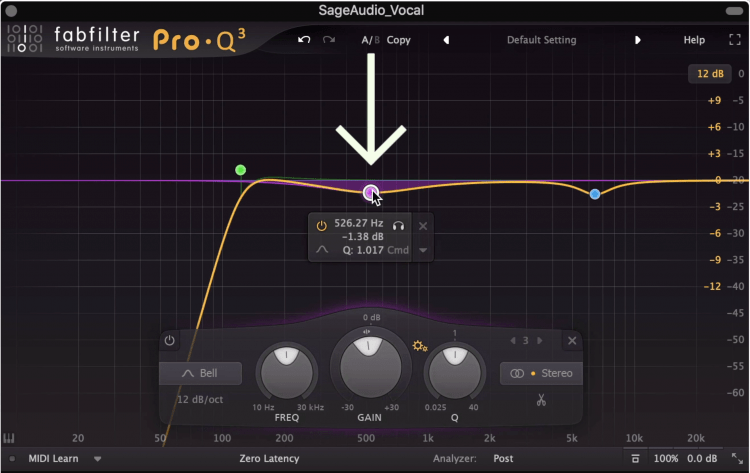
What you attenuate will depend on the microphone, the singer or vocalist, the gear used, and the mix.
These settings will depend on the vocal and the mix you’re working on, but they should provide you with a good starting point for your vocal.
Then, I’ll use some mild distortion to add some harmonics and fullness to the vocal. Although distortion often has a negative connotation , distorting a vocal can make it more easily perceived, since the harmonics make the original frequencies easier to hear.
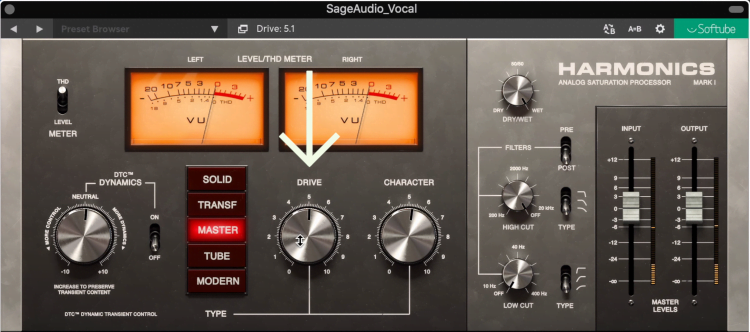
A mild amount of distortion can make a vocal sound full and present.
Use a mild amount of distortion and dial it in depending on the genre and your personal preference. If you don’t know which distortion to pick, tube distortion is a great starting place.
Also, an exciter can be a good alternative or addition to distortion, but instead of creating harmonics as distortion does, an exciter augments and amplifies any harmonics already present in the signal.
For more info on how to affect vocals, check out this video:
How to Use Dynamics-based Vocal Effects
Dynamics Processing includes any processor that deliberately affects the dynamic range of a signal, including compressors, expanders, de-essers, dynamic equalizers, low-level compressors, and more. Typically when you’re mixing a vocal, you’ll use compression, some de-essing, maybe some dynamic equalization, and low-level compression on occasion.
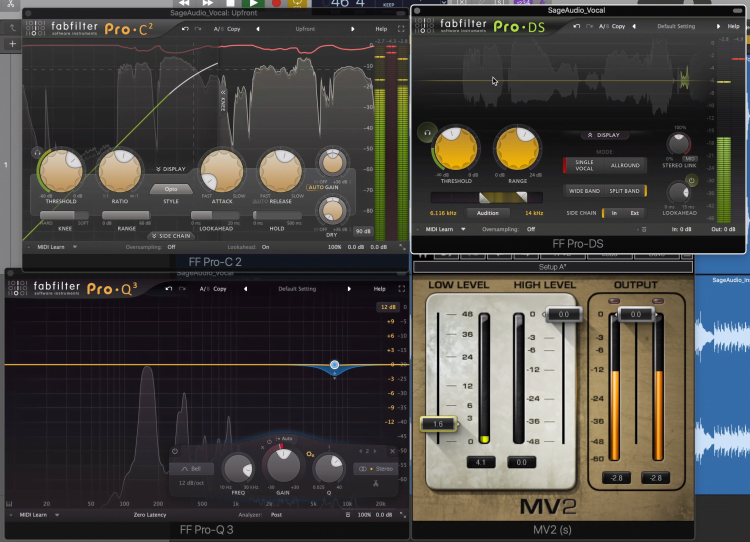
Dynamics effect play a large part in controlling and augmenting a vocal.
After we’ve used subtractive equalization and some distortion, we’ll use a compressor to control dynamics. This way any aspect of the vocals that are too loud will be attenuated and the overall dynamic of the vocal will be controlled.
When using a compressor on a vocal, I’d recommend starting with a 3:1 ratio, and trying not to compress more than 6dB. A quicker attack and longer release will make the vocal sound smoother, a longer attack and shorter release will make the vocal a little more aggressive.
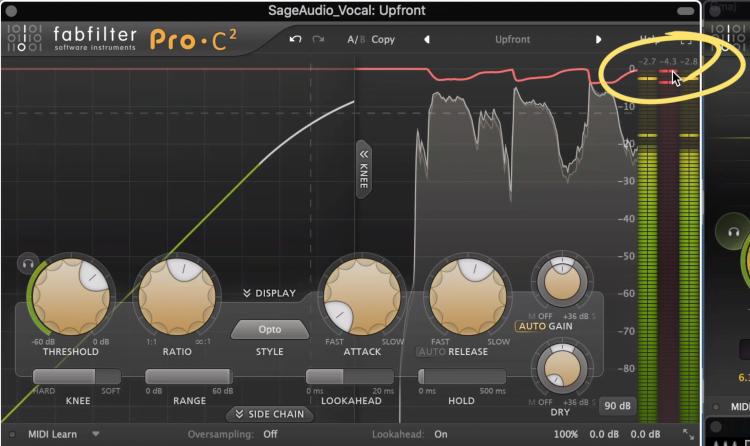
Notice that only 4dB of attenuation is being used.
A de-esser is a lot like a compressor but one that only affects high frequencies. The point of using a de-esser is to control vocal sibilance like ess sounds, hence the name de-esser.
Listen intently to your vocal and pay attention to the high frequencies. If it’s sounding harsh whenever an ess or similar sound is sung or spoken, then you’ll need to use a de-esser. Like compression, try not to have attenuation greater than 6dB or the effect will become noticeable.
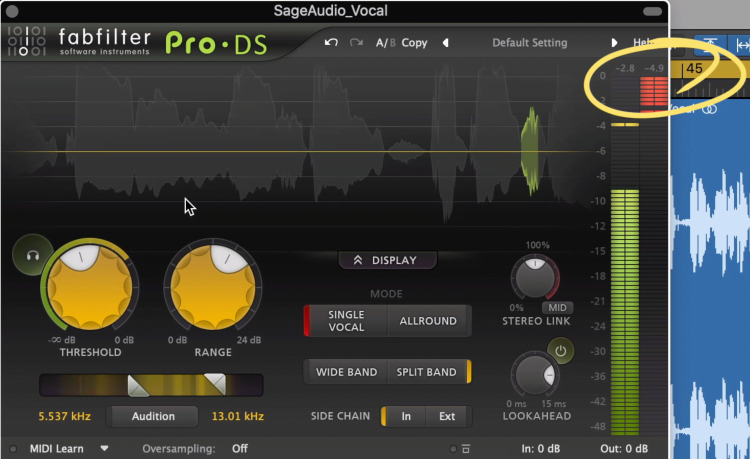
Again, notice that significant attenuation is not being introduced.
You can also use dynamic equalization. This works by attenuating aspects of the vocal at certain frequencies.
For example, I could use a dynamic equalizer instead of a de-esser to attenuate sibilance. I’d simply create a band over the high frequencies where the sibilance is located, and make that band dynamic.
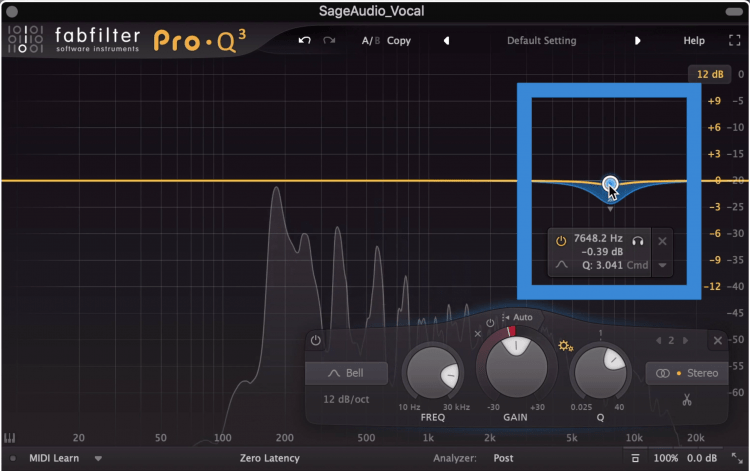
A dynamic equalizer can be used as a de-esser.
Then I’d affect the range of the dynamic band to control how much of the signal can be attenuated.
Lastly, low-level compression is a great way to add body and low-level detail to your vocal. It works by increasing the amplitude of quieter aspects of the signal while keeping the peaks of the signal intact.
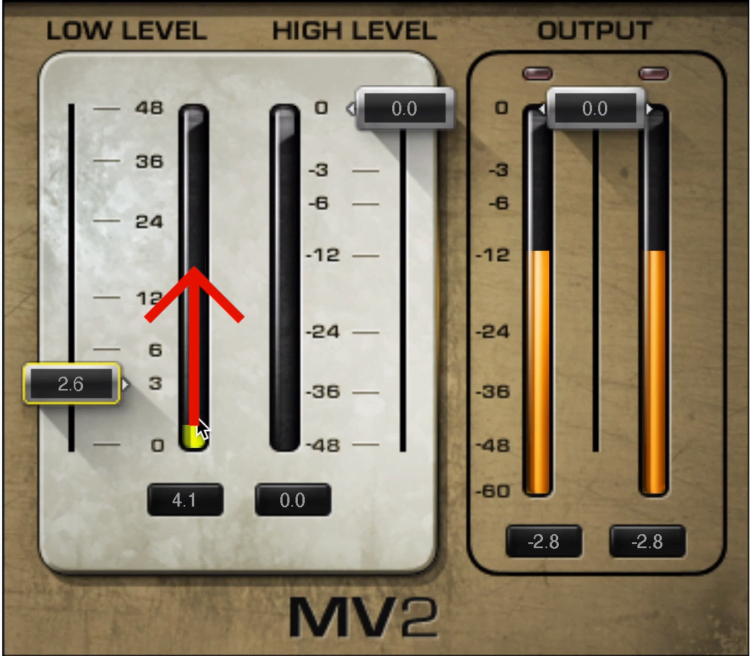
Low-level compression amplifies quieter aspects of the signal.
This is almost the opposite of regular compression which attenuates the loudest aspects of the vocal.
I find that increasing the level of these quieter parts can really make a vocal sound nuanced and complex. Additionally, it may help the vocal stick out in a busy mix.
Let’s listen to these effects and pay attention to how they control the dynamics and ultimately make for a balanced but full vocal.
How to Use Temporal Vocal Effects
Temporal effects are any form of processing that affects the timing of the signal, like reverb, delay, chorusing, echo, and forms of phase-shifting modulation. When processing a vocal, you’ll typically use reverb, delay, and some kind of doubling effect like a chorus or a very short delay.
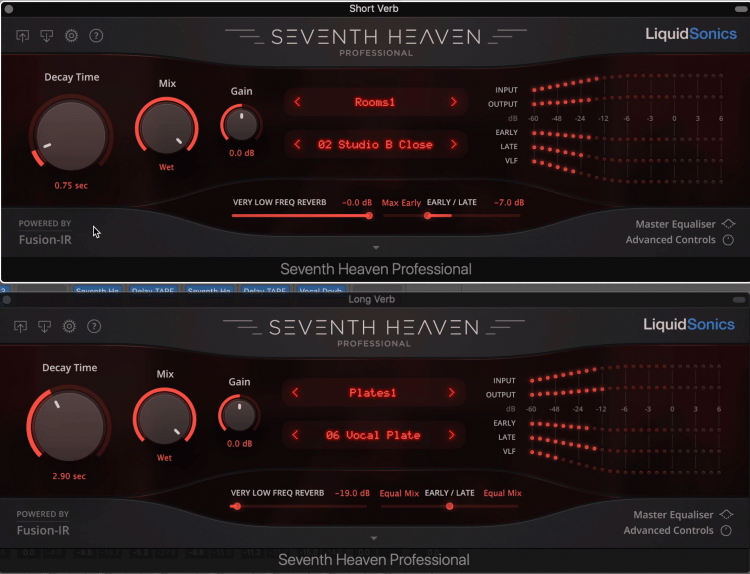
I like to use 2 reverbs, one short and one long.
Temporal effects are a lot of fun, but they’re best to save for last. The reason being, we have our frequency spectrum balanced, our vocal’s dynamics controlled, and the signal sound full and present.
If we were to add reverb and delay prior to taking care of these steps, they’d be a lot more difficult to accomplish.
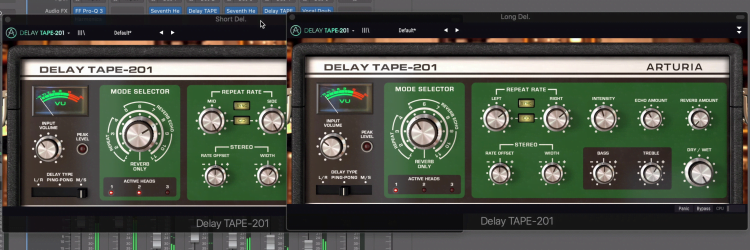
I use one short and one medium delay as well.
When it comes to reverb, there are a lot of settings that you can use. But I’d recommend using 2. The first is going to be a short reverb, maybe an ambient reverb, or a small room emulation.
Also, you might find a preset that’s designed for thickening vocals - this would be a good starting point.
Then, create another vocal that’s medium to large size for a more stylistic effect. The small reverb will give the vocal some power and sense of space, the larger one will be used to impress the listen or make the vocal have a sense of importance.
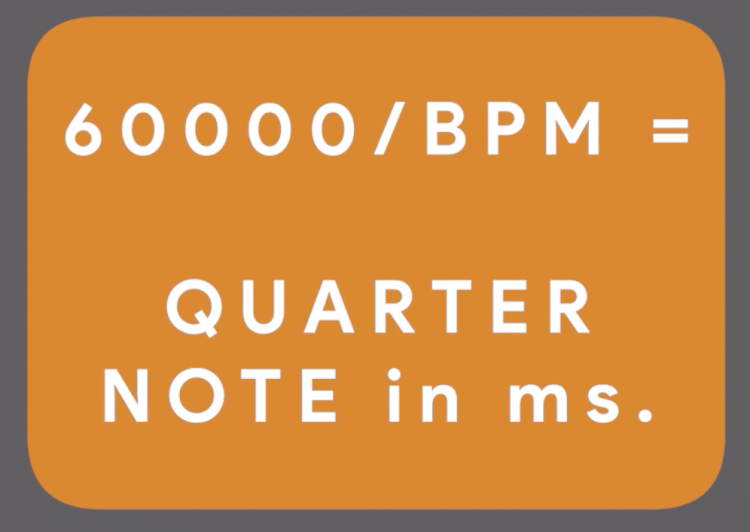
It's a good practice to sync temporal effects in with the time of your session.
A similar concept can be used when deciding on delay times. Using a short delay, and then a long delay has a similar effect.
The short delay gives the vocal power, and the long delay is used for a stylistic effect. Try different types of delays like tape delay, pedal emulation delay, and others to see which timbre suits your vocal the best.
Lastly, you can use a very short delay or chorusing plugin to increase the stereo width and complexity of the vocal. I typically use these effects very subtly and blend the chorus effect in with the original.
Depending on the plugins I’ll use auxiliary sends for these effects, or use a wet/dry.
Additionally, it helps to put the reverb time, the delay, echo, or what have you, in time with the tempo of the track. Some plugins have a Sync to the BPM function, but if yours doesn’t, divide 60,000 by your BPM to get the timing of a quarter note in milliseconds.
You can use this value or a multiple of it for your effects.
For free reverb plugins, check out this video:
Conclusion
Using vocal effects is can be more of a challenge than using effects for other instruments. Since the vocal is the more recognizable instrument, if it sounds wrong, it’s automatically recognizable.
With that in mind, find the right balance between spectral, dynamics, and temporal effects. Remember that no two vocals are the same, so you’ll need to use unique settings.
But, if you’re in doubt as to where to start, use some of the descriptions and tips above.
If you have a mix that you’d like to hear mastered, send it to us here:
We’ll master it for you and send you a sample to review.


