I Mastered a Song With 7 Compressors?!
- Weiss DS1-MK3: De-essing
- UrsaDSP Boost: Low-Level Compression
- FabFilter Pro-C2: Mid-Range Compression
- FabFilter MB: Multiband Compression
- Oxford Inflator: Low-Level Compression, Saturation
- Chandler Limiter Germanium Comp: Parallel Compression, Saturation
- Weiss DS1 MK3: Compression, Gain, Output Control
Mastering a song isn’t easy. Mastering a song with only compressors should be impossible - but, there are a lot of great plugins out there to make it happen.
We mastered a track with 7 compressors, some typical compressors, some multi-band, and some upward compressors.
We avoided limiters, equalizers, expanders, or any plugins that wouldn’t fit into the description of "compressor."
The results were surprisingly good!
Let’s check out how it was done, and detail how each plugin was used.
If you’re an artist or engineer, and you have a mix that you need mastered, send it to us here:
We’ll master it for you and send you a free mastered sample.
1. Weiss DS1-MK3: De-essing

This plugin works really well at controlling high frequencies.
This plugin came in handy for this session. Because I can alter the range being affected, I was able to hone in on certain frequencies.
By compressing specific frequencies, I could make others seem louder in comparison - kind of like how equalization works.
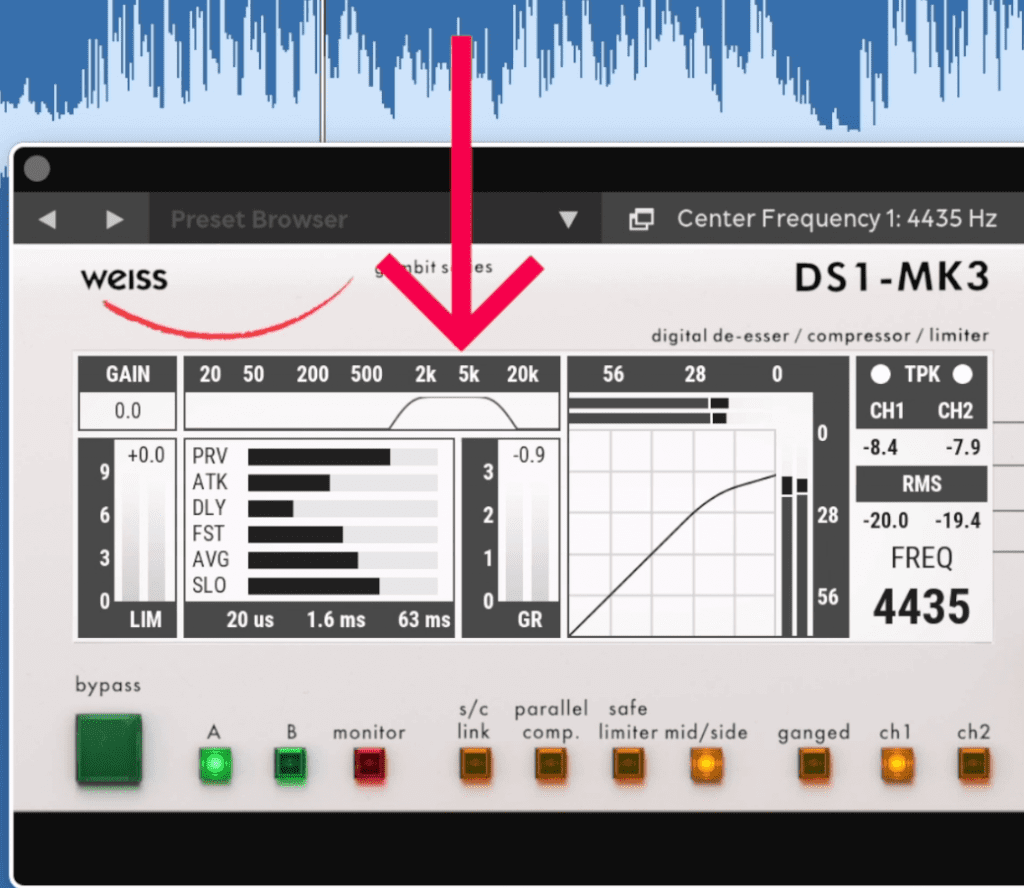
Notice that this bandwidth is all that's being affected.
I used this plugin to gently attenuate sibilance-based frequencies around 5kHz and up. I accomplished this by using a narrow band, and switching the plugin to mid-side so that only those frequencies in the center image would be compressed.
The result was a smoother, slightly wider sound.
2. UrsaDSP Boost: Low-Level Compression
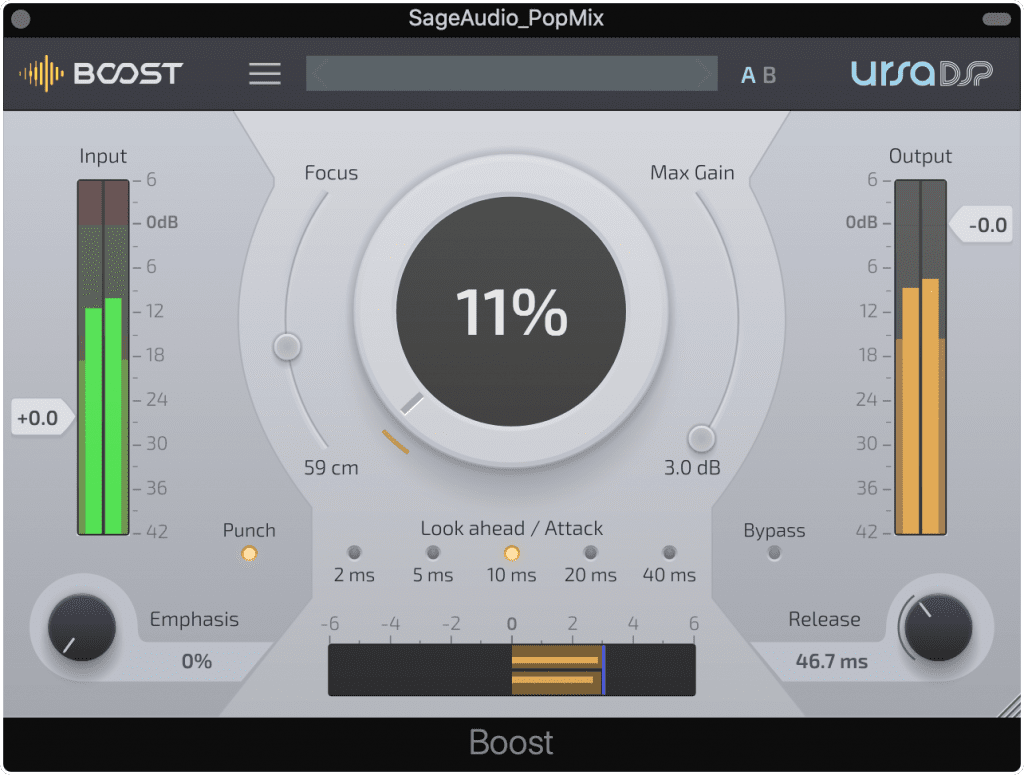
Low-level compression brings details forward, and creates a more impressive master.
With the highs tamed, I could now start amplifying aspects of the signal that I enjoyed. Using the Boost plugin, I introduce subtle maximization and low-level compression.
I made sure not to engage this plugin’s limiter since that would kind of be cheating.
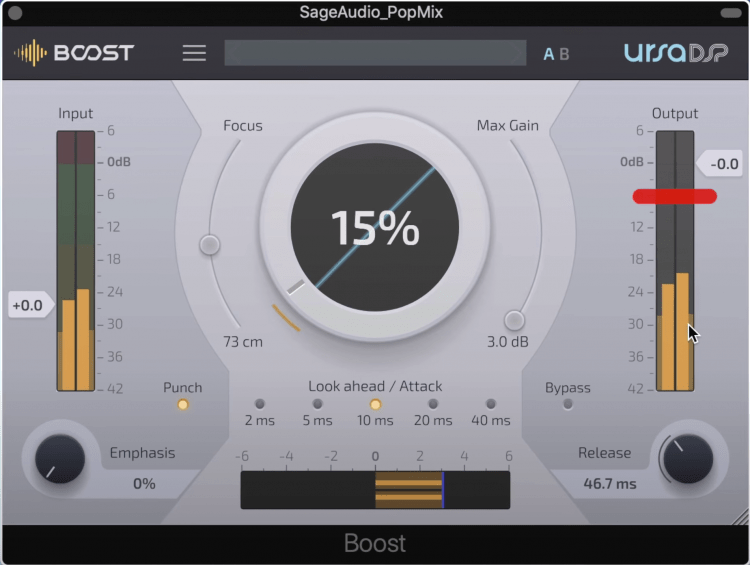
I made sure not to engage the limiter when using this plugin.
I keep the max gain to 3dB, to ensure that the maximization and low-level compressor didn’t amplify the signal too much. Again, I wanted to perform his master without any limiting.
Lastly, I didn’t use any transient shaping, since this doesn’t fit into the definition of a compressor.
For more info on this compressor, check out this video:
3. FabFilter Pro-C2: Mid-Range Compression
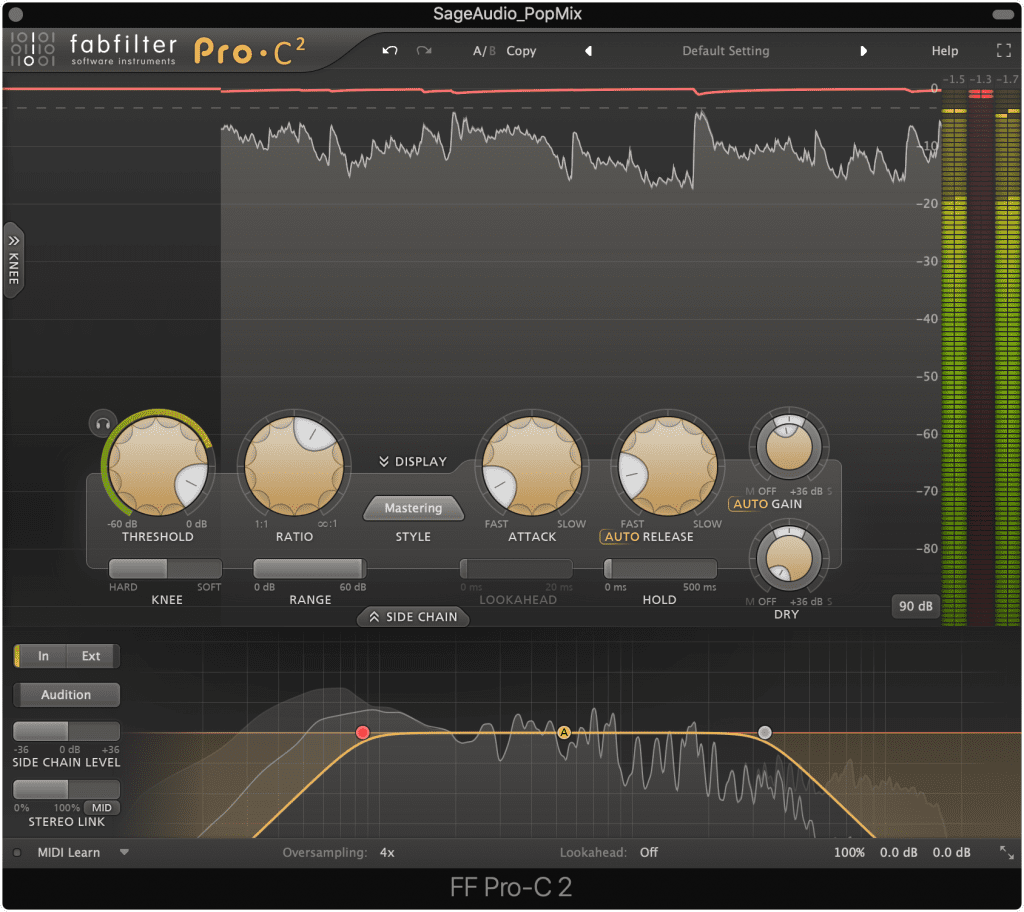
I very subtly used a compressor to control dynamics and boost the mid range.
With the Pro C-2, I wanted to capture the mid-range and subtly compress and amplify it.
Using the Mastering algorithm, and by carefully setting my threshold, I was able to compress the signal in an almost transparent way.
I enabled the Auto Release setting and made it a little faster so that the timbre of the track wasn’t altered. Additionally, I kept the Auto Gain setting enabled to compensate for any attenuation.
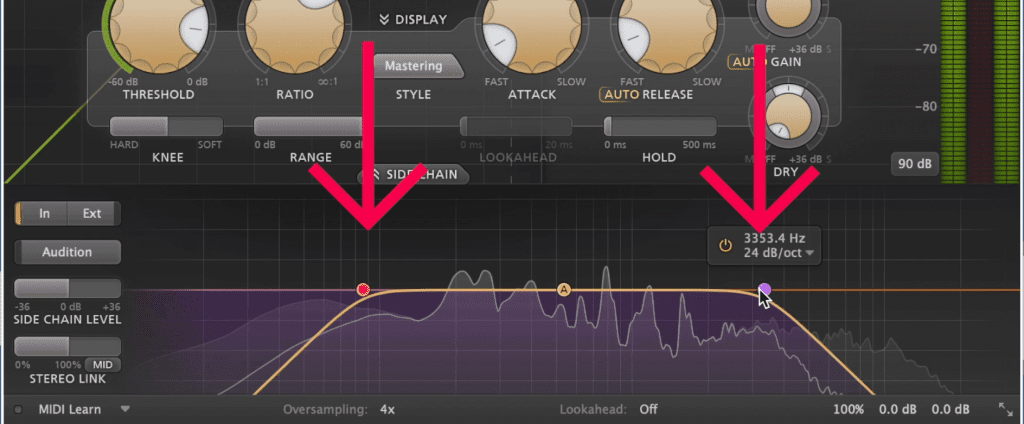
By using the internal side chain I was able to compress the mid range.
Lastly, in the side chain section, I enabled both the low and high pass filters. This way only the mid-range would be affected.
I enabled oversampling to make the quantization more accurate, which would prove to help avoid peaking later on.
Additionally, I slightly reduced the output, later on, to avoid clipping.
4. FabFilter MB: Multiband Compression
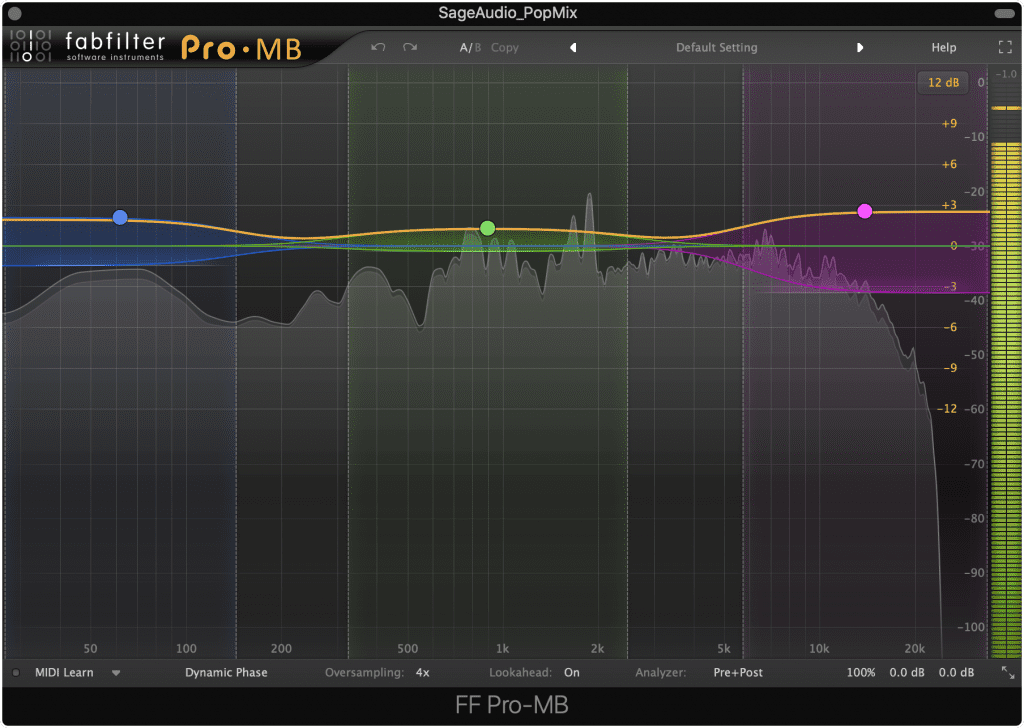
Multiband compression let me augment the kicks, vocals, and high hats.
With this compressor, I wanted to augment the kick, mid-range, and high-frequency spectrum.
I increased the amplitude of these sections by 1 to 2.5dB and enabled a compressor.
By carefully setting the range of each band, I was able to get the signal to return to 0dB whenever the compressor was triggered.
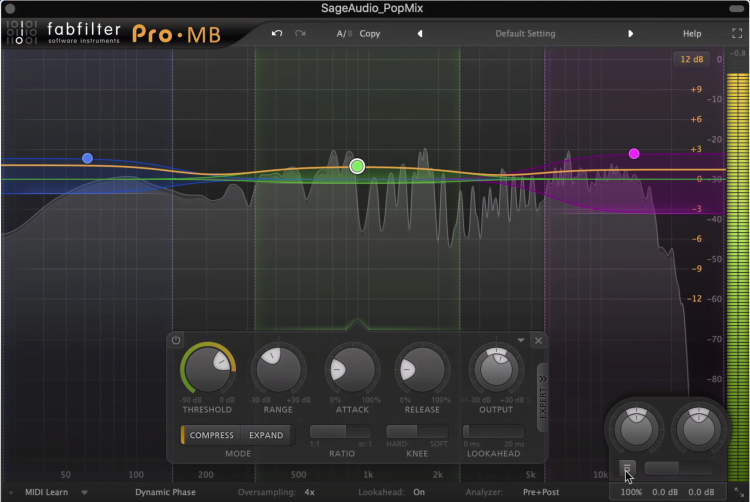
The band would return to unity or 0dB whenever the threshold was crossed.
I also tailored each band’s attack and release to that frequency to ensure that distortion didn’t occur and that transients were retained.
As a result, I ended up with a more impressive kick, vocal, and high-hats.
I also enabled oversampling to reduce peaking later on.
5. Oxford Inflator: Low-Level Compression, Saturation
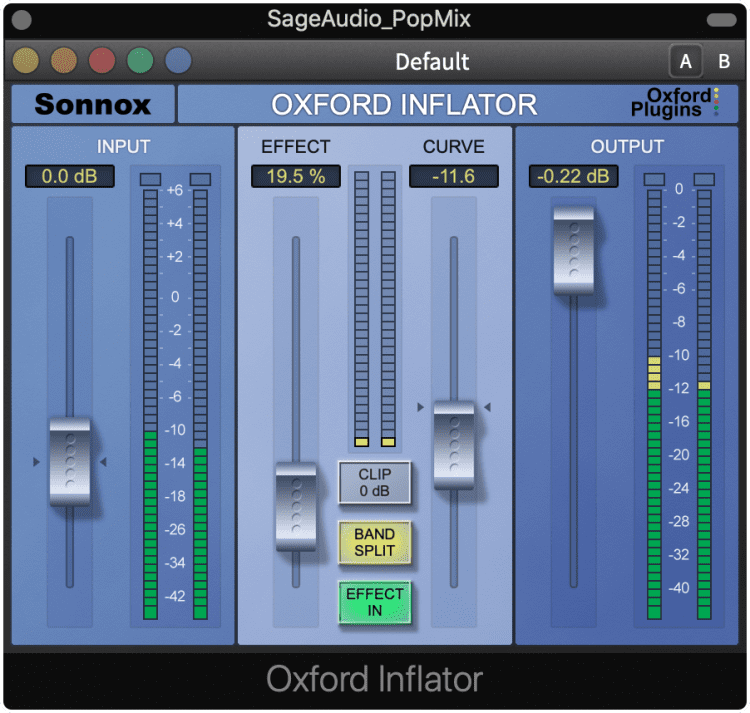
Inflator helped with the tone fo the signal by introducing mild distortion and upward compression.
The Oxford Inflator has a great tonality to it. With it, you can simultaneously compress a signal, and achieve a tone similar to a valve tube.
Keeping in mind that I wouldn’t be able to use limiting later on, and in turn, wouldn’t be able to push low-level signals higher against a brick wall ceiling, I used this low-level compressor more aggressively than normal.
I increased the effect to about 20 percent and reduced the curve. If I wanted to make the signal warmer I could increase this curve, but, I liked the cleaner sound of a negative curve.
I also split the signal using the band split option since I was working with a full-spectrum signal.
6. Chandler Limiter Germanium Comp: Parallel Compression, Saturation
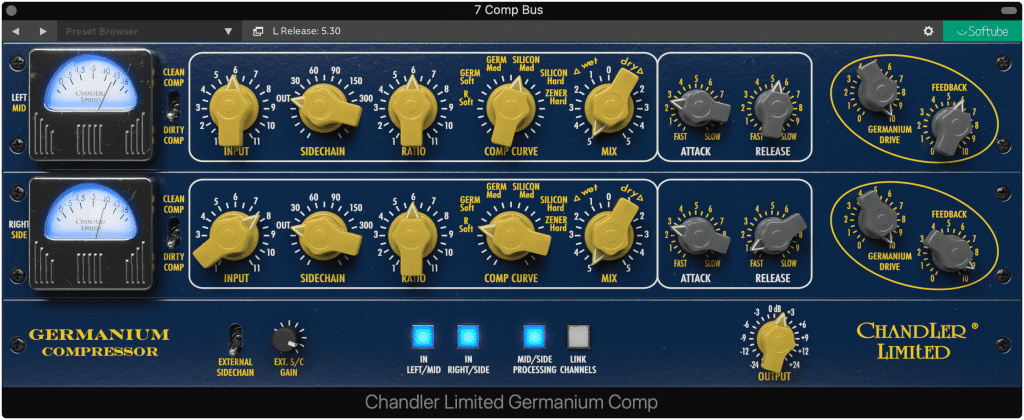
This plugin was used for a lot of things, including parallel compression, distortion, and stereo imaging.
Next, I knew I needed to achieve some distortion, but didn’t want to resort to a saturator plugin. Although saturation is technically a form of compression, I thought it would be best to stick to actual compressors.
I figured I could use parallel compression to heavily compress the signal, in turn causing some distortion and in turn achieving saturation.
With the Germanium comp, I used the dirty comp setting.
Then, realizing that I wouldn’t be able to use a stereo imager or mid-side EQ, I decided to enable mid-side processing. This way I could compress and distort the mid and side channels separately, and eventually cause stereo expansion.
I increased the drive and feedback of both bands, as well as used more aggressive compression settings on the mid-channel to make the side more impressive.
Additionally, I reduced the release speed for the side image to ensure that the high-hats retained their timbre.
Lastly, I increased the output of the plugin to get more tonality from it, while reducing the level of the auxiliary channel fader. This way I got a complex and wide-sounding signal, while still being able to blend it in with the original signal.
For more info on parallel compression, check out this video!
7. Weiss DS1 MK3: Compression, Gain, Output Control

Lastly, I compressed the mid-band again to get more body from the signal.
Making sure that the signal didn’t clip, without using a limiter, and while keeping the level of the master somewhat loud, was the biggest challenge of this chain.
In the end, I was able to get the master to -13LUFS without clipping, which wasn’t as loud as I wanted, but, it would work well for streaming nonetheless.
Kind of like with the FabFilter Pro-C2, I kept the compression to the mid-band. This way the kick and high hats came through, but the mid-range was controlled.

Notice that I let the kick and high-hat pass through unaffected.
This definitely made things more difficult, since the high hats and kick in this song were the most dynamic things, but keeping those intact was important.
Next, I starting adjusting the compressor settings, by using a soft-knee setting, with a lower threshold, and a high ratio of 13:1.
These settings emulated how an electrical component would saturate if pushed, but without the distortion. This created a naturally dynamic sound.
Additionally, I enabled the mid/side mode to keep the majority of the compression to the mid image.
The most important setting I used here was automatic makeup gain. I had to balance this setting with reducing the overall gain to ensure that clipping didn’t occur , but having the signal increase when compression occurred caused a similar effect to limiting, but without truncating any transients.
Getting the attack and release times right was tricky as well, but I ultimately settled on faster settings to retain transients, but not so quickly that the signal distorted.
Conclusion
Mastering a song only using compressors probably isn’t the best approach, but, you can learn a lot by giving it a try.
It definitely won’t result in the best sound possible, but you’ll gain a better understanding of how compressors overlap with other processors, and how you can use this overlapping functionality to your advantage.
Try this out for yourself and share the results with us!
If you’re an artist or engineer, and you have a mix that you need mastered, send it to us here:
We’ll master it for you and send you a free mastered sample.


