Preparing a Mix for Stem Mastering
After a mix engineer completes a mix, it is good practice that the mix is sent to a mastering engineer. Most often the mastering engineer performs stereo mastering and works on a single stereo file to prepare a well-polished track ready for commercial distribution. However, many mix engineers don’t realize that there is another option when it comes to the mastering process. The less often alternative is called stem mastering. Unlike stereo mastering, stem mastering involves more than one and usually many (up to 8) stereo files that are treated individually. By giving the mastering engineer access to predetermined sections of the mix, the mix engineer is providing more flexibility to the mastering process while keeping key elements of the original mix intact. The stems can be sectioned to fit the mix engineer’s needs, but often stems are created based instrument type or frequency content. In this article we will examine some key ideas surrounding stem mastering, discuss the ins and outs, and help you prepare your files if you decide it is right for any of your mixes.
Advantages of Stem Mastering
Stem mastering is an attractive option for mix engineers who may lack confidence in a particular mix or section of that mix. Perhaps, a mix sounds great in the home studio room, but the low frequency content loses punch in alternate listening environments. Maybe the instrumentation sounds great, but the vocals lack a specific clarity and high-end sheen that is typical of vocal tracks in the genre. A reputable mastering engineer typically works in a well-balanced acoustic environment. Thus, a mix engineer can utilize that superior environment for particular sections of their choice during stem mastering. Those sections are the low frequency instruments (kick and bass) and vocals in this example.
While stereo mastering has the same goal of making a mix translate well in all playback systems, stem mastering allows for more treatment on specific sonic aspects and less treatment on others. Creative choices by the mix engineer can remain in tact and the master engineer can work with more precision. That is the mix engineer can not only specify which parts of the mix need further treatment, but they can also specify which parts of the mix they want left untreated. Perhaps the engineer loves his mix choices for the snare track. Just as the engineer separated or stemmed out the low/sub frequency content and vocals for further treatment in the previous example, he or she can separate the snare track so that it is left untreated in relationship to the other stems.
In addition to a superior acoustic environment, mastering engineers often have an arsenal of reputable analog gear that is often out of the price range of the hobbyist and home studio professional alike. An experienced mastering engineer not only has the gear but has a working relationship with the gear. He or she knows how the gear is best utilized and which source signals (stems in this case) it is best utilized for. Top of the line limiting, multiband processing, stereo compression, EQ, Harmonic distortion, saturation, magnetic tape, and non-linear analog summing mediums are common tools used by the master engineer. When these tools are used on stems they become very powerful. For example, the sonic magic that can ensue when vocal stems are ran through a classic magnetic tape machine is natural, complex, and hard to describe in traditional mixing terms. The same magic can go true for any stem coupled with the right combination of analog goodness.
Even if you aren’t planning to get a mix stem mastered, the stemming process can still be very beneficial. Get in the habit of stemming out your mixes after they are complete. Why? Because five years down the road when an engineer opens up a project, there is likely to be compatibility issues between old plugins, new software, and upgraded operating systems. If the engineer has the stems then he or she doesn’t have to worry about wasting intellectual that they cannot access in the future. Stems will always remain in tact, giving an engineer the option to accurately recreate or revise a mix when project compatibility issues arise.
Self Mastering
It is best practice to hire a mastering engineer, but many mix engineers get away with doing mastering themselves and some do it very well. If self-mastering a mix is well suited for your purposes and budget, then it would be very beneficial to take a solid break between the mixing and mastering process. A few days will help, but a week or two is even better. This will allow the engineer reproach the project with fresh ears, perspective and mindset. This applies to both stereo and stem mastering, but the break is even more essential during a self stem mastering process because you are revisiting more specific aspects of the mix.
Always remember, that the ears are tricky in nature. That is, the brain becomes accustomed to sound content that the ears have heard before. It is the same reason why it takes music consumers more than a couple of listens sometimes start enjoying a certain song. Thus, if you are mixing a song and have played it back hundreds of times then you will become quickly biased as to what is sonically pleasing in the listening environment. One of the key ideas behind hiring a mastering engineer in general is to get a fresh and different set of ears on the final product. In fact, projects with serious budgets often have a mix sent out to multiple mastering engineers and the favorite is then chosen. Stem mastering takes that idea a step further in comparison to stereo mastering. While hiring multiple mastering engineers is not always practical for smaller budget projects, it is often what the little guys are competing against! Be extremely careful when self-mastering mixes, and if you can afford it then don’t do it yourself.
Preparing Stems
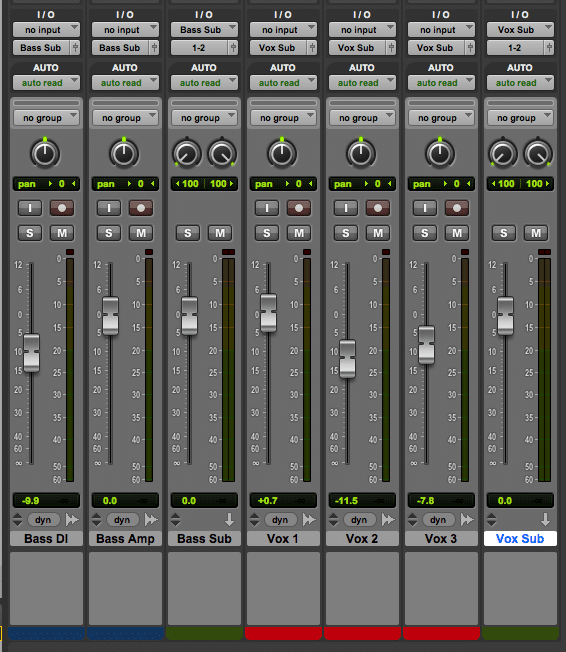
Determining how to group several tracks into stems should be somewhat logical and straightforward. Hopefully you are an organized mix engineer. If the mix session is well organized, then chances are that the tracks are already categorized into sub groups or sub mixes already. For example, it is likely that all of the vocals are sub grouped together via a stereo aux send, or possibly the lead vocals and background vocals have separate sub mixes. All of the drum tracks are grouped together and there are separate groups for the acoustic guitars and vocal effects. The point is that the way an organized mix engineer sub groups tracks in a mix, is often a good way to print stems. The difference between a sub-mix and a stem is that a sub-mix is being bus routed in real time during playback and the stem is a printed version of the routed audio. Rendering or bouncing a sub-mix return as a stereo audio file creates a stem. Stem mastering engineers typically allow up to 8 stems total, so be smart about how the tracks are sub grouped, and don’t feel the need to create up to all 8 stems if it is not necessary in mix context. A very simple version of stems for a mix would include one stem for the instrumentation and another stem for vocals. Don’t over complicate it!

Caption: “A typical way to separate groups for bass and vocal tracks. Notice the inputs and outputs.”
In addition to rendering the sub-groups as stems, engineers may also separate singular elements from their mix groups for stemming. This could involve separating the kick or the snare from the drum/percussion stem, or separating the lead vocal track from the rest of the grouped vocals. It is important to note that a common problem in home studio and other non-ideal listening environments is low frequency accuracy. Thus, if the home studio engineer is having trouble mixing low and sub frequency content, he might also separate the bass or 808s into its own stem in addition to the kick track.
One other consideration to make when preparing the stems is to be aware of aux groups that might have solo-safe engaged. A typical use for solo-safing an aux group is on effects that the mix engineer wishes to still hear when soloing certain track elements. This could be problematic, for example, when the vocal effects and the snare reverb returns are both solo-safe. That is, if the snare reverb is not either muted or un-solo safed while rendering the stem, then the snare reverb will come through with the vocal effects. That wouldn’t be a logical.
Mix Bus and Sub Group Considerations
Using overall mix bus compression and other sub group processing is a common technique among many notable mix engineers (See Article: Using Mix Bus Compression Before Mastering ). If you are an engineer that uses mix bus processing then there are some special considerations that need to be made when creating stems of your mix. When rendering stems through the mix bus compressor, the compressor will act differently on each stem as opposed to how it did when the full stereo mix was driving the compressor. So, a solution is to use a sidechain to key the input of the compressor to react to the full mix while rendering that particular stem. That way when the stems are rendered through the mix bus compressor, it is reacting as it did when the full mix was driving it. This will insure that the sum of all stems equal the original mix which is very important.
Sending The Stems
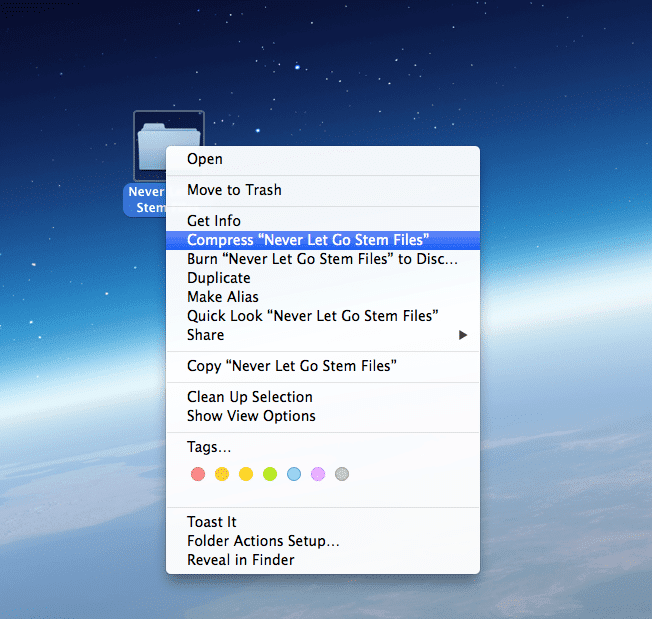
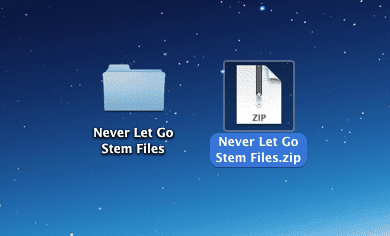
If the stems have been grouped and prepared, then it is a good idea to check them before sending them to the mastering engineer. Import each stereo stem into a blank session in the DAW. First, make sure every stem is a stereo file. Even mono sources like a kick drum stem should be rendered as one stereo file even though the left and right sides will be identical. Next, make sure each file is consolidated to the exact same length. All files should be full resolution in an uncompressed format. Most engineers will ask for .WAV files at a 24 bit-depth. 32 bit-depth files are sometimes acceptable, but the floating bit depth should not be needed if the original stemming gain structure is correct. The stems should leave at least 1dB of peak headroom. That is your stem peaks should not go above -1dBfs. Dither should not be applied to any of the stems. Finally, play the stems back. All of the stems should playback to sound identical to the original mix. If playback of the stems (all at unity gain) does not sound the same as the original mix, then they haven’t been stemmed with intention and stemming should be revisited. Once the files have been checked then compress their folder location into .zip file and deliver them to the master engineer’s desired location. The master engineer will specify how he or she wants the .zip file to be uploaded to the cloud and delivered.


Caption: “Compressing multiple files in a folder to create .zip file is easy on a mac!”
It always important to provide the mastering engineer with reference mix files. The original mix should be sent along with a file of at least one song that resembles realistic sonic goals for the final mastered product. In addition, send along any written notes or special considerations for the mastering engineer.

Caption “Consolidated files should start and end at the exact same point. Be sure to zoom in on the files and make sure your start and end points are precise.”
Final Thoughts
Although both stem and stereo mastering prices vary based on the engineer, we must keep in mind that stem mastering is generally more costly than stereo mastering. So, if you are confident in a mix, then stereo mastering may be a cheaper and better-suited option. Also, if you are an engineer who struggles with giving up sonic control then stem mastering may be frustrating. Although, it would be great practice to take a step back and let another engineer try to improve upon your work in a more intimate way then conventional stereo mastering. Try it out if you have the budget! If you aren’t sure what to do, many master engineers will give an appraisal to help you decide if stem mastering is best suited for your needs. Finding a master engineer that is compatible with a mix style and budget can prove to be a tough task, but finding that chemistry with a master engineer can greatly improve the sonic value of your mixes. That is especially when the master engineer has access to stems.


