Top 4 FREE Tape Emulation Plugins!
- Tape Cassette & Tape Cassette 2 by Caelum Audio
- Chow Tape Model by ChowDSP
- Cassette Transport by Wavesfactory
- Bonus: Reelbus by Toneboosters
Free tape machine plugins are hard to come by. They might be harder to code or get a decent sample or IR of - regardless, we wanted to find a few that you can use for your mixes and masters.
The ones we’re showing here are some of the only ones we could find, but, they’re still fantastic and innovative in their own right.
We’ll dive into the functionality of each one of these plugins, discuss how they work and when to use them, and listen to them on a mix.
If you have any questions about these plugins, or if you know of some more free tape emulation plugins, let us know in the comment section of the video embedded above.
Also, if you’re an artist or an engineer, and you have a mix that you’d like to hear mastered with all analog equipment, send it to us here:
We’ll master it for you and send you a free sample to review.
Tape Cassette & Tape Cassette 2 by Caelum Audio
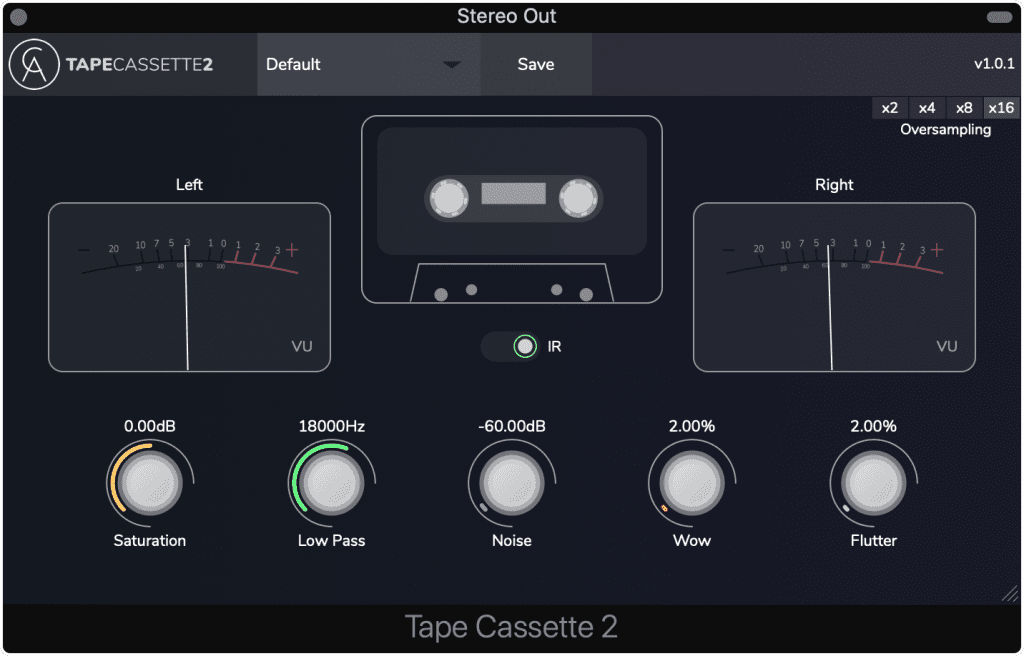
Tape Cassette 2 emulates the timbre and distortion of a cassette deck.
Caelum Audio has come out with 2 iterations of their tape cassette plugin - both of which offer unique saturation and emulated tape artifacts.
Let’s start with the simpler of the 2.
The original tape cassette plugin has a saturation dial, which introduces both even and odd ordered harmonics.
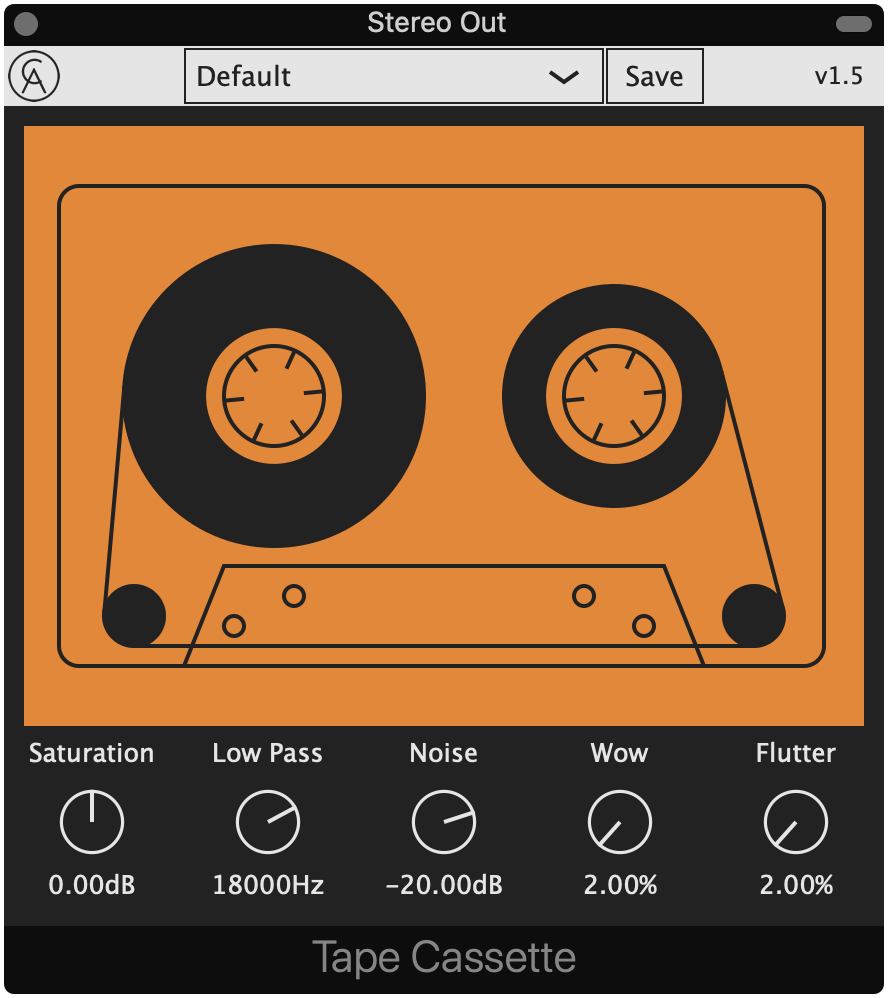
The original cassette plugin has a simpler design, and less functionality.
The lowpass filter introduces what looks like a 12dB per octave cut-off. This doesn’t create a resonance filter or any other changes to the audio.
Noise is the level of tape noise introduced into the signal.
Lastly, we have wow and flutter. Wow modulates the frequency of the fundamental and any generate harmonics, whereas flutter generates a harmonic, a sub-harmonic, and causes other mild shifts to the frequency response.
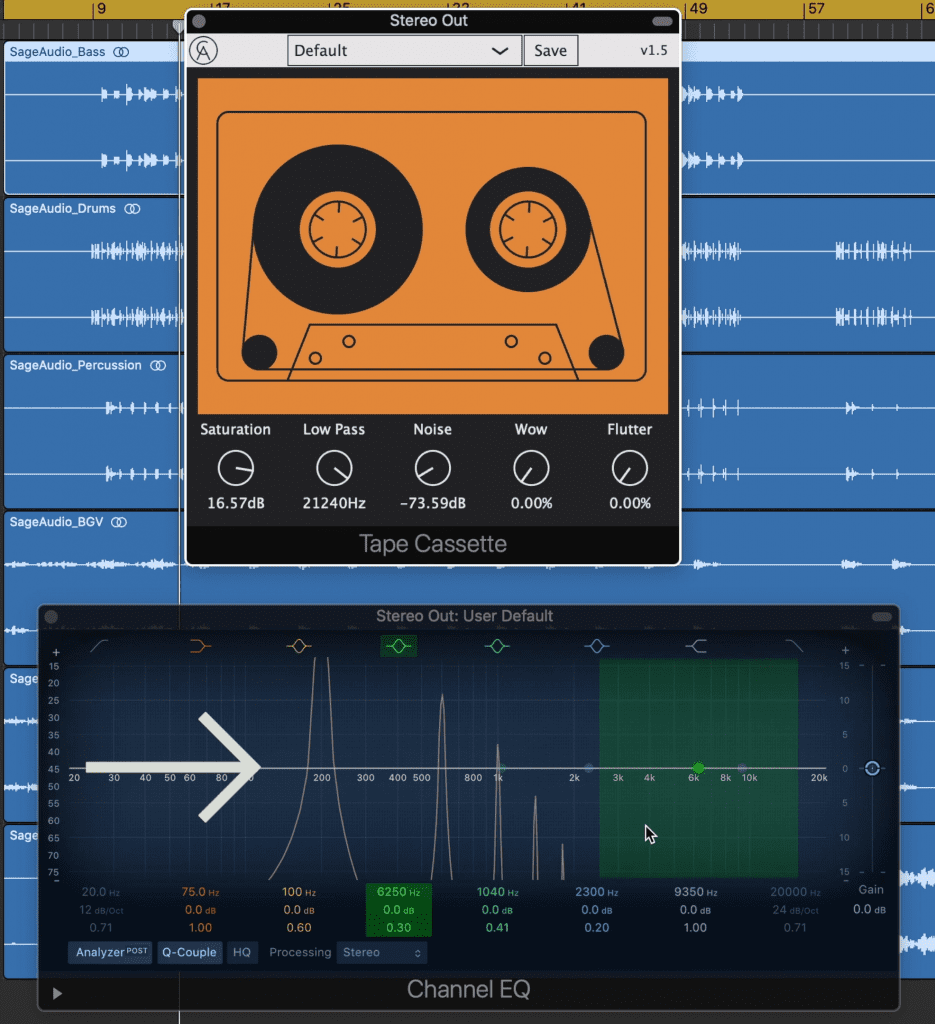
Notice the harmonic distortion that this plugin creates.
Tape Cassette 2 is very similar but with some notable improvements. The saturation seems more or less the same, as does the low-pass filter, but the noise, wow and flutter functionals have made noticeable improvements.
First, the noise used is now real sampled noise from a cassette deck, which adds a little bit of realism to the plugin. Wow still modulates the frequency of the signal; however, this modulation is now variable.
In other words, the modulation speeds up and slows down, making it sound a little more interesting than the previous version. The same can be said about the flutter function which now introduces mild modulation to the harmonics it creates.
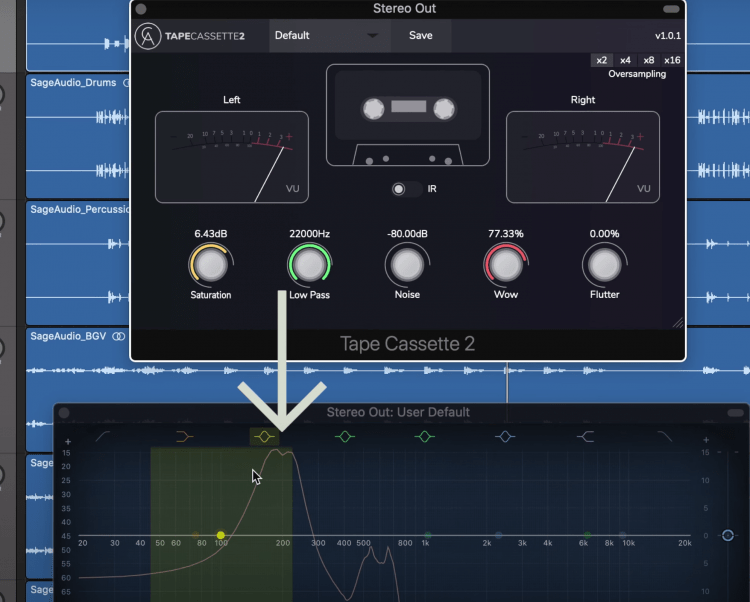
The newer version modulates it's wow and flutter.
The IR switch enables an impulse response section that changes the timbre of the overall signal by adding a subtle EQ curve . It cuts out a little more of the high end and some of the high-mid frequencies.
Lastly, oversampling has been added to reduce aliasing distortion and to create more accurate quantization.
Let’s listen to both of the plugins back to back.
Pay particular attention to how the flutter and wow functions differ sonically, as well as how the IR shifts the frequency response.
For more plugins like these two, check out this video :
Chow Tape Model by ChowDSP
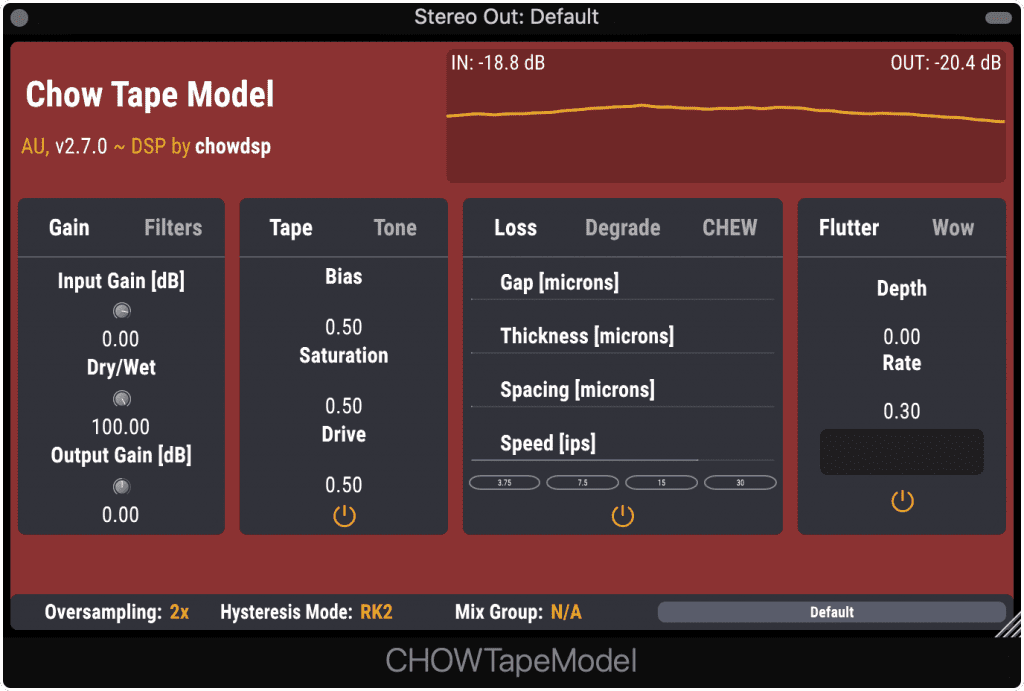
Chow Tape Model is a complex and well designed tape emulation plugin.
The Chow Tape Model is a lot more complex than our previous example.
In the left-hand window, is the input gain, mix, and output gain. The filter section affects the internal side chain of the plugin, so you can alter what frequencies are and aren’t affected.
Tape bias, saturation, and drive are in the second window - use these to control the dynamics of your signal, and to add some harmonic distortion.
Hysteresis is at the bottom of the plugin and changes the overall timbre and quality of the effect. Use NR8 for the highest quality emulation.

Changing the hysteresis mode changes the quality of the emulation.
The tone window lets us emphasize or boost frequencies prior to compression and saturation - making these frequencies more compressed or distorted.
In the next section, we can emulate some of the degradations that tape can cause. Ultimately, all of these settings affect frequency response and cause the signal to cut out. Keep this at lower settings, or turn the section off if you’d prefer not to include these artifacts.
Degrade and CHEW emulates tape that has shed magnetic particles or has been torn by the tape machine. The variance dial makes this effect a little more random.
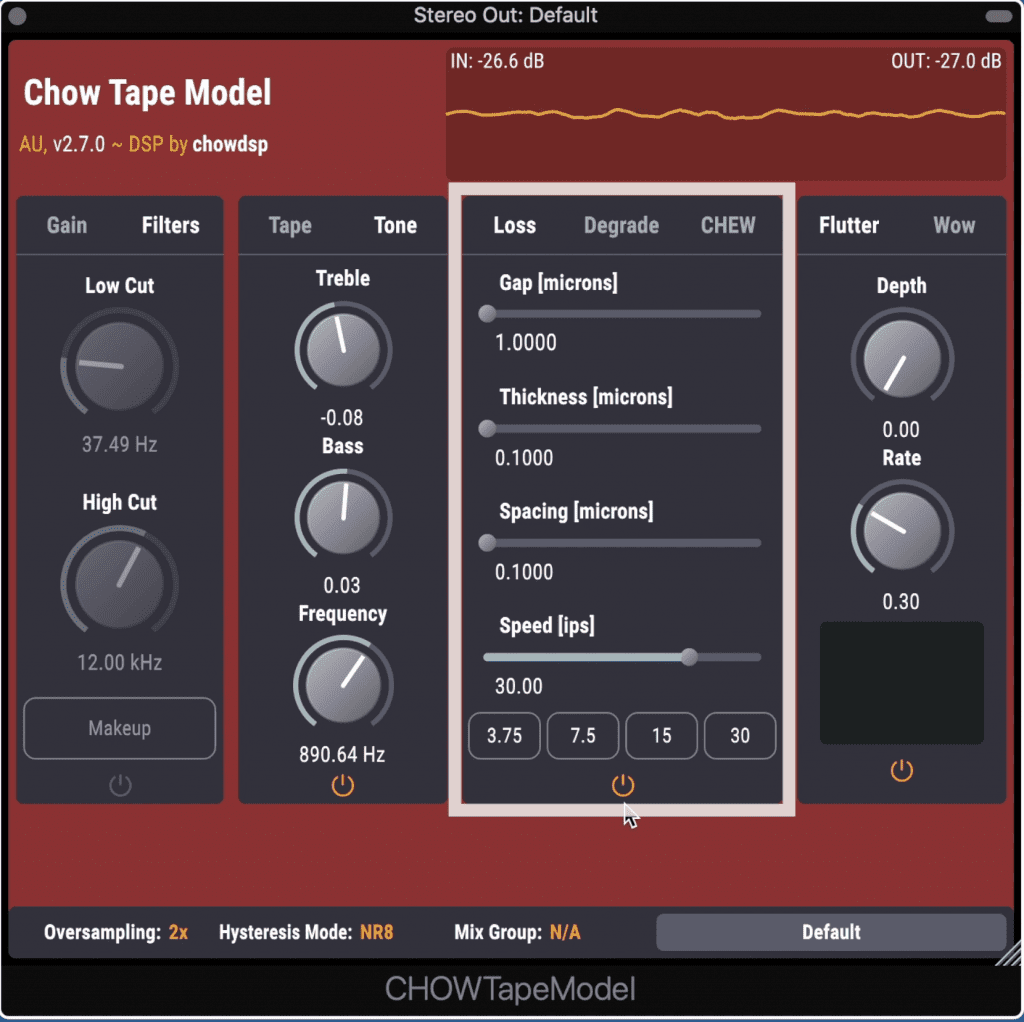
This section is used to degrade and distort the signal in unique ways.
If you’re mastering, a tape speed of 15ips or higher is better. This will result in a full frequency spectrum, but if you’re looking for a lo-fi and warm sound, try a lower speed.
Like Cassette Wow and Flutter introduces modulation and distortion.
Lastly, oversampling can be introduced at the bottom left of the plugin. Consider using this if you’re mastering or using higher amounts of distortion.
Let’s listen to the plugin, and pay attention to how the tape speed and the degradation settings really affect the fidelity of the signal.
Cassette Transport by Wavesfactory
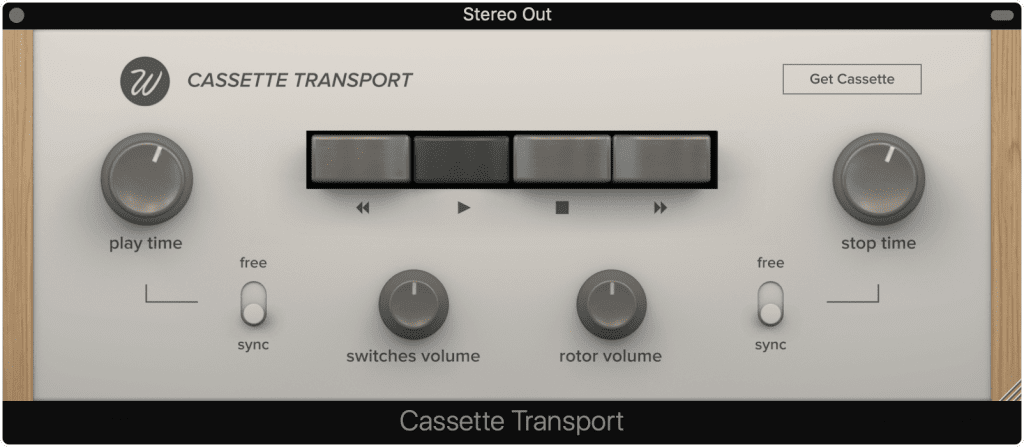
Cassette Transport emulates the sounds of a tape deck speeding up and slowing down.
Admittedly, this one is a little less exciting than the other 2 plugins, but, it does offer some functionality which the other 2 don’t.
In short, it emulates the sound of tape speeding up and slowing down, as well as the clicks, caused by the buttons being used.
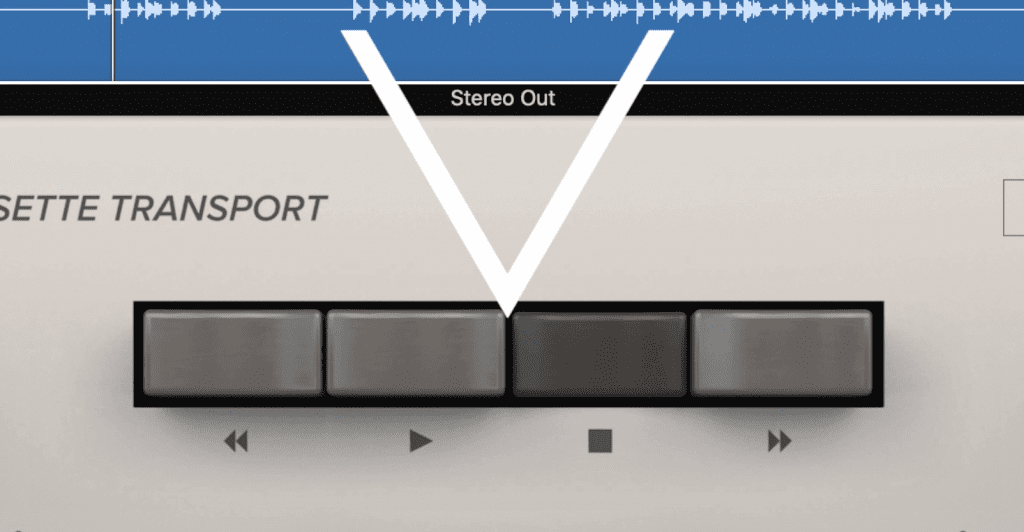
These buttons control rewind, play, stop and fast forward functions.
Furthermore, the sound of the rotor is constant in the background but can be turned down if you don’t want it.
Interestingly, reverse and fast forward buttons are included. Unfortunately, these don’t cause the actual audio to speed up or slow down but instead play a prerecorded track.
The play-time, and stop-time can be controlled which introduces longer speed up or slow downtimes. These can be synced to the BPM of the track or in milliseconds.
Although this plugin can’t be used to shape the overall tone of a track, it is well designed and gives you some creative options - especially if you’re looking for a unique way to start a song or transition from one section to another.
Let’s take a listen to the plugin.
Bonus: Reelbus by Toneboosters
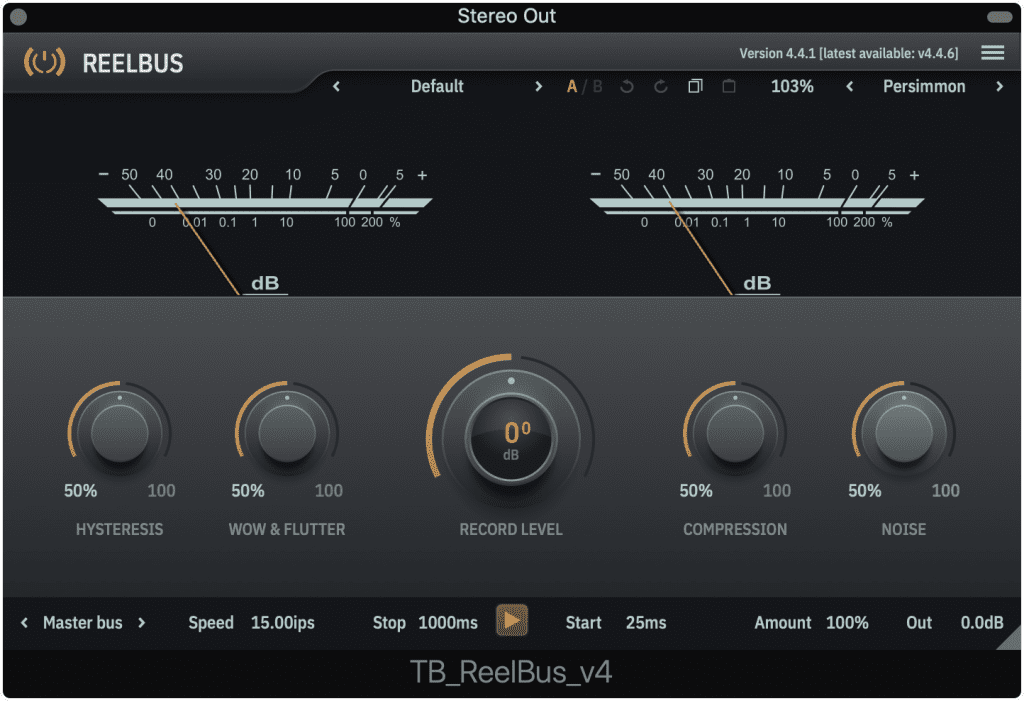
Although not entirely free, the demo version of this plugin offers full functionality.
This last plugin isn’t completely free; however, you can demo it without any limitations to the functionality.
The only stipulation is that it won’t save your settings; however, when I save a session and reopen it, I’ve found the plugin the same as I left it, so I’m not entirely sure what limitations have been coded in.
Despite all of this, the plugin sounds fantastic and is incredibly versatile. I won’t cover every function, but it’s important to note that it can work on a lot of different levels.
First, you have a master bus section which is great for processing stems or shaping the timbre of your stereo output. You can adjust the amount of compression, the fidelity with the tape speed at the bottom , and you can even stop and start the tape, similar to the previous plugin we covered.
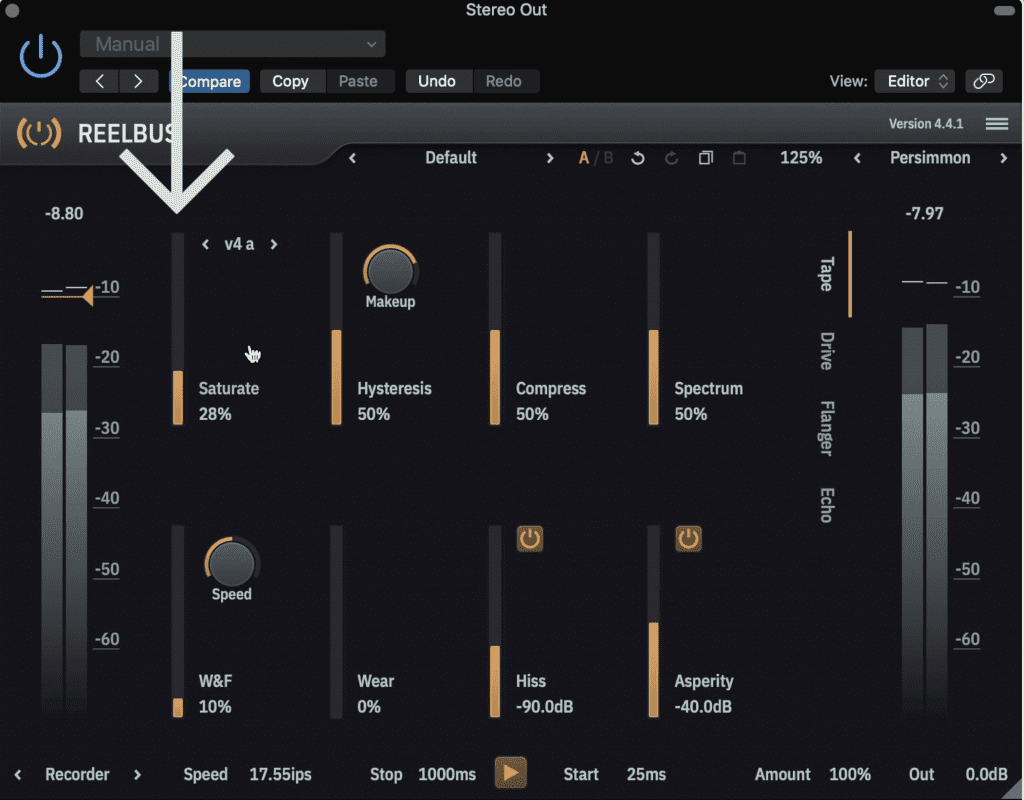
In the recorder section you can introduce saturation, as well as alter many other parameters.
If you use the Recorder option which is located in the bottom right, you get a lot more control over the signal. For example, the saturation section offers 7 different types of saturation.
You can also use it for compression, tape modulation and degradation, and even flanging and tape delay. It can be used as an insert or send as well, so the amount of the effect can be controlled in just about every way from within the plugin.
It’s really impressively designed, has an HD display which is always nice, and can have its appearance changed.
And if you do decide to purchase it, it’s about roughly $50, so you’re really getting a lot of high-quality tape emulation for the price.
Let’s listen to the plugin, and try to note the difference in tonality caused by using the master bus section and the recorder section. We’ll also cycle through the different saturation types, so let us know which setting you thought was the best in the comments section below.
For more information on Reelbus, check out this video:
Conclusion
Although we don’t have many options for free tape emulation plugins, at least the options we do have a really well-rounded.
Whether you’re trying to create a realistic effect, some tape saturation, or try something creative, one of these plugins will work well.
Also, if you’re an artist or an engineer, and you have a mix that you’d like to hear mastered with all analog equipment, send it to us here:
We’ll master it for you and send you a free sample to review.


