What is Apple Digital Masters?
Quick Answer
Apple Digital Masters is a specification set by Apple Music to ensure that the highest quality masters are created for their Apple Music Platform. Based on the Apple Digital Masters guidelines, your master should be of the highest original bit-depth and sampling-rate possible and should avoid clipping.
Apple Digital Masters in Detail

Apple's software and devices have changed how we consume music.
Apple has no doubt revolutionized how we consume and listen to music. iTunes, although now nearing its end, changed how we purchased music - placing the emphasis on the digital medium instead of the physical CD or record. The iPod and then the iPhone meant we could not only listen to music anywhere, but also listen to a vast array of music all from one device.

Apple devices and other modern devices allow for flexibility and a vast library of music.
To list all the changes that Apple has made to the music world would take some time, but one innovation, in particular, that doesn’t seem to get as much attention as some others is their lossy file format, the AAC.
If you’ve purchased music from iTunes or used the Apple Music service, you’ve listened to an AAC file. This might not seem like a big deal, considering we listen to MP3s and Ogg files all the time, without having to think about the complex process with which they were created. But, objectively speaking, the AAC’s encoding process is the best sounding, and most true to the original PCM file from which it was created.
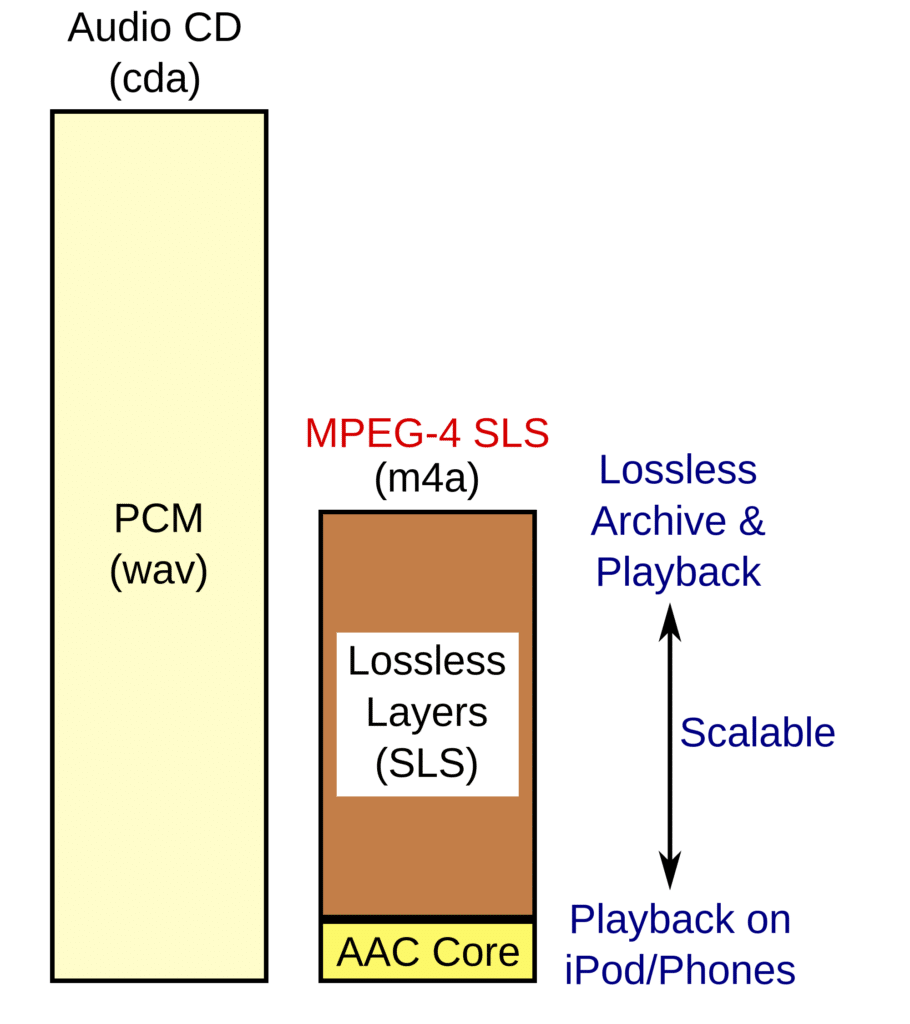
Apple's latest AAC encoding process creates possibly the best sounding lossy file.
If you’d like to learn more about audio file formats, check out our blog on the topic for an in-depth look: “ Top 10 Audio File Formats****”
To the average listener this may not seem crucial, but to any artist, tracking, editing, mixing, or mastering engineer who spent the time and energy to create a song, EP, or album - having the best sounding record possible is important.

Any artist or engineer who has created music should be concerned with how their project is represented during playback.
It’s the difference between having your hard work covered up by aliasing, distorted by quantization error, or muddled with a slew of improper encoding practices - and actually sounding the way you intended it to sound.
Apple, being the company that revolutionized the music industry knows this, understands it, and wants the very best for their platform. That’s why they've developed some of the best encoding possible, and devised a system with which mastering engineers can submit their music to be encoded properly.

Apple has come up with a protocol and an advanced encoding process, designed to create great-sounding music.
Furthermore, it's a great opportunity for any artist wishing to have their music on an Apple playlist, as sections of iTunes, and soon Apple Music, are dedicated to Apple Digital Masters. The only way to have your music accepted, is to have it mastered and submitted by an Apple Digital Masters Certified Studio.
It’s rare that a company takes such a concern what may seem like minutiae to others, but fortunately, music creators and engineers alike have Apple on their side.
Let’s take an in-depth look at what Apple Digital Masters is, the practices behind creating a master for Apple Digital Masters, the AAC file in greater detail, and some of the tools Apple uses during the encoding process (which they offer for free).
If you’d like to have your music master by an Apple Digital Masters Certified studio, send us one of your mixes here: https://www.sageaudio.com/register.php
We’ll master it for you and send you a free mastered sample in return.
The Benefits of AAC Encoding
There are no doubt issues that arise when creating a lossy file from a PCM file. A lossy file is an MP3, an AAC, or any file type in which information is deleted in exchange for a smaller file size. These files are being used now more than ever, considering the wide-spread use of online streaming, and the need for small file types to expedite this process.
Smaller lossy files are being used to speed up the streaming process. Larger PCM files would slow things down significantly.
A PCM file is a WAV or AIFF file created using a sampling rate and a bit depth. The sampling rate is the number of samples take per second, and the bit depth is the number of bits per sample.
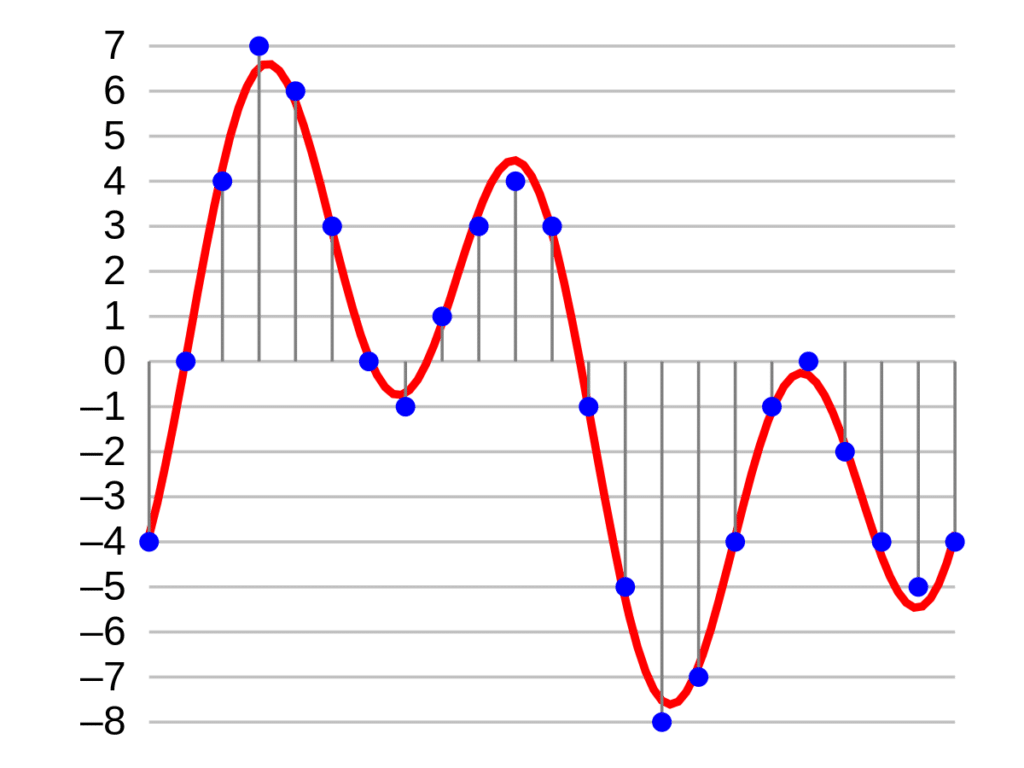
Shown is a 4-bit quantized file.
Sampling rate corresponds to the frequency response and range, while bit-depth corresponds to the dynamic range as well as the accuracy of amplitude encoding, or as it’s more commonly known, quantization.
When creating a lossy file, and deleting certain information, certain problems arise. For example, when the bit depth of a file is reduced, quantization error occurs which can result in distortion or noise.
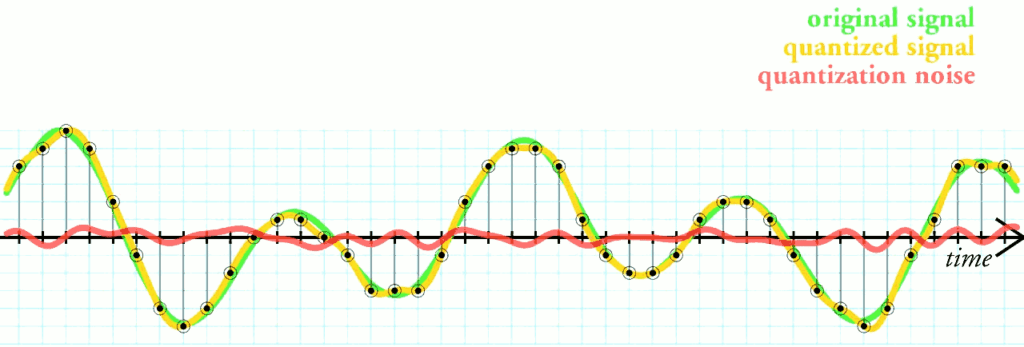
The red line above represents the small amount of noise generated from quantization error.
As a means to remedy this, dithering is used to mask and randomize quantization distortion, but results in an increased noise-floor, which can be louder than the distortion is was designed to cover up.
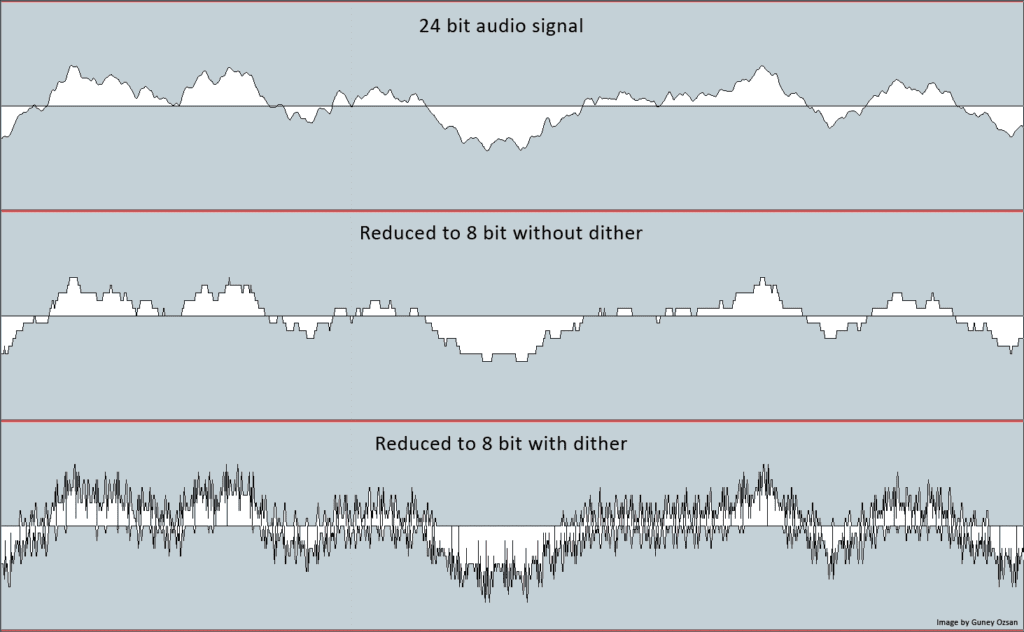
Dithering can be thought of as an exchange or swap out of noise and quantization distortion.
(If you’d like to learn more about dithering, and quantization distortion, check out our blog on the topic where we explain the process described above in much greater detail: What is Dithering?)
Also when creating a lossy file, aliasing occurs when reducing the sampling rate. Aliasing results in generated harmonics, that when not able to go above the max frequency set by the sampling rate, in turn, decrease in frequency and become audible. This is something that becomes more noticeable the greater you reduce the sampling rate of a file.
How does AAC encoding remedy these issues?
Fortunately, AAC files are encoded using 24-bit quantization. This eliminates both the distortion caused by quantization error and the need for dithering. As a result, an AAC file has a lower noise floor, and no quantization distortion, other than the incredibly lower quantization distortion that was created during the original recording process.
In other words, AAC encoding creates a clean lossy file, without added distortion or noise. This is not something you can achieve by using other forms of lossy compression.

AAC files introduce less noise than other lossy file types.
Furthermore, Apple uses an advanced encoding process during sample rate conversion. It first saves and packages the file as a 32-bit float file known as a .caf file, and then uses filtering that ensures any harmonics generated during the downsampling process don’t result in audible harmonic generation.
Also, by using a 32-bit float file which allows for additional accuracy when determining a sample’s amplitude, Apple’s encoding process drastically cuts down on the inter-sample peaks that can occur during encoding, safeguarding against unwanted clipping distortion.
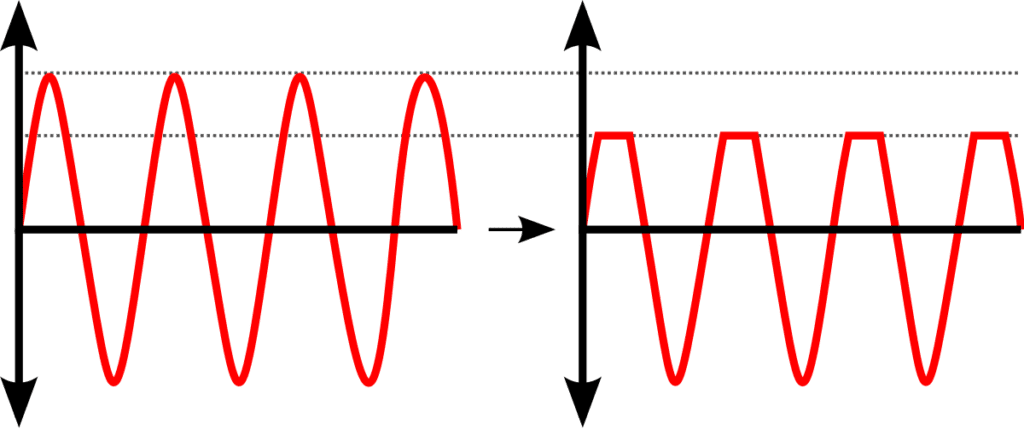
If pushed, masters can clip during the encoding process.
Although this may sound convoluted, these technical measures make the AAC leaps and bounds ahead of other lossy formats. In turn, the AAC’s encoding process offers exceptional quality and prohibits the negative effects that commonly affect lossy file formats.
So just to recap, AAC files are better than other lossy formats due to:
- A 24-bit depth: eliminates quantization distortion and the need for dithering
- A 32-bit float encoding process: Allows for hyper-accurate quantization, resulting in less inter-sample peaking
- Anti-Aliasing Filters: Filters and attenuates unwanted harmonics generated from sample rate conversion.
All of these measures ensure your music sounds as close to the original master as possible.
The Best Files to Send for Apple Digital Masters
Although many engineers prefer to perform conversion during the mastering process, Apple asks that they refrain from doing so, and send the highest quality files possible.
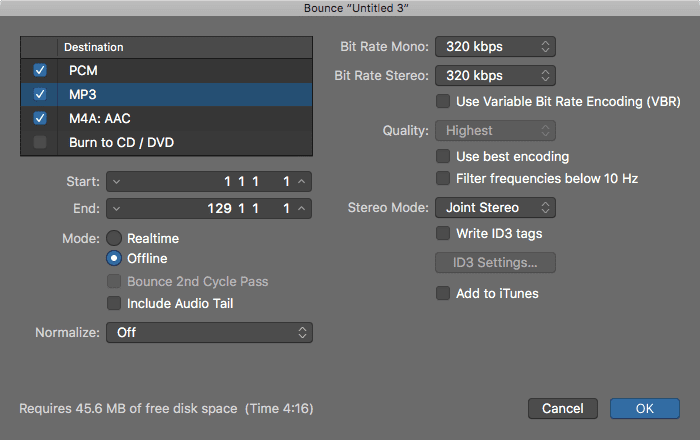
It's best to refrain from sending files you've converted with your DAW or other software.
Sending the highest quality files doesn’t mean up-sampling the signal, or adding bits to the bit-depth after the fact. By doing so you wouldn’t be increasing the audio quality or generating new samples, so this process is best avoided.
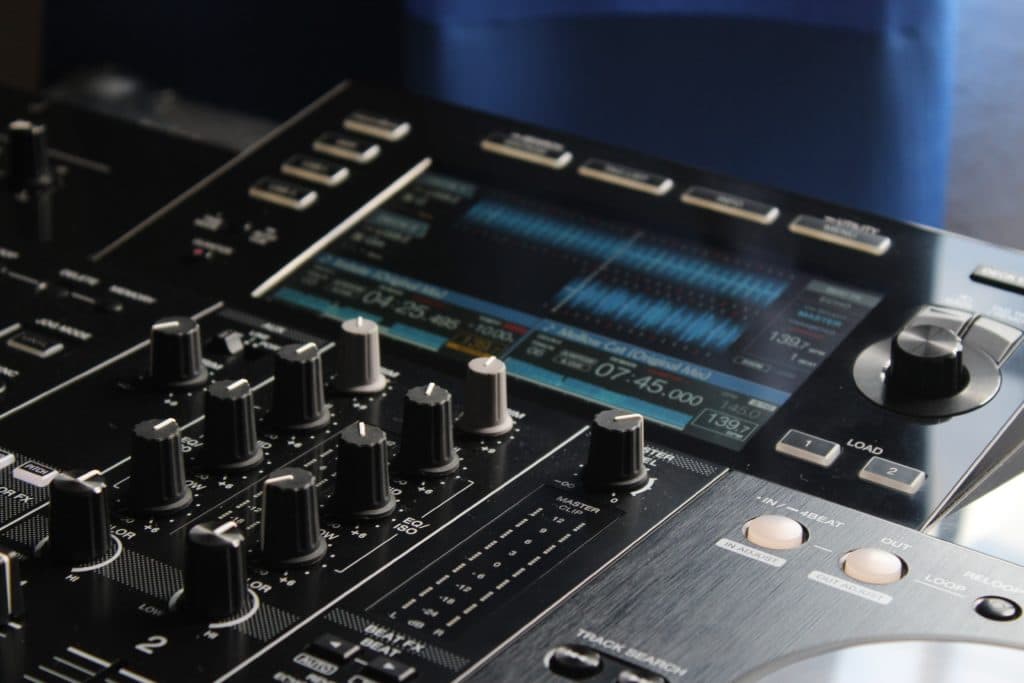
Some digital boards increase the bit-depth of a recording when exporting. Keep this in mind when finalizing a track.
What it does mean, is sending a master that is in the original sampling rate and bit-depth of the recording process. Ideally, the masters would be 24-bit, 96kHz. files. By sending these files, Apple can use its encoding process, nest suited for creating high-quality AAC files.
If this sounds like overkill, or if you believe that their encoding process doesn’t yield better results, take a look at this quick test which showed how their new AAC encoding process out-performed Logic Pro’s. Keep in mind that you can download their AAC encoder from the Apple website if you’d like to perform a similar test.
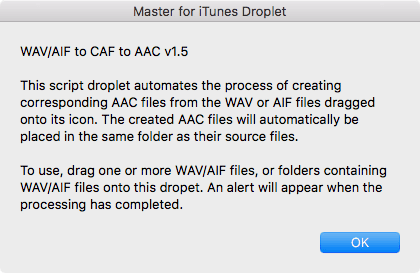
Apple's "Master for iTunes" droplet allows you to encode your AAC files in the same manner Apple does.
For this test, I used an original 44.1kHz. 16 bit master as the source file to bounce out a 320Kbps AAC and 320kbps Mp3. I then used this same source file to create a 256kbps AAC using Apple’s newest ‘Master for iTunes Droplet’ tool.
By performing a null test between the original file and each respective lossy file, I was able to conclude that the 256kbps AAC created using Apple’s ‘Master for iTunes Droplet’ tool resulted in the smallest amount of gain reduction during the conversion process. This is surprising considering the 320kbps AAC and MP3 exported from logic are larger files.
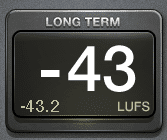
This shows the amount of noise generated from a null test between a source wav file, and Apple's 256kbps lossy file.
In fact, the better encoded 256kbps AAC file results in 6 LUFS less in reduction than the not as well encoded AAC - and 8 LUFS less in reduction then than the MP3.
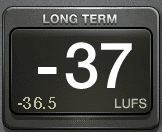
This shows the amount of noise generated from the same null test between a source wav file, and a not as well encoded 320kbps AAC file.
In other words, the better-encoded AAC somehow managed to be a smaller file size, while still including more audio information than its other lossy counterparts. This may be due to the lower amount of distortion and aliasing, as a result of their advanced encoding process.
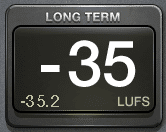
Lastly, this shows the amount of noise generated from the same null test between a source wav file, and a 320kbps MP3 file.
With that said, it may be best to leave the encoding up to Apple, as they seem to know some innovative ways of creating impressive-sounding lossy files.
If you’d like to learn more about null tests and how they work, check out our blog titled “ This One Test Can Change How Your Mix Audio.****”
If you’d like another example of how to perform a null test, using true peak meters to measure the differences between audio files, check out our blog titled “ What is Dithering****” and watch the video at the top of the blog.
The Tools Apple Digital Masters Provides
On its website, Apple provides many free tools you can use when creating a master. There are some that allow you to convert your WAV to AAC and vice versa as mentioned above, and there are some that allow for older Mac users to measure and convert their audio - but let’s focus on two truly helpful tools in particular.
These are the ‘afclip’ tool and the ‘AURoundTripAAC’ tool.
‘Afclip’
The ‘afclip’ may turn some people away initially by needing to be activated via Mac’s terminal, but once you get the hang of it, it’s just as helpful as it is easy to use.
Essentially, the ‘afclip’ quickly examines an audio file and determines if, when, in what channel, and to what extent a sample is peaking.
It also takes into account inter-sample peaks and can convert its findings into an AAC file with which pulse codes demonstrate where the peaks are occurring within a waveform representation.
To see if your mixes or masters are peaking, download and install the ‘afclip’ tool and then follow these steps.
Step 1: In your terminal, which can often be found in the “Other” folder within your applications, type ‘afclip’ and then 1 space. It should look like this:
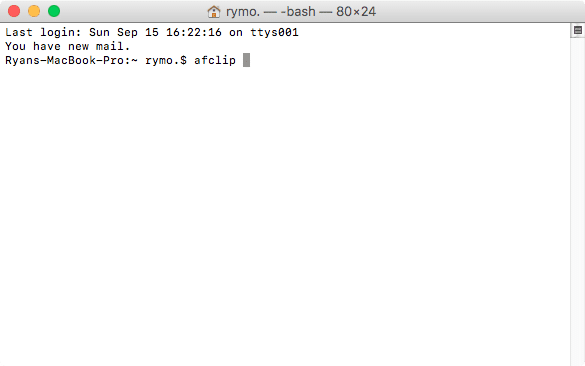
You can copy and paste this line if you'd like "afclip " - do not include the quote marks.
Step 2: Once you’ve done this, grab an audio file from your computer, and drag and drop it into your terminal.
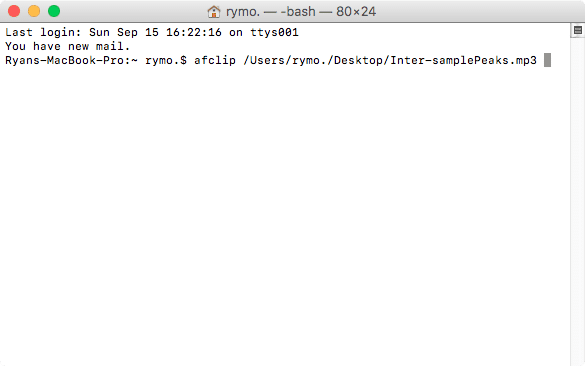
Your terminal will read the file's name and location.
Step3: Press ‘Enter’ or ‘Return.’
After these simple steps you should see something that looks like this:
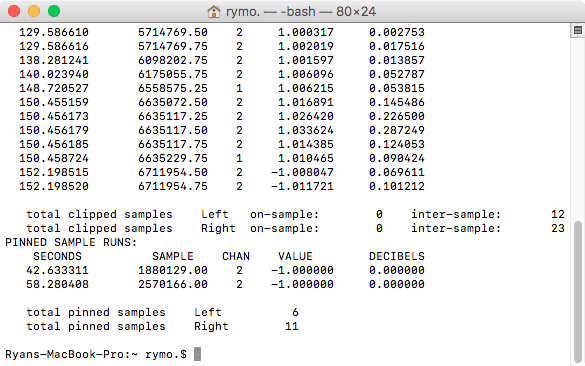
This is only a portion of the report.
The peaks will be mapped out in this fashion, detailing the Seconds, Sample Number, Channel, Value, and the amount that particular sample went over in Decibels.
This tool is incredibly helpful for determining if peaking is occurring in your masters, and can help indicate when you need to reassess how you’re going about avoiding clipping distortion.
‘AURoundTripAAC’
The AURoundTripAAC tool is a bit more user-friendly, in that it shows up in your DAW as a plugin.
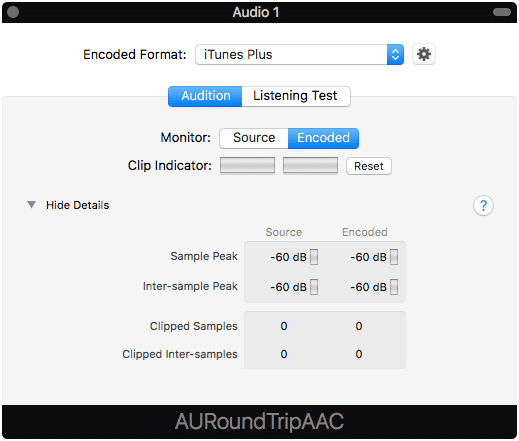
This plugin should already be available in most versions of Logic Pro.
It allows you to encode your master as an AAC file in real-time, then observe any peaks that would occur during that encoding process.
It also allows you to switch between encoded formats, the default being Apple Music’s 256kbps AAC file, with lower quality formats available as well.
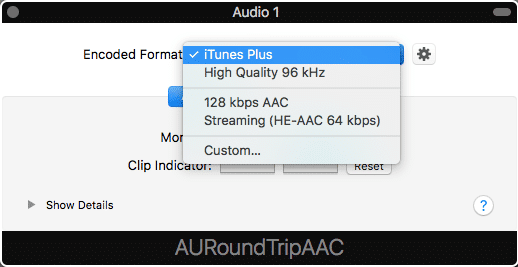
You can choose one of Apple's options or model a custom conversion.
Like afclip, it will demonstrate whenever a peak it measured and can be used to better understand how your master will translate when encoded to their standard.
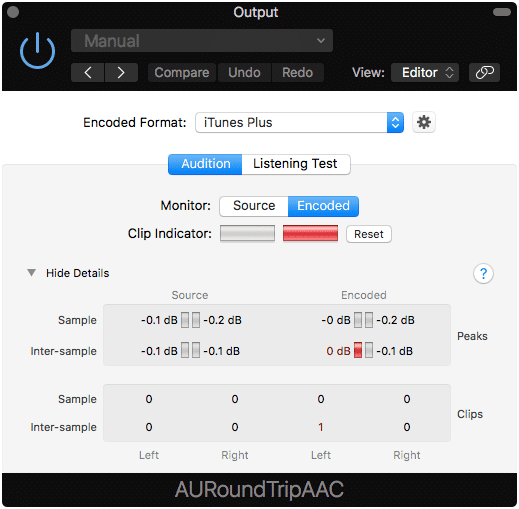
Notice the details section, indicating the type of peak, and the channel from which it came.
The Apple Digital Masters protocol asks that mastering engineers use these tools prior to submitting their masters. This way, any peaking that will occur during the encoding process can be accounted for and avoided to ensure the best sounding result.
If you’re an Apple user or tech-savvy enough to run an Apple OS from other hardware, you can use these tools in a DAW and in your Mac terminal. They’re incredibly helpful and take the guesswork out of the encoding process as it relates to metering and clipping.
Loudness Normalization
One important aspect of mastering for Apple Music or any streaming service is the normalization that will be applied prior to the song being uploaded. Services like Spotify use software known as ReplayGain, but Apple Music has created a unique version of loudness normalization called Sound Check.
Although the exact specifications of SoundCheck are unclear, mastering loudly prior to normalization will result in your master being turned down. If you sacrificed your dynamics in exchange for increased volume, then, unfortunately, your master will not sound the way you intended it to.
In fact, after being turned down, it will sound less dynamic and less impressive than more dynamic masters played at the same volume. All this to say, that mastering loudly serves little to no benefit when Loudness Normalization comes into play.
If you’re looking for a good loudness at which to master your music, an integrated LUFS of -14 is a great place to start. Granted this is the normalization of Spotify, but until Apple clearly states how it normalizes audio with SoundCheck, this may be the best reference for Loudness.
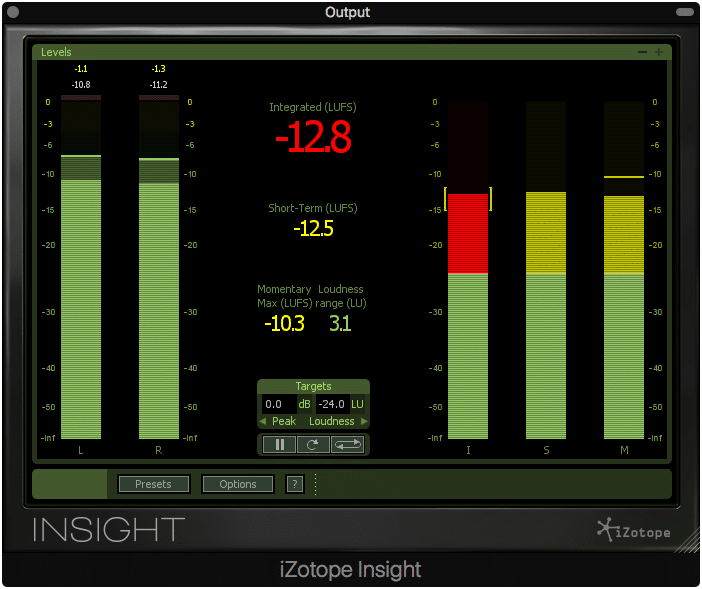
Use an integrated LUFS meter to measure your master's loudness.
If you’re looking to learn more about mastering your music for streaming, check out our blog on the topic:“ Master Music for Streaming****”
Also, if you’re curious how streaming services turn down loud masters, check out our blog titled “ Loudness Penalty****,” where we go into much great detail on this process.
Conclusion

Keep updated with how Apple may change its encoding and specifications in the future.
Apple Digital Masters has created technology and a protocol for making great-sounding playback during streaming. It offers a set of guidelines as well as advanced encoding techniques and tools for creating some of the best sounding music currently available during online streaming.
Any artist or engineer who is concerned about how their music translates digitally should certainly take a look at how Apple Music affects your music, and the specifications that make their encoding process sound as good as it possibly can.
Some important things to know about mastering for Apple Music Masters:
- Avoid clipping, both inter-sample and regular.
- Use the highest original sampling rate and bit-depth when creating a master.
- Leave the encoding process up to Apple Music. Do not convert your master yourself.
- Utilize the AURoundTripAAC plugin as the last step on your output to see how the encoding process affects your peaks.
- Utilize the ‘afclip’ terminal tool to double-check if your master is peaking in any way.
- Keep loudness normalization in mind when determining the loudness of your master.
If you’d like to have your music professionally mastered by an Apple Digital Masters Certified studio, send us your mix here: https://www.sageaudio.com/register.php
We’ll master it for you using sole analog equipment, and send you a free mastered sample of it.
How will you master for Apple Digital Masters?


