What is Mid-Side Processing? (And How to Use it When Mastering)
Quick Answer
Mid-Side Processing is any form of processing in which the stereo channel is separated and affected as mid and side channels. Mid and side channels are created by using phase cancellation, resulting in 1 channel which is located at 0 degrees, and 1 channel at 180 degrees.
What is Mid-Side Processing? (And How to Use it When Mastering) in Detail
Mid-side processing is often used during mastering. Whether you’re introducing equalization, compression, saturation, and distortion, or of course stereo imaging, mid-side processing can play a role.
We’ll cover how mid-side processing is created, how it’s used in other forms of audio production, and how it’s used specifically when mastering.
Additionally, we’ll listen to examples of mid-side processing (in the video embedded above) to understand its effects on a master.
If you’re an artist or an engineer, and you have a mix that you need mastered, send it to us here:
We’ll master it for you and send you a sample to review.
How Does Mid-Side Processing Work?
Mid-side processing and imaging is created by duplicating two identical signals as left and right channels and then inverting the phase of one of them. When the phase of one channel is inverted, the channel goes from being completely centered at 0 degrees, to completely spread at 180 degrees.
Notice that by inverting the signal sent to the side.
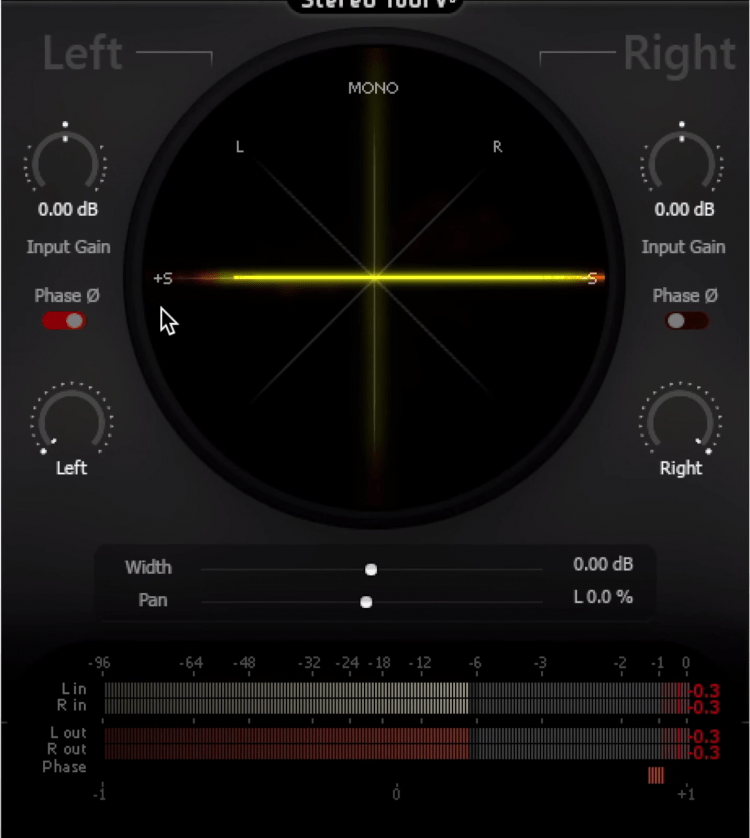
If we use a sine wave and open up the Flux plugin Stereo Tool, we’ll notice that the image of the wave is completely centered. Furthermore, if we begin to pan the signal, it’ll shift within the 90-degree field, but it won’t ever branch out farther than that.
Altering the amplitude of the signal or panning it, only moves the image within a 90 degree stereo field.
It’s only when we invert the phase of one side of the signal that we create the side image.
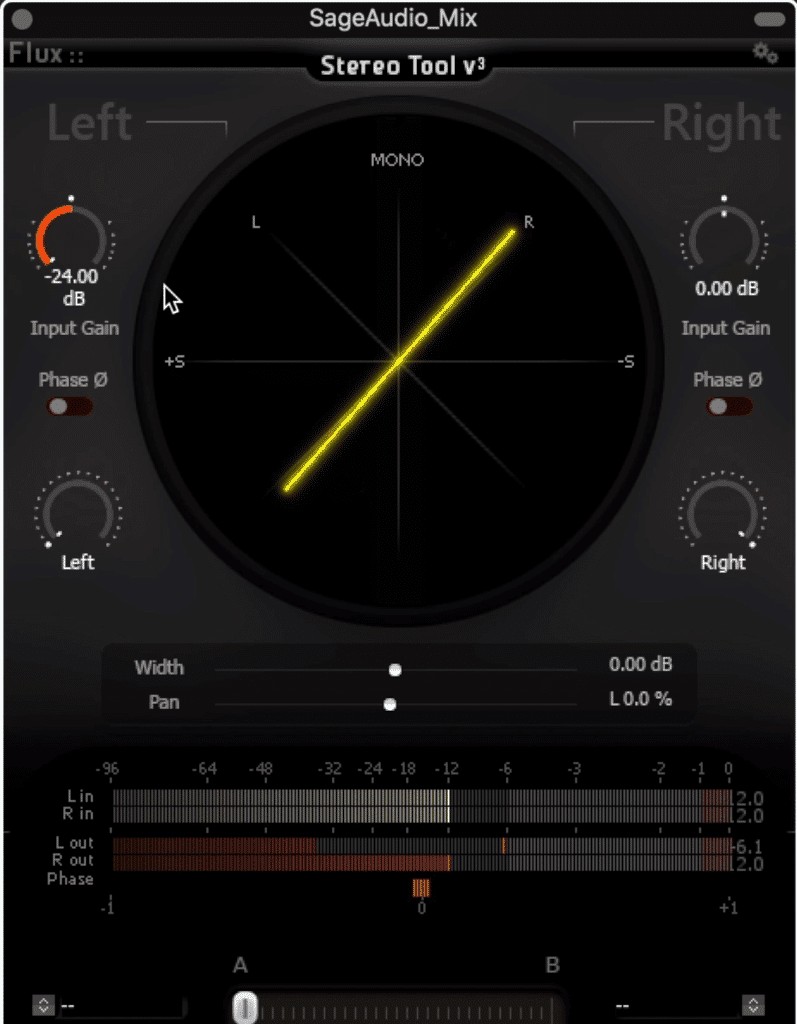
To understand this even more, let’s take a stereo mix, and run it through the FabFilter Pro-Q 3. If we convert the output from left and right to mid and side, and then pan this signal completely to the side, we’ll notice that again, the imaging is completely to the left and right.
Notice that the signal is panned to the side by the FF Pro-Q3, and it shows up on the Stereo Tool as completely side.
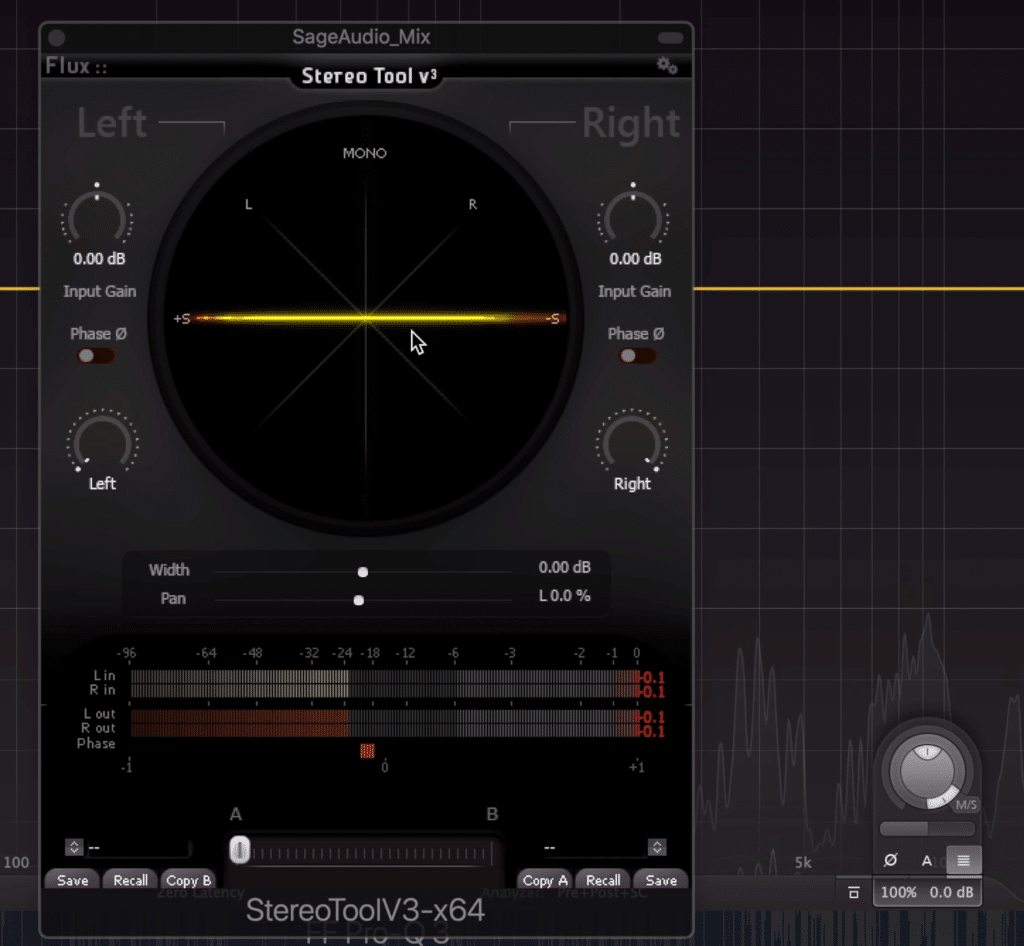
Similarly, if we pan the output to only the mid, we’ll observe the same centered line as with the original sine wave.
All this to show, phase relationships and the duplication of a signal into left and right signals make mid-side processing possible.
For more info on stereo imaging, take a look at a similar video here:
How is Mid-Side Processing Used in Tracking?
When tracking, mid-side processing is introduced by using the mid-side microphone technique with 2 microphones - 1 figure 8 and 1 cardioid. The recording from the figure 8 is duplicated and then has its phase inverted - this creates the side image, whereas the cardioid microphone signal is the mid.

A mid-side micing technique is created by using a cardioid microphone and a figure-8 microphone.
By blending these 2 signals together you can create a balance between your mid and side, similar to how you can when mixing and mastering.
How is Mid-Side Processing Used During Mixing?
When mixing, and engineer can change the levels of mid-side recorded instruments, and can also introduce mid-side processing based plugins or hardware. Similar to mastering, mot mid-side processing that’s used during mixing is introduced via plugins, hardware, and identical channels with 1 having an inverted phase.
How to Use Mid-Side Processing When Mastering Music
When mastering music, mid-side processing is typically used to subtly widen or narrow the stereo image of the signal. Often times, certain aspects of the stereo image will be narrowed and other aspects will be widened in order to achieve a desired effect during mastering.

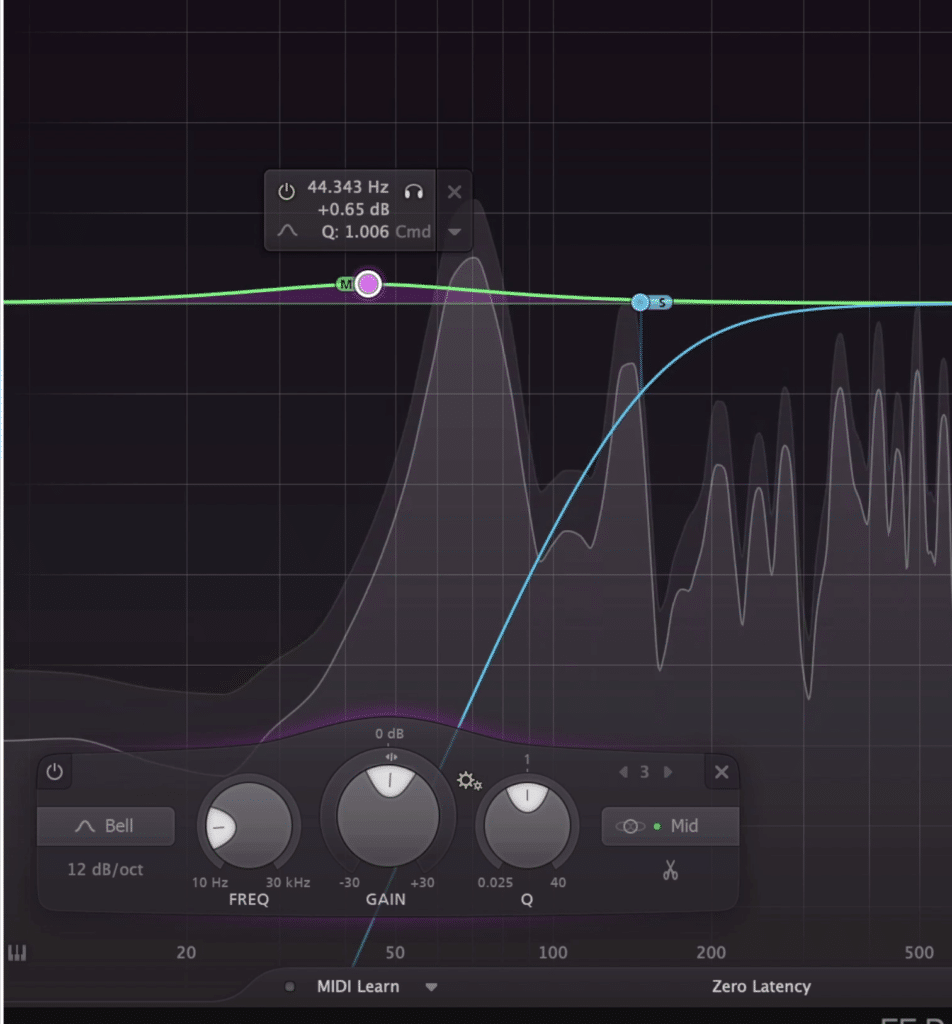
Increasing the amplitude of the side image on the FabFilter Pro-Q3 results in a wider stereo image.
For example, if I was to use a mid-side equalizer, I could place a high-shelf filter on the side image, and amplify above 7kHz by 3dB.
This means that those frequencies on the side image are now 3dB louder. As a result, the side image becomes louder overall, and the stereo image becomes wider.
By cutting the lows on the side, and boosting them on the mid, we can make the kick and bass more focused.
Similarly, if I wanted to make the kick and bass centered, I could cut out low frequencies on the side image using a high-pass filter, and amplify the mid-image kick frequencies.
This will make the low-end mono or centered, and keep the driving aspects of the mastered more focused and driving.
As you can imagine, there will be some frequencies that you want more centered and some more mono - another example of this is about 700Hz on the side image, which is where a lot of body on the guitar is. If you amplify this, you can make guitars sound bigger.
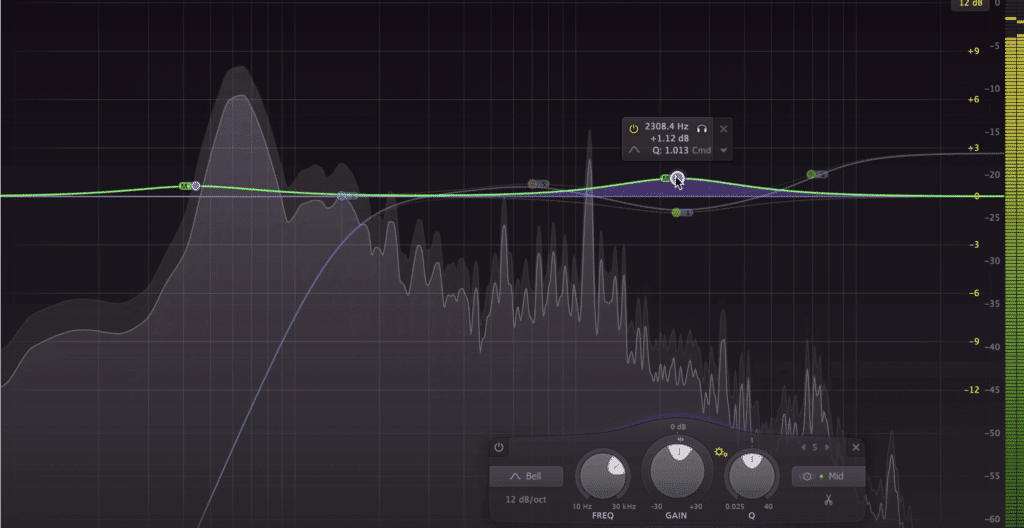
Here are a few curves that are useful.
Or, if you feel that the vocal is getting buried, attenuate 2kHz on the side image and boost it on the mid image. This will carve out some space for the vocal and reduce the effect that phase cancelation is having on the mono vocal.
You can do the opposite by cutting 2kHz on the mid-channel, and boosting it on the side channel if you feel that the vocal is too prominent.
There are more examples like this, but this should be a good start.
A similar effect can be achieved by using mid-side compression. If you want to increase the width of a master, and your compressor allows for mid-side compression - this is a great way to achieve that extra stereo widening.
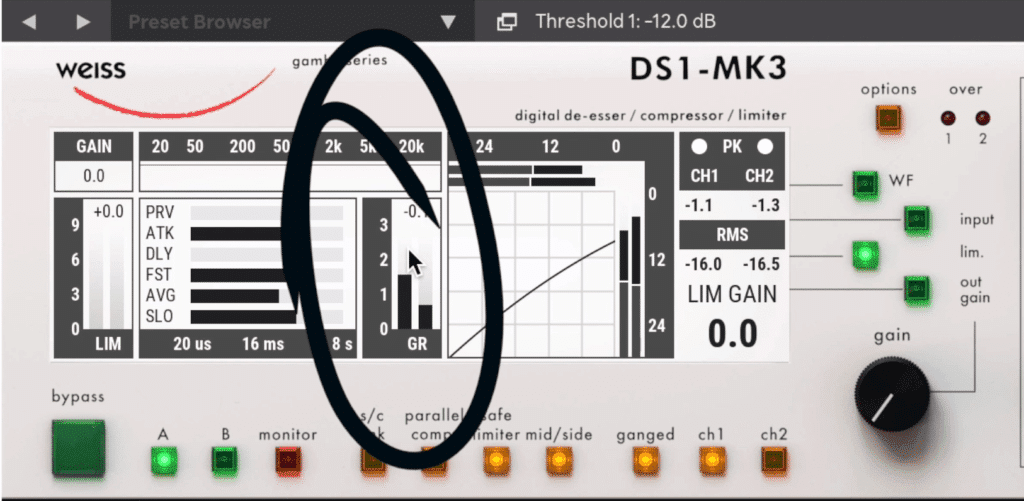
Notice that when using mid-side compression, the mid channel (the left bar) is compressed more than the side channel.
If you compress a signal as mid and side channels, the mid-channel will almost always have a great amount of the signal. Subsequently, more compression will occur on the mid-channel than the side.
This results in a quieter mid image and a respectively louder side image, in turn increasing the stereo width of a master.
In addition to these techniques, you can use mid-side expansion, and mid-side saturation - the latter being used for when you want to distort just the mid or side, but not the full stereo image.
If you want to use some stereo imagers on your mix, here's a list of free ones :
Is Delay-Based Stereo Imaging Mid-Side Processing?
Delay-based stereo imaging is incredibly similar to mid-side processing - it’s accomplished by delaying either the right or left channel slightly, resulting in phase cancellation. This phase cancellation results in a wider stereo image by increasing the signal present beyond the center and 90-degree image.
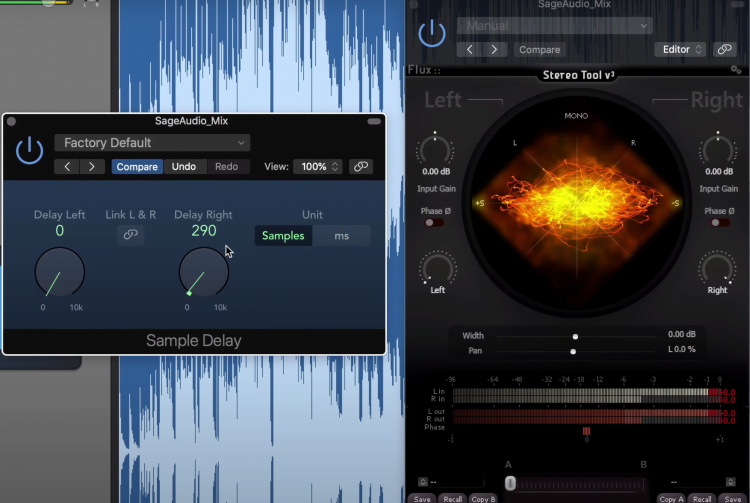
Notice that the signal goes from being relatively centered, to spread out.
To visualize this, if we take the same sine wave we used before, and then run it through a sample delay, we can observe that by delaying one side slightly, the centered image becomes spread into the 180-degree field.
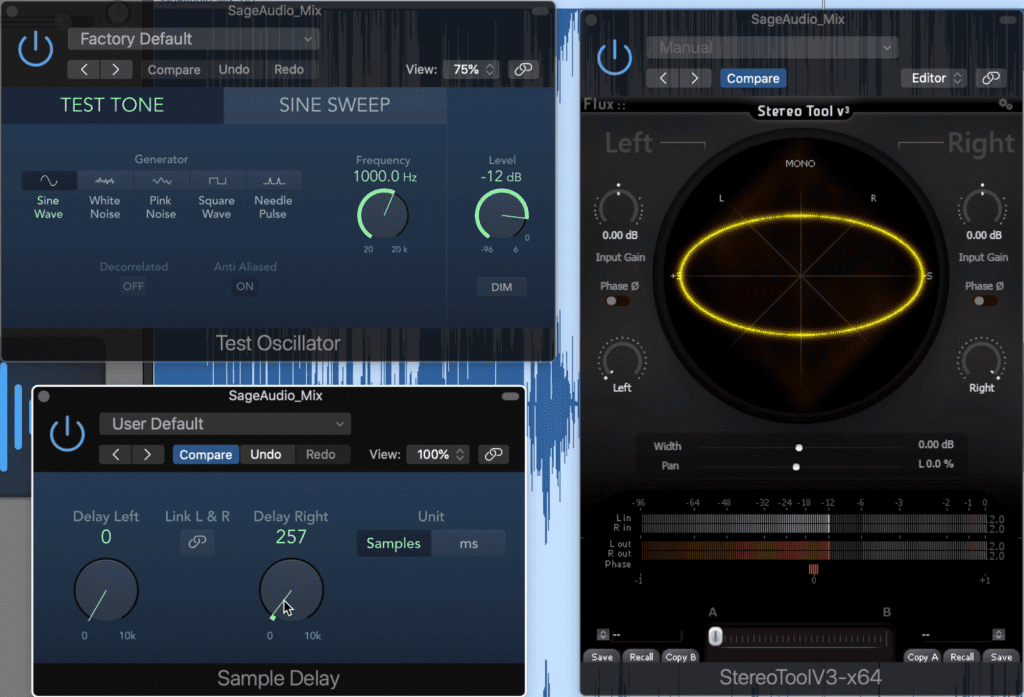
We can see that delay-based stereo imaging has a somewhat similar effect to mid-side stereo imaging.
Conclusion
By observing mid and side signals, creating it with phase cancellation, and discussing how it can be used during tracking, mixing, and mastering, hopefully, we’ve come to a better understanding of the concept in general.
The more that you understand the principles behind mid-side imaging, the better you can utilize it during mixing and mastering.
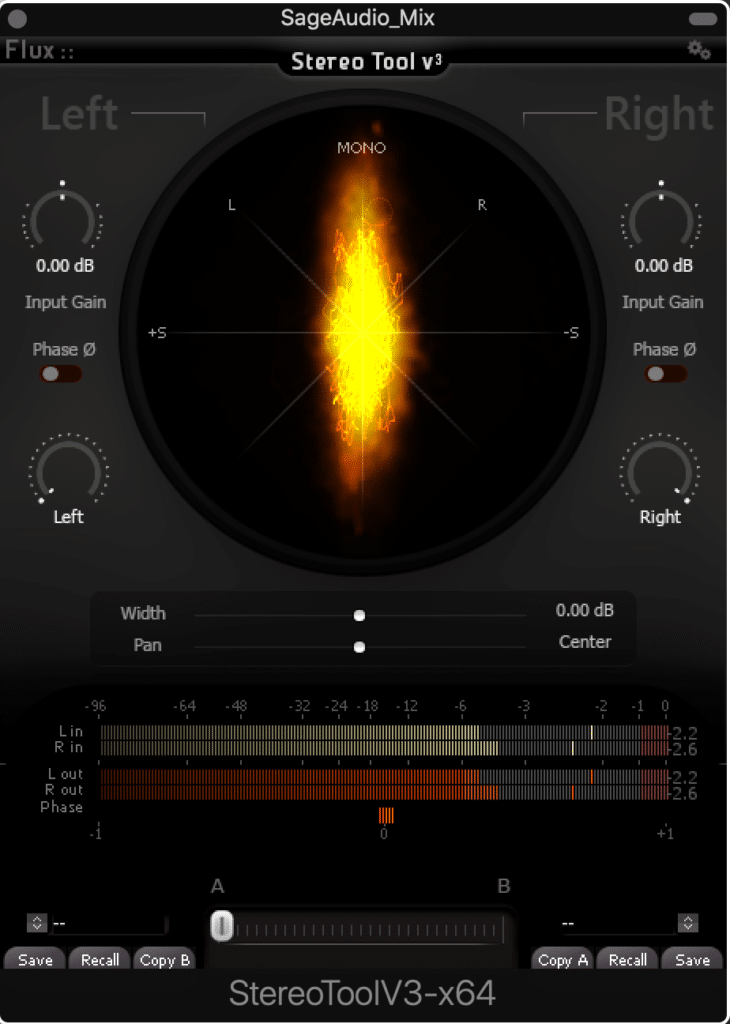
If you want to observe your stereo image, the Stereo Tool shown here is completely free.
When mastering, mid-side processing can be an especially powerful tool. If you use it excessively or without an understanding of how it’s affecting the stereo image, it’s easy to ruin the sound of a track.
With that in mind, it’s best to use the effects that we covered here sparingly, and in a way that’s conducive to creating an enjoyable sound.
If there’s something about mid-side processing that we didn’t cover here, let us know in the comment section of the video - we’d love to hear from you.
If you’re an artist or an engineer, and you have a mix that you need mastered, send it to us here:
We’ll master it for you and send you a sample to review.


