What is Wave’s Best Tape Plugin: J37 Tape vs. Kramer Tape?
When trying to find a great tape plugin, Waves audio has been a go-to for many engineers. They offer 2 affordably priced and widely used plugins - the J37 tape emulation and the Kramer tape emulation.
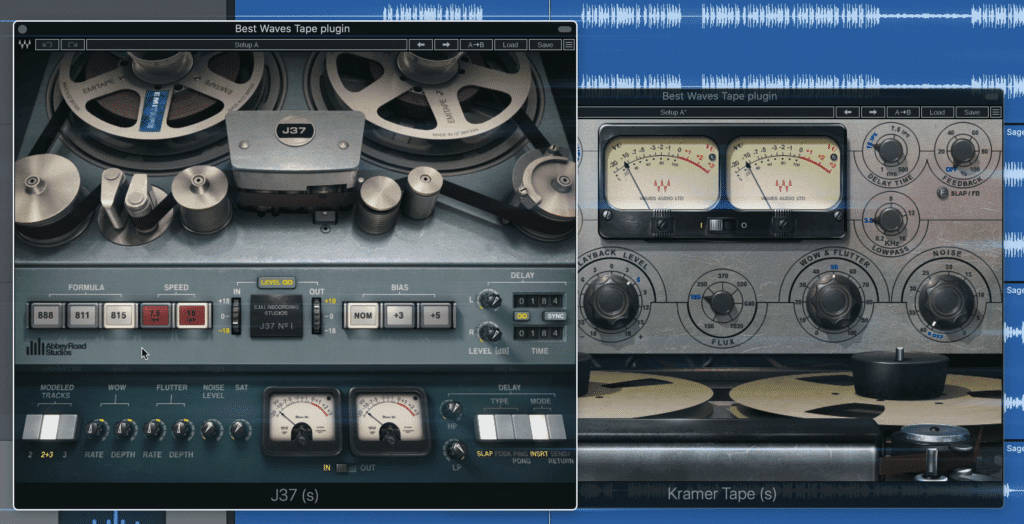
Both the Waves J37 and Kramer Tape plugins have been a go-to for many engineers.
Both of these have unique characteristics, functions, and nuances that make them better for certain genres, individual instruments, and as a means to achieve specific timbres.
The J37 tape and Kramer tape are currently on sale for $40 and $30 respectively, so we’ll mainly consider which one offers a more complex sound with a greater number of features and uses.

The low cost of these tape machines make them a good choice for quality tape emulation.
Additionally, we’ll listen to the plugins on a stereo mix and on individual stems, so check out the video embedded above if you’d like to hear those examples.
Also, if you’re an artist or an engineer and you have a mix that you’d like to hear mastered, send it to us here:
We’ll master it for you for free and send you a sample to review.
The Functionality of the J37 Tape Emulation Plugin
The J37 Tape is an emulation of the Studer tape machines used in Abbey Road Studios in the mid to late 1960s. The machine was a 4-track recorder, which was used most notably on the Beatles’ ‘Sgt. Pepper’s Lonely Hearts Club Band.’
Starting from the left of the plugin we notice 3 tape formulas, the 888, 811, and 815. The 888 is the most aggressive in its distortion - with the 811 and 815 progressively becoming less distorted. Use the 888 from more lo-fi projects, and the 815 for a more subtle effect.
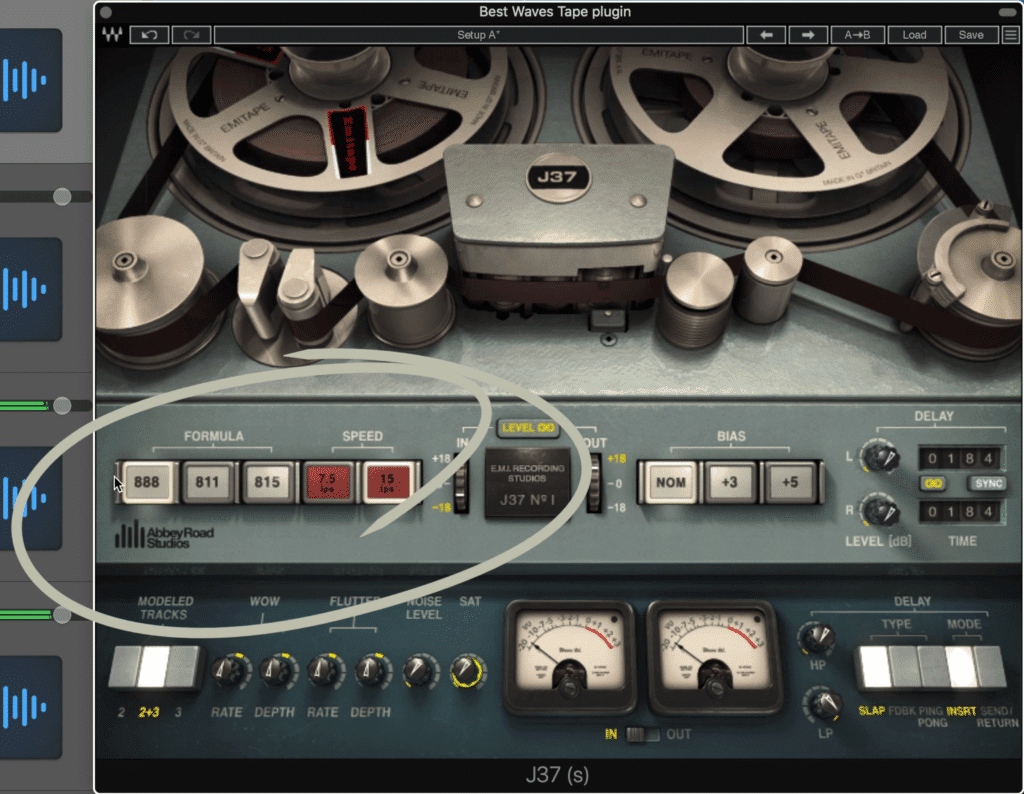
The plugin offers 3 distinct tape formulas for different levels of distortion and compression.
The speed can be switched between 7.5 inches per second and 15 inches per second. 7.5 is better for a warmer sound with attenuated highs, whereas 15 is better suited for a cleaner full-spectrum sound.
In the middle of the plugin are the input and output levels, which can be linked or controlled independently. Waves Audio recommends that your signal peaks around 0dBVU to get the best effect, so keep an eye on the meter below to achieve that.
Bias is to the right and ranges from +1.5dB, +3dB, and +5dB , which is an ultrasonic frequency used to reduce tape hysteresis. When it comes to a plugin, this function will subtly increase your high frequencies and can lead to some distortion at higher levels.
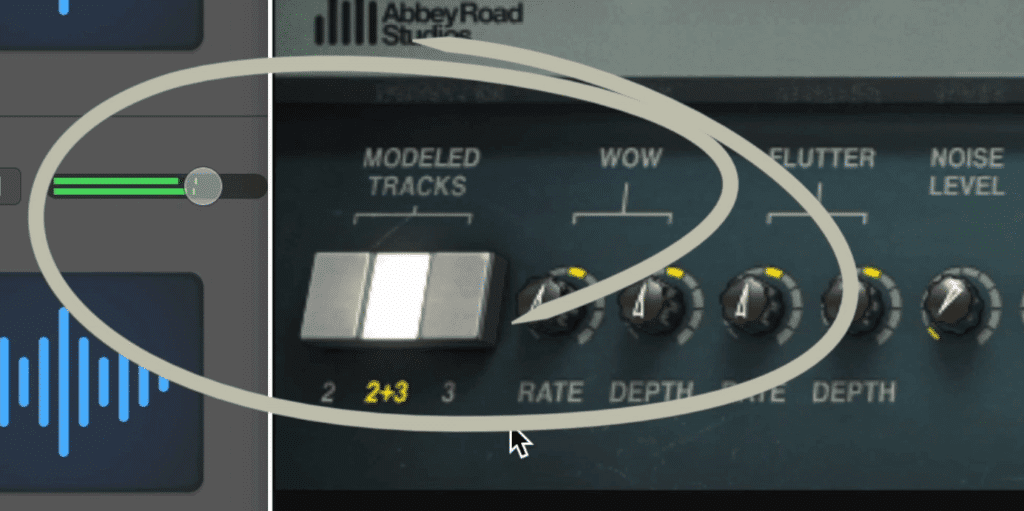
The modeled tracks acts a lot like a crossover effect.
In the bottom left-hand corner, we have the modeled tracks section, which can be switched between the 2nd, 2nd plus 3rd, and the 3rd. Think of this kind of like a crossover effect in which the left and right channels bleed into one another.
When you use the 2nd plus 3rd option you’ll create some mild phase cancellation resulting in a wider stereo image. If this effect is too aggressive try either just the 2nd or 3rd option.
Wow Rate and Depth control the amount of frequency modulation to the signal, in conjunction with the tape speed. Depth will control the amount of modulation and the rate will control the frequency range of the modulation.
Flutter is similar but is the modulation of the overall amplitude of the signal.
You can also introduce noise, and increase the amount of compression and harmonic generation with the saturation rotary.
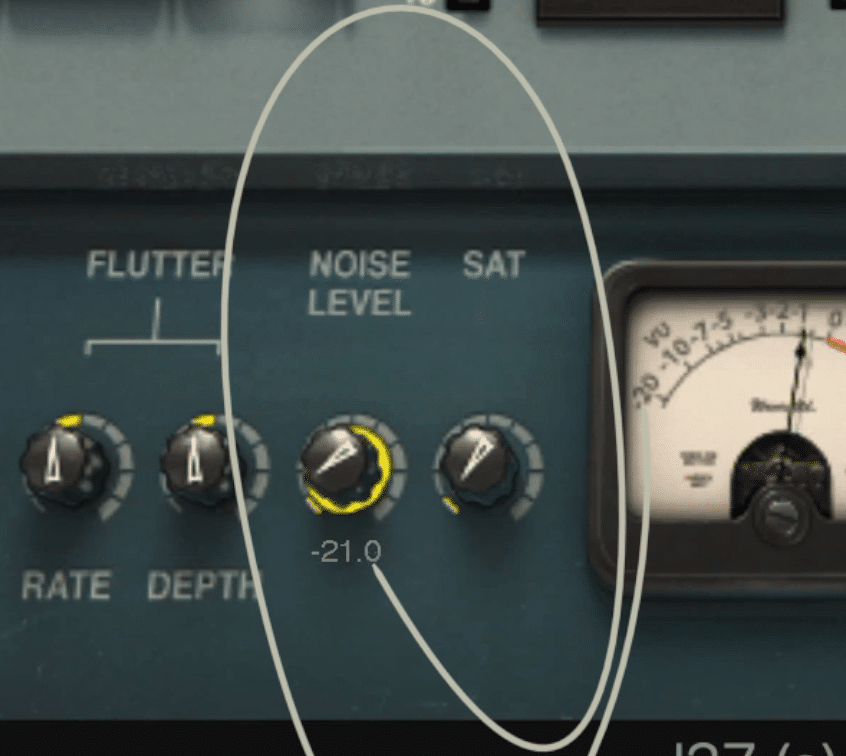
Noise and saturation dials allow for more distortion and compression.
Your meters can be switched between input and output, and have a default calibration of 18dB, but this can range from 8dB to 24dB using the screw image underneath the meter.
Last up let’s take a look at the delay section. The J37 allows you to control delay on the right and left channels independently or linked.
The level of the delay is adjusted in dB, and the delay time is adjusted in milliseconds or can be synced to the host bpm.
In the bottom right, the delay type can be altered between a slapback delay, feedback delay, and ping-pong which alternated the delay between the left and right channels.
This can be further controlled with the high and low-pass filters which allow you to focus the delay into a more narrow band of frequencies.
Insert and send switches are available, which alternate the signal between being wet and dry with the insert option, and complete wet or only the delay effect with the send/return option.
Let’s take a listen to the plugin (in the video above) to understand it better.
If you’re looking for more tape machine plugins to check out, take a look at our video comparing a few more.
The Functionality of the Kramer Tape Emulation Plugin
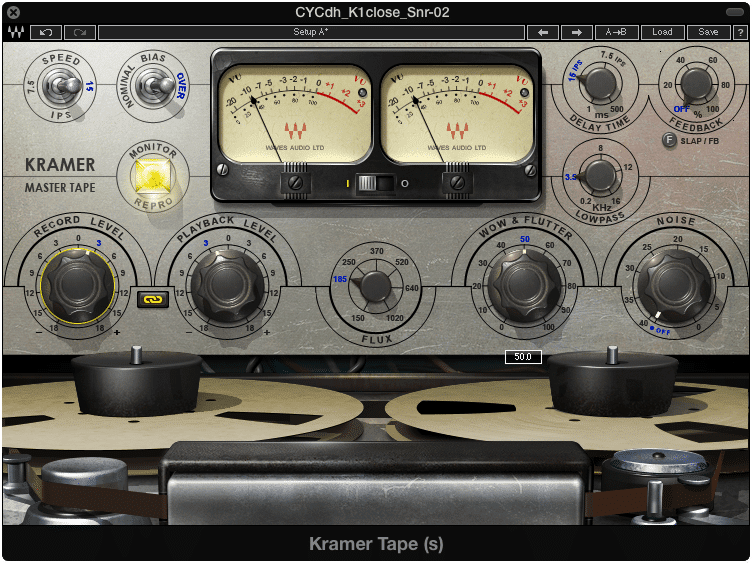
The Kramer Tape plugin is simpler but designed with mastering in mind.
From the start, we notice a big difference between the 2 plugins. The Kramer tape is a lot simpler and less versatile.
On the top left of the plugin is the tape speed, which can be switched between 7.5 and 15 inches per second. Bias ranges from 1.5dB to 3dB.
The input and output can be linked or controlled independently. Drive the input and reduce the output to create some distortion or keep the input more relaxed for a subtle effect.
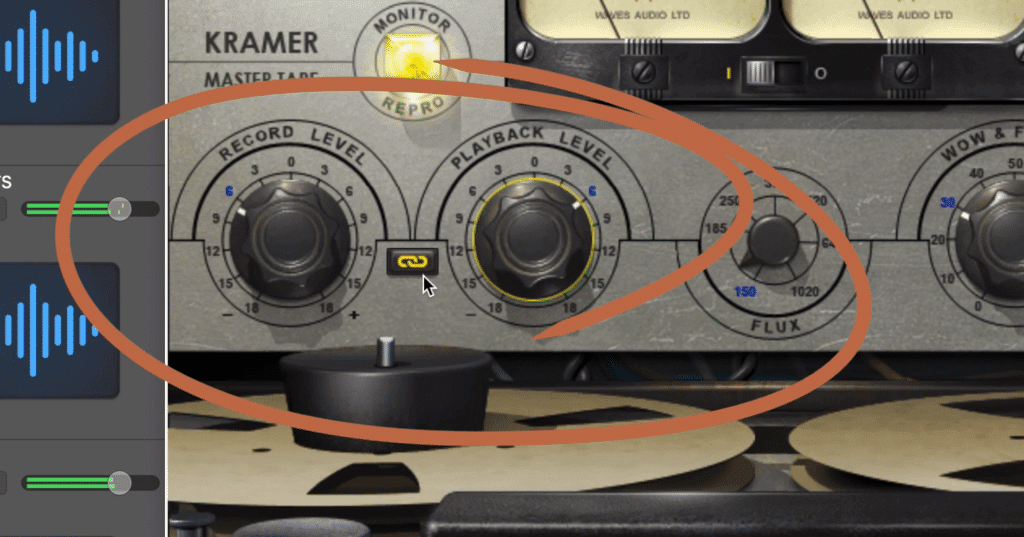
The record level and playback levels are your input and output.
Flux is an interesting feature, as it allows you to control how much of the signal is imparted onto the tape. If we were to compare this feature to the j37, this would be a lot like the Saturation rotary.
Wow and flutter are controlled collectively with one dial, making this feature easier to use but with less control.
Noise can also be introduced to the signal. If you’re not interested in using the majority of the plugin’s features, or maybe you’re trying to cut down on CPU, click the monitor button to turn off the tape speed, bias, flux, and wow/flutter functions.
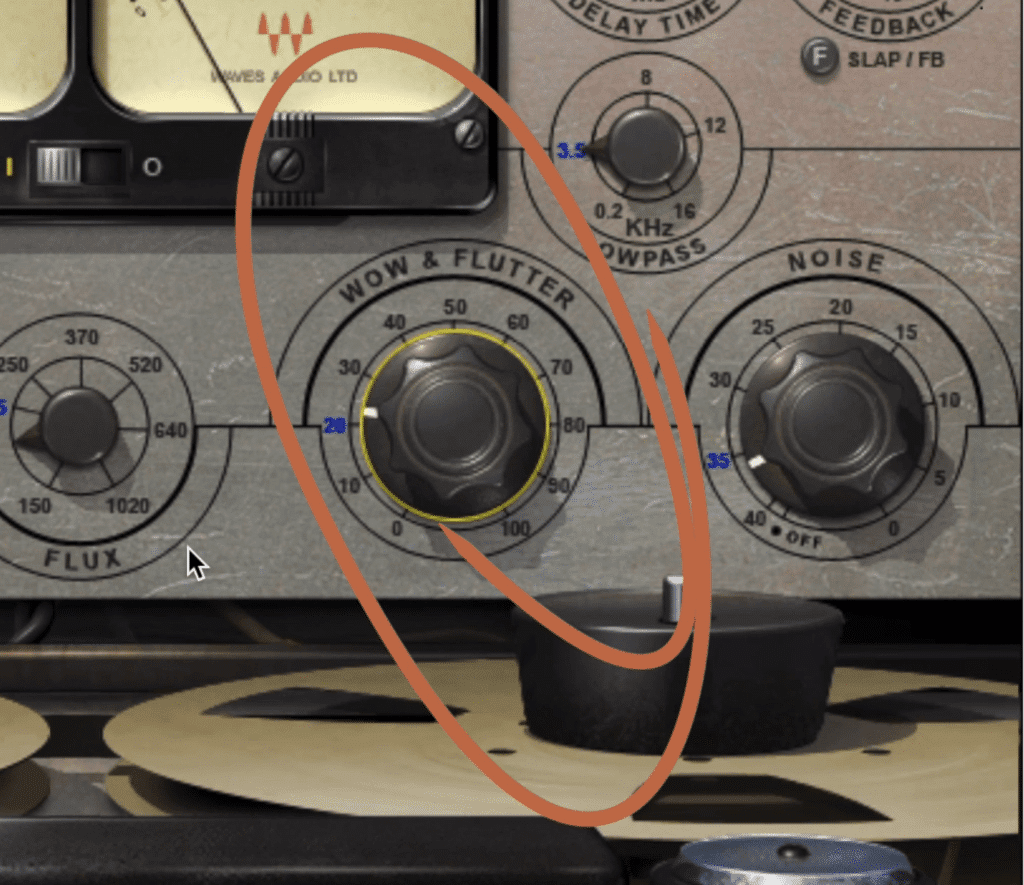
Wow and flutter are controlled collectively with one dial.
Like the J37, Kramer tape can introduce delay, but with simpler controls. The delay type can be switched between slap and feedback, and the delay time is affected in milliseconds without the option to sync the time to your BPM.
A low-pass filter affects which frequencies will be delayed.
Lastly, the meters can be switched between input and output and can have their calibration altered.
Take a listen to the Kramer Tape on a stereo mix and some stems (in the video embedded above).
Also, if you want some free saturation plugins, here’s a video on that very topic:
Our Pick for the Winner: J37 Tape
Although the Kramer Tape is a great plugin that I’ve used and enjoyed on a lot of projects, the J37 offers a lot more flexibility.
Granted the Kramer Tape is designed with mastering or bus compression and saturation in mind, whereas the J37 is designed more for creative effects, but you can still achieve a lot more with the J37.
If you had to pick one of the plugins, I’d recommend the J37; however, since they’re both affordably priced, you can most likely pick up both.
Additionally, it's always a good idea to test the plugins yourself and decide which one is best for your mixes and masters. They can both be demoed for 7 days with full functionality.
But let us know which one you think is the better plugin, or if you use these plugins at all.
Lastly, if you’re an artist or an engineer and you have a mix that you’d like to hear mastered, send it to us here:
We’ll master it for you for free and send you a sample to review.
Do you prefer the J37 or the Kramer Tape?


