Top 9 Free Delay Plugins
Pitched Delay by Ljkb
Valhalla FreqEcho by VahallaDSP
Sound Delay by Voxengo
Tempo Delay by Voxengo
Lagrange by UrsaDSP
HY-Delay by HY Plugins
Brigade Delay by Full Bucket Music
Hysteresis by GltchMachines
Speculum Free by Decade Bridge
Delay has a rightful place among some of the most popular and important forms of processing during the mixing stage.
Although not allows a go-to for a lot of engineers, delay has helped to create and define genres, such as psychedelic rock, as well as create distinctive forms of vocal processing, like the slap-back delay.
Just as important as a potential style that delay can impart on a signal is the pragmatic aspects of using short delays to thicken sounds.
Whatever you might be using delay for, odds are at least one of the plugins on this list will work well.

Free plugins help to add some variety to an engineer's repertoire.
As the name of this post suggests, each of these plugins is completely free and can be downloaded from various sources, including vst4free (a popular free plugin site), and the websites of the various manufacturers of these plugins.
Now it should be noted that these plugins are in no particular order, and they are available for both Mac and PC operating systems.
With that said, let’s delve into our picks for some of the best free delay plugins available at the moment.
First, if you have a mix you’d like to hear mastered, send it to us here:
We’ll master it for you and send you a free sample for you to review.
Pitched Delay by Ljkb
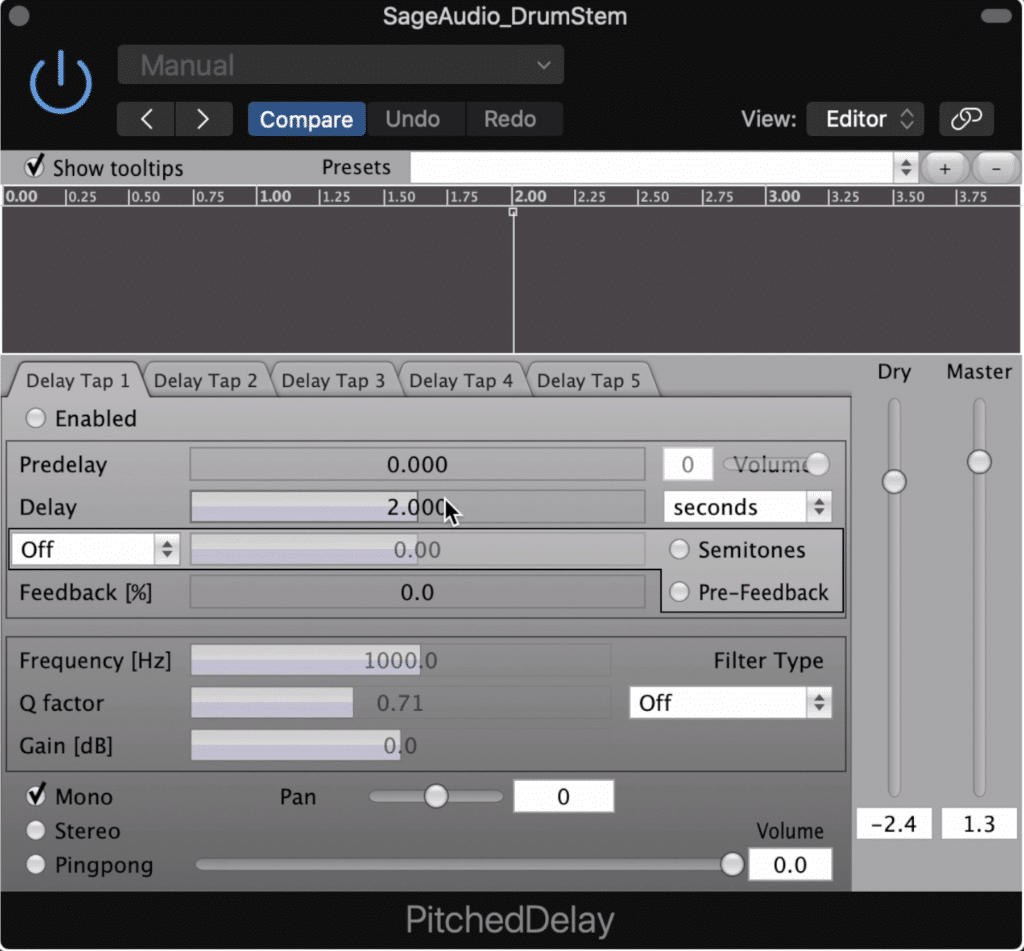
Pitched Delays lets you pitch-shift the delay bands up or down.
Starting off our list is an incredibly unique and useful delay plugin, that allows you to not just delay your signal, but to pitch shift these delays as well.
Its simplistic design makes it easy to understand what’s happening and what you’re affecting when using the plugin.
The Pitched Delay plugin allows for up to 5 Delay taps , each independently controlled in the display panel associated with it.

In the first section, you can switch between 5 bands, and control your delay and pitch.
In the first section, you have your delay amount and denting amount, including pre-delay and feedback. You can easily alter your delay with the slider, the note type, as well as a second-based delay metric.
Just as importantly, you can detune your delay, as well as alter the quality of the tuning as it relates to plugin latency.

At the bottom of the plugin, you can create a filter and change the delay type.
Below this, you have a filter section, which allows you to create various and selectable filters, as well as change these filter’s root frequency, Q, and gain.
Lastly, you can switch between mono, stereo, and ping-pong delay to create some versatility with your delay and tuning. A Dry and Master fader controls the output of your signal.
Valhalla FreqEcho by VahallaDSP
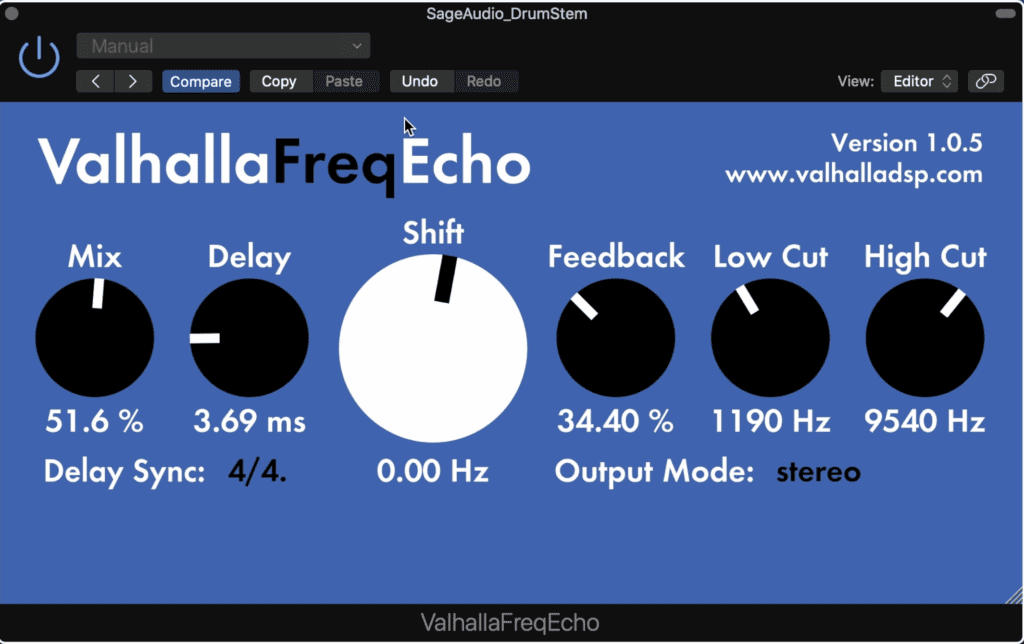
VahallaFreqEcho is by the same makers as the Valhalla Room Reverb plugin.
Creators of the much loved ValhallaRoom reverb plugin, VahallaDSP created a free and just as useful delay plugin.
The simplistically designed yet powerful and versatile plugin allows you to control various aspects of your delay to create sounds ranging from the typical to the psychedelic and unorthodox.
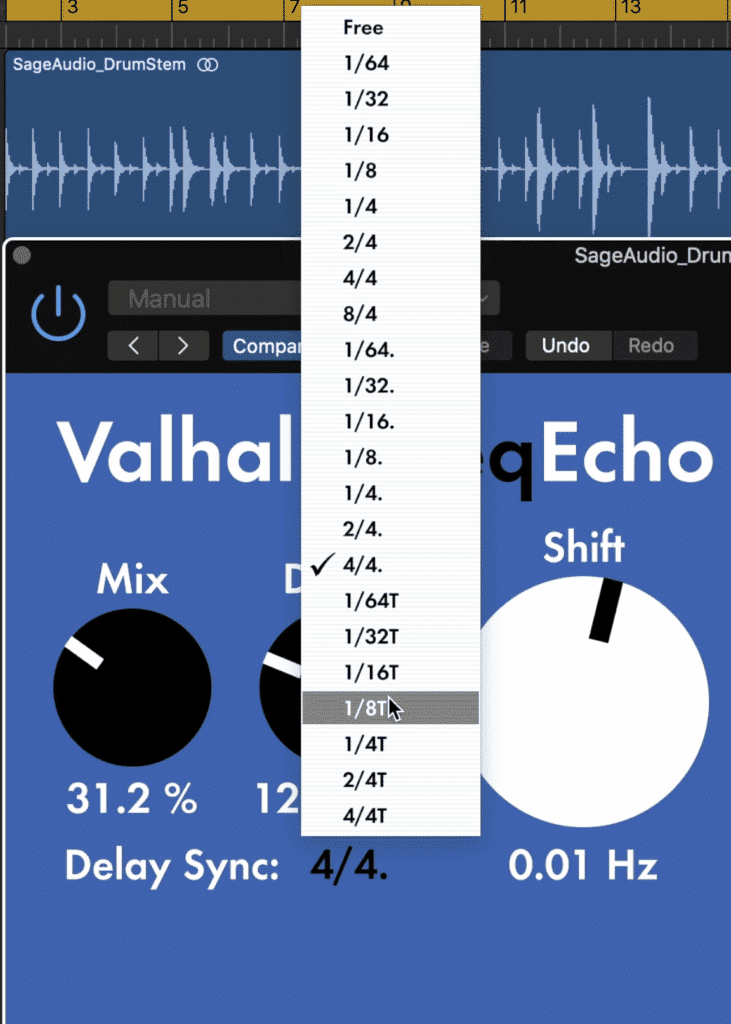
You can switch between free delay and delay based on your host bpm.
The shift function allows you to alter the frequency of your delay. Although the rotary states-1000Hz to 1000Hz to be its range, to my ear it sounds like the delay ranges from 1 octave to 2 octaves above the delayed signal.
The mix rotary works as a wet/dry function, whereas the delay and delay sync mode alter the amount and type of delay.
The feedback rotary determines how much of the delayed signal is fed back into the delay, and the low and high cut functions allow you to equalize the frequency range of your delayed signal.
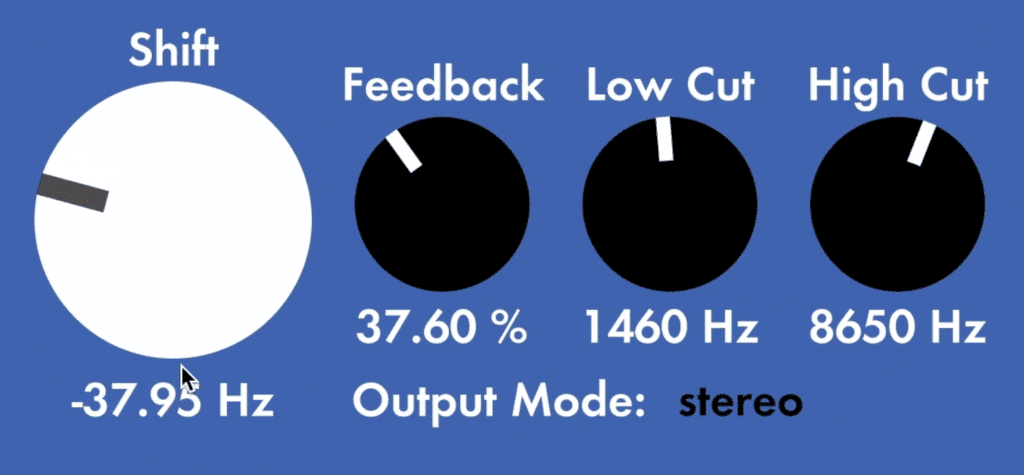
The shift rotary changes the pitch of your delay and can create some very unique sounds.
Lastly, the Valhalla FreqEcho has a great HD display that can easily be resized by click and dragging the tab in the bottom right-hand corner.
If you’re using delay in your mixing session, check out our blog post all about mixing:
In it, we cover some lesser-known and used mixing techniques that can be incredibly helpful when mixing.
Sound Delay by Voxengo
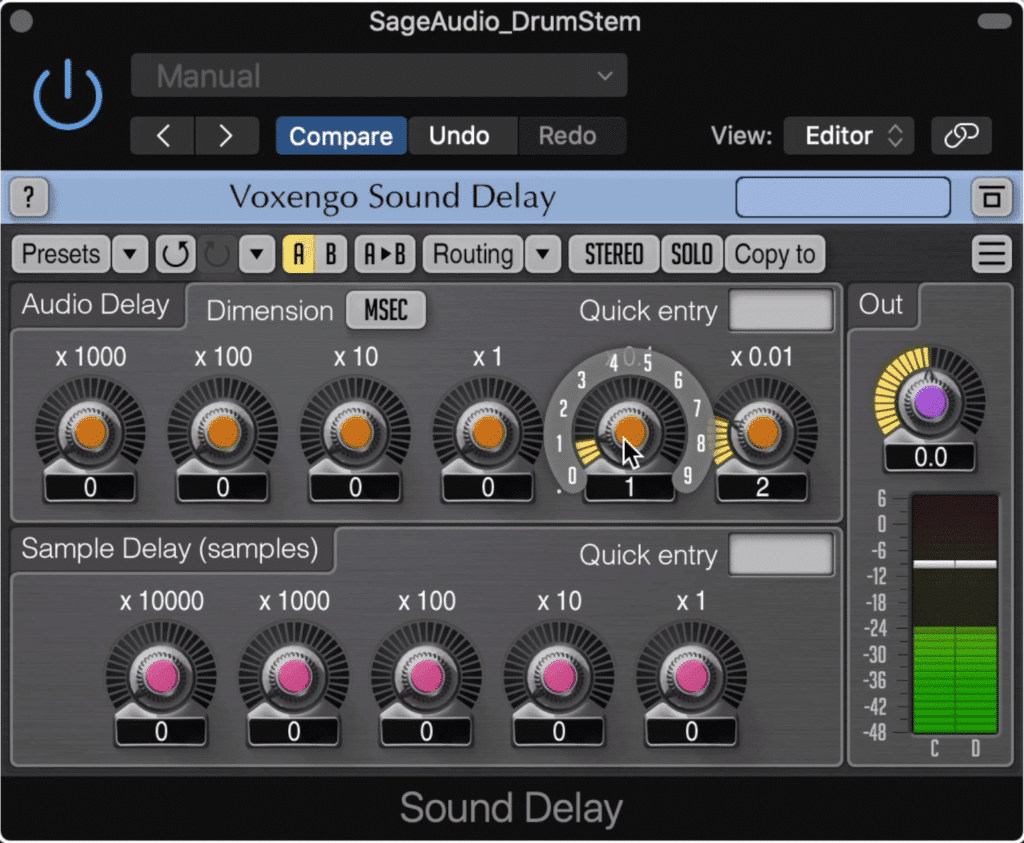
Sound Delay was designed to fix phase issues in a mix.
Sound Delay by Voxengo is a very technical plugin, often used to fix latency and phase issues in a mix ; however, it’s great design and flexible routing gives engineers a good reason to find out how it can be used creatively.
Granted if you’d like to use this plugin to correct timing issues, then this plugin is fantastic, as it lets you move the entire track by as little as 10 microseconds, which is 1 hundredth of a millisecond. This makes it a really fantastic technical tool.
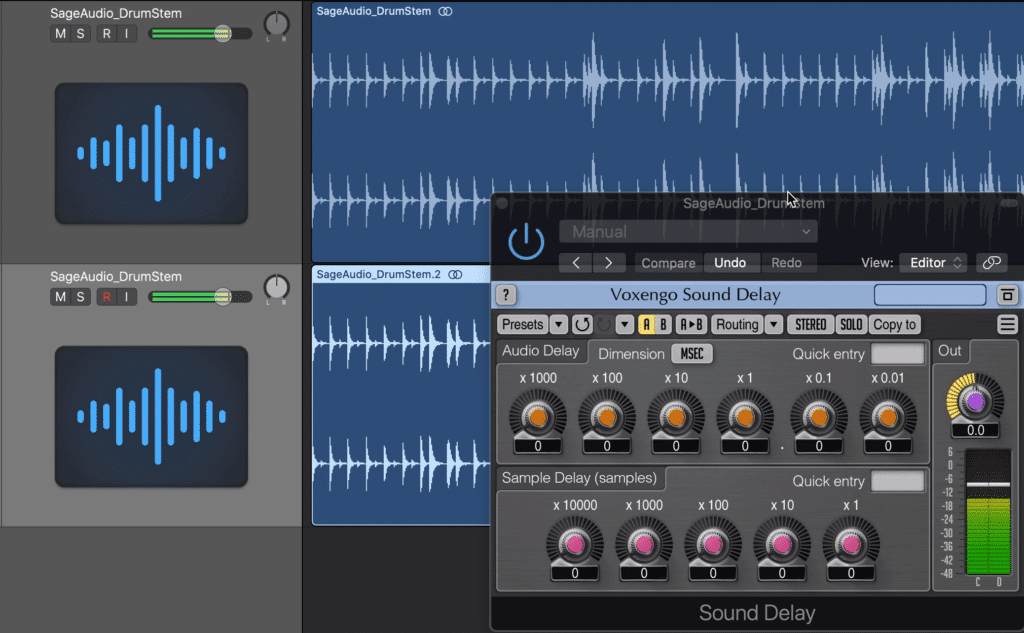
To use it creatively, you'll need to duplicate the track and affect only one of them with the plugin.
But, if you want to use it creatively simply duplicate the track you intend to delay, and then begin to delay one of those tracks. The plugin will move the delayed track over by the amount you choose, meaning the undulated signal will almost serve as your dry signal so to speak.
Looking more at the plugin, you can see that you have two main windows. In the first, you can alter your signal in milliseconds, or measurements they call feet and meters. In the second you’re altering your signal in samples.
The delays you create are in multiples of 10, with the largest amounts on the left, and the smallest on the right.
Perhaps my favorite part about this plugin is the routing since switching to stereo mid-side allows you to delay either the mid or side image independent of one another. This means you can create a delay solely on your mid or side image, resulting in some incredibly unique effects.
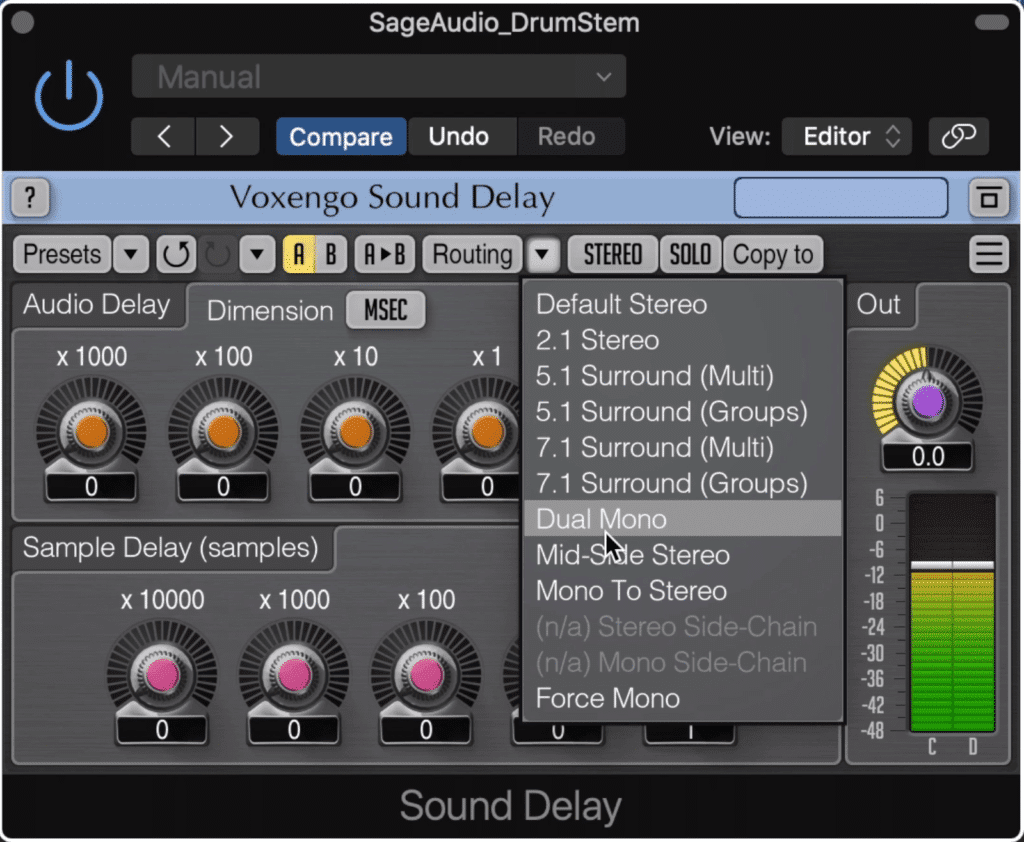
In the routing section switch the setting to stereo mid-side to create unique effects.
Tempo Delay by Voxengo
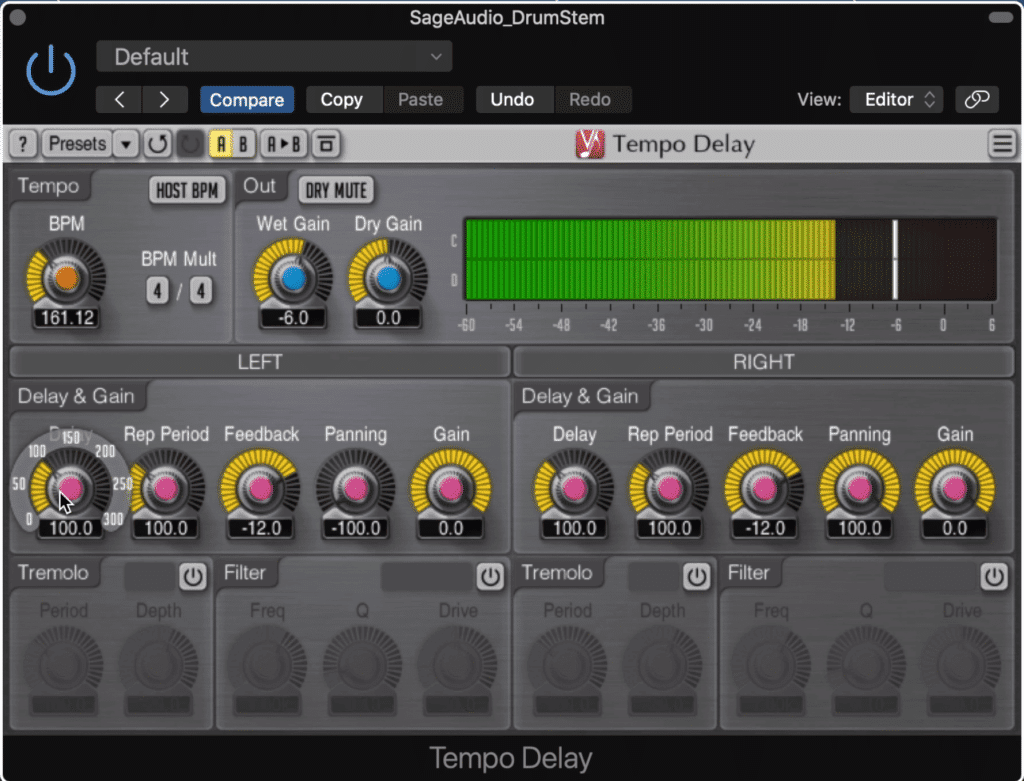
This Voxengo delay plugin is more straightforward and easier to set up.
Another great Voxengo plugin, the Tempo Delay offers engineers with a more typical and creative delay, used mainly for musical purposes.
With it, you can control your left and right channels independently , as you alter various parameters. A master section allows you to alter your delay from independent of your session to controlled by a host bpm.
Your output section allows you to control the wet and dry signals, as well as quickly mute your dry signal to give you a better idea of the delay that you’ve created.

In the master section, you can enable your host bpm, making setting your delay easy.
One unique feature is delay panning - which if you wanted, could allow you to have your right channel’s delay show up in the left channel and vice verse.
Additionally, tremolo and filter effects respective to each left and right channel can be enabled, giving you the option to drive your signal, as well as alter the delayed signal’s frequency.
Like all Voxengo plugins, the display and meter settings can be changed to better suit your preferences.
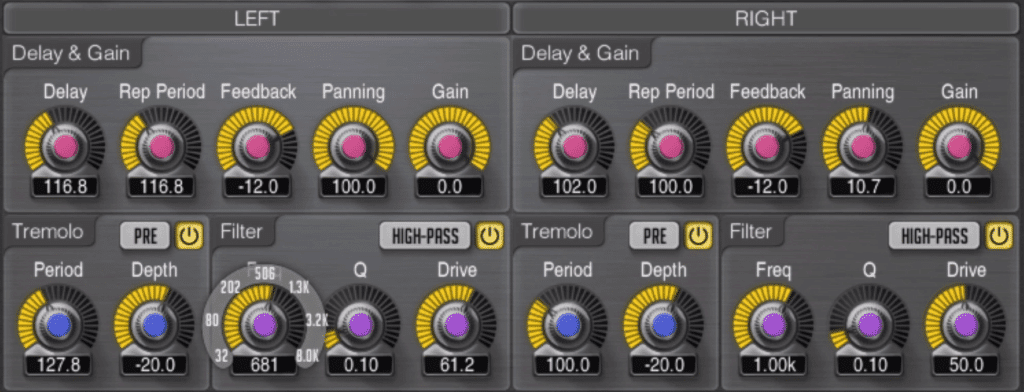
The various functions are divided into left and right sections.
The only thing this plugin is missing is the advanced routing options that Voxengo plugins typically have, but all things considered, this is still a great and useful plugin that can augment any mix in which delay is needed.
If you like Voxengo’s plugins, and you want to check out some more of their free software, check out our blog posts on these free plugins:
In it, you’ll find an incredibly useful Voxengo plugin, as well as some other great ones.
Lagrange by UrsaDSP
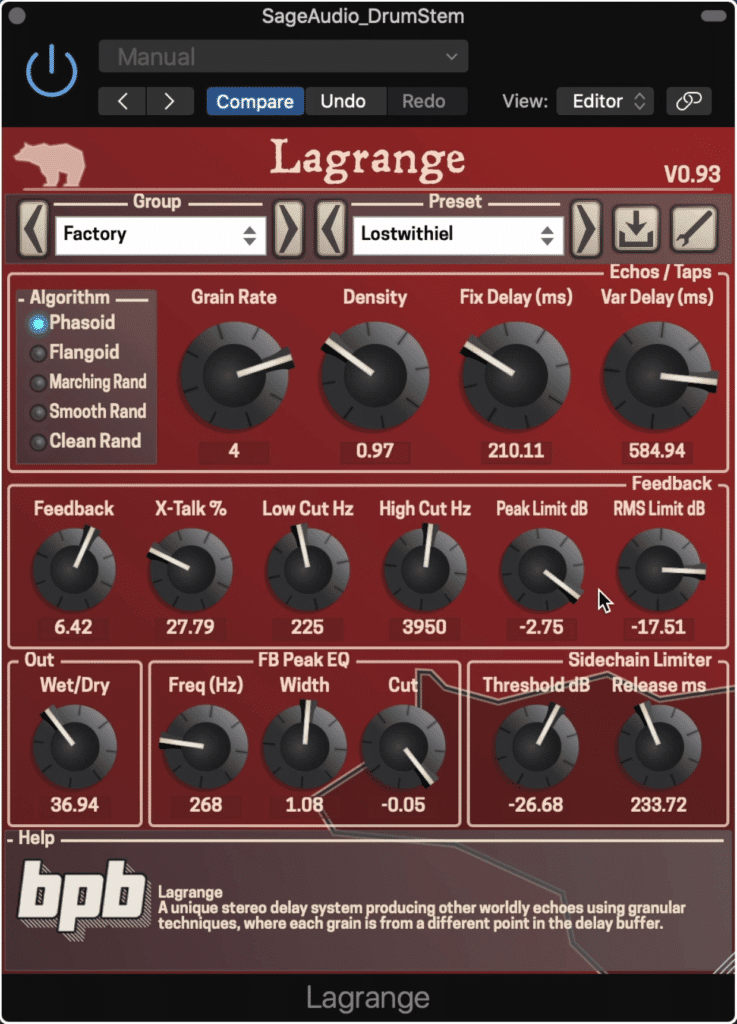
Lagrange creates the most unique delay effects of any plugins on this list.
If you’re looking to create truly bizarre and complex delay yes then the Lagrange plugin, designed by UrsaDSP is a great option.
Unlike some of the other plugins on this list, the Lagrange plugin provides you with an immense amount of options that could leave you tweaking your settings for hours to create just the right otherworldly sounding effect.
The first thing to understand about this plugin is the grain rate - a function that I personally haven’t seen before in a delay plugin. From what I understand, changing this grain function changes the rate at which delay times change.
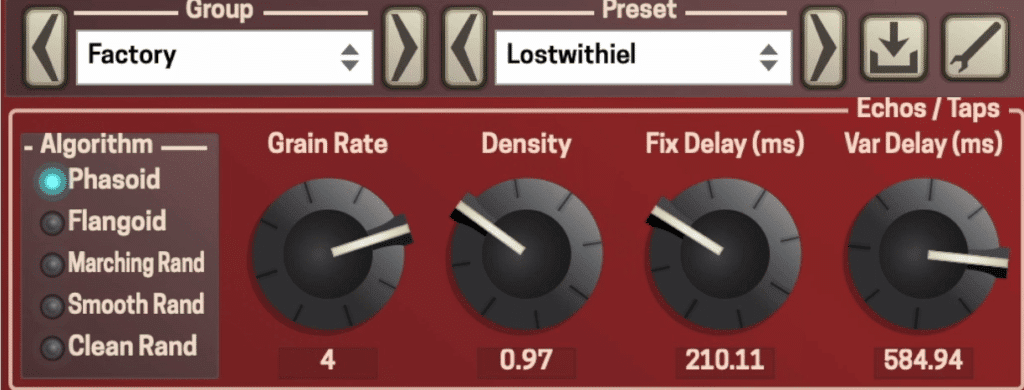
Changing the grain rate and the variable delay will result in the most interesting effects.
This alone makes this plugin stand out, as the delay times are variable, or switch at any given point during the signal being delayed. The higher the grain amount, the quicker these delays will alter in time.
The density function controls how much these different delays overlap, with a lower setting allowing them to fade out completely and a higher setting allowing for greater overlap.
The fixed delay function sets the minimum amount of time between each delay, whereas the variable function allows for more seemingly random delay times when the setting is higher. These functions are heavily influenced by the algorithm type , which will vary the sound from phasing, flanging, to more spacious and clean delays.
The feedback section allows you to alter the amount of feedback, crosstalk between your left and right signals, some eq filters for your feedback, and a limiter to control your feedback based on both peak and RMS values.
Additionally, you have a wet/dry rotary, a peak equalizer section, and a side chain limiter that attenuates the wet or delayed signal depending on the threshold, and attenuates it for a given amount of time depending on the release.
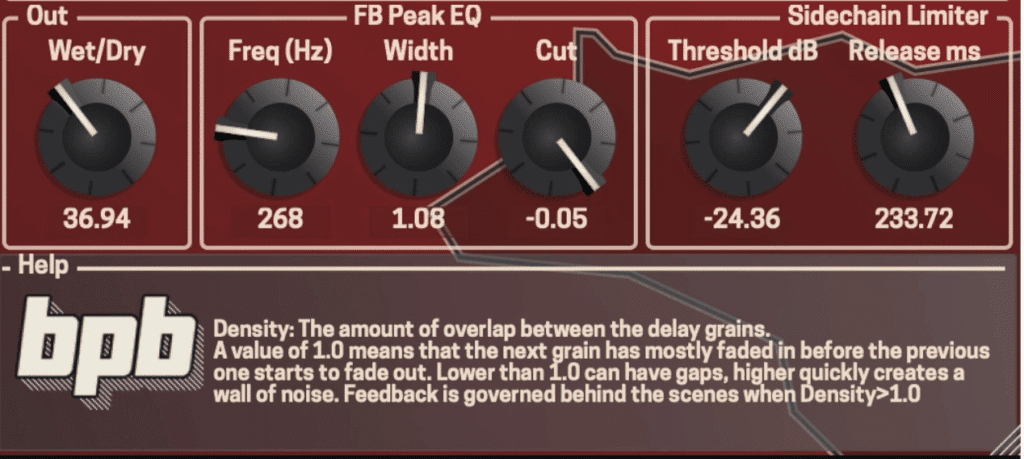
Notice at the bottom there is a help section that can explain the parameters in greater detail.
With all of that said, this is certainly the most complex plugin on this list, so if you want to know about it, simply hover a parameter and a text box at the bottom will cue you in on what’s happening, as well as give you a little insight on who worked on the plugin.
Lastly, you can easily resize the plugin with a tab in the bottom right-hand corner.
HY-Delay by HY Plugins
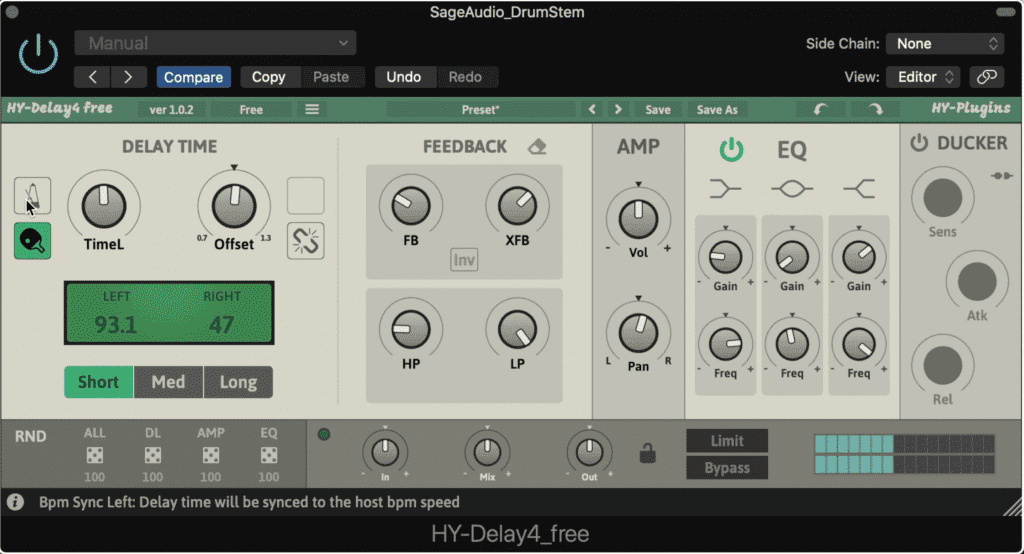
The HY-delay has a complex but accessible and well-designed interface.
With an aesthetically pleasing interface and advanced delay options, the HY-Delay is a solid free option for any engineer looking for an advanced, yet still accessible amount of delay functionality.
On the left side is the delay panel which presents a linked delay time, and an offset to create some wide stereo imaging if desired. Or you can click an unlink button and affect the left and right signals individually if that’s easier.
You can also independently alter the delay setting from time-based to note based for the left and right channels. Below this button is a ping-pong delay enabler.
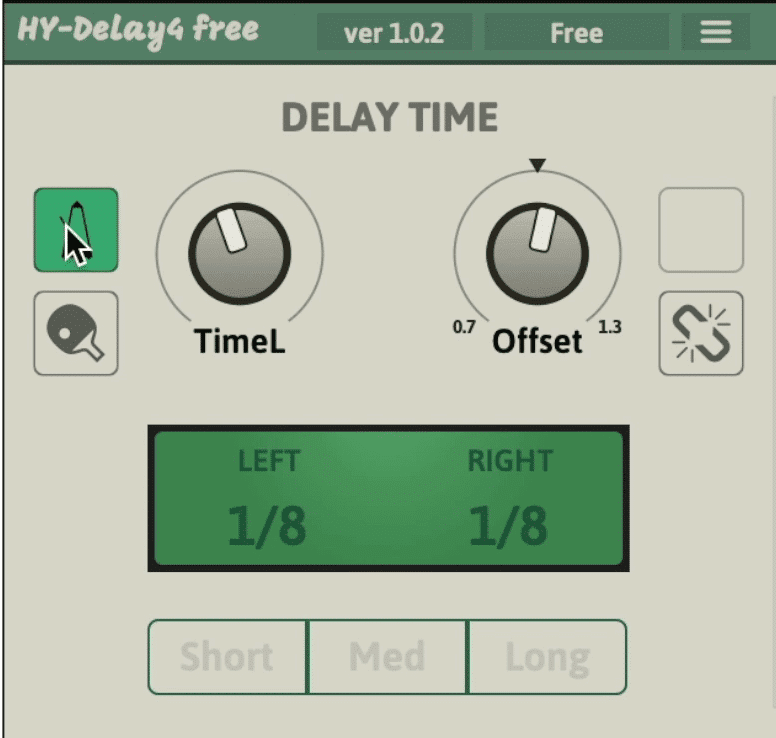
You can switch the delay from time-based to note-based with the metronome button.
3 delay settings of short, medium, and long allow for easy delay altering, while the random section at the bottom allows you the quickly alter your entire plugin settings, your delay time, your feedback section, your amp section, and your 3-band parametric eq section.
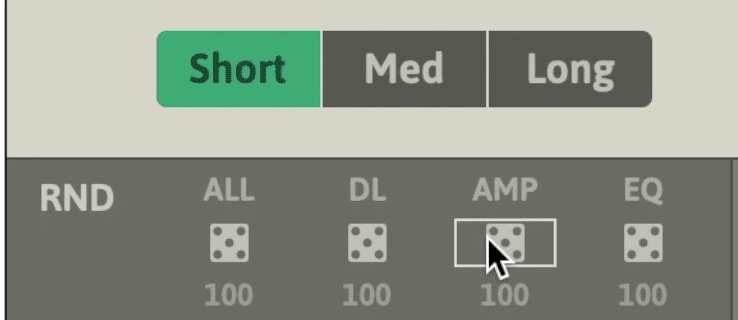
At the bottom of the plugin is a random section that can completely reset your plugin's parameters.
The feedback section includes feedback amount and crosstalk, with a high and low pass filter respective to your feedback. The amp section works as an output but with additional harmonic distortion or drive capabilities.
The ducker section on the far right acts like a compressor that attenuates the delayed signal. The sensitivity rotary is essentially a compressor threshold.
Lastly at the bottom, you have an input, output, and wet/dry mix function - as well as a limiter, most likely used to control feedback when enabled.
Brigade Delay by Full Bucket Music
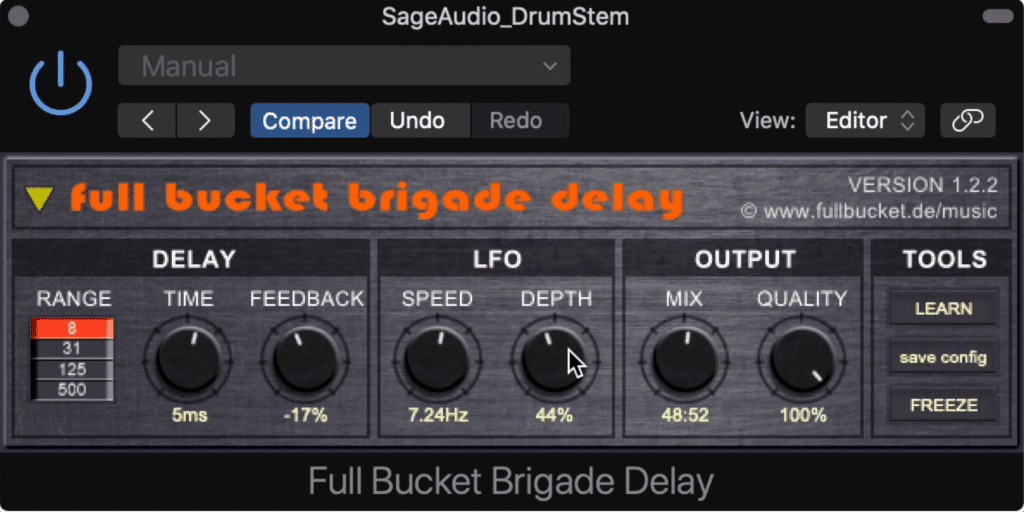
The Brigade Delay is a simple and easy plugin to use.
The Brigade Delay by Full Bucket Music is a straightforward and easy to use delay plugin for anyone looking to create delay quickly.
The delay section of the plugin includes the delay time and a feedback rotary, while the range quickly switches between shorter and longer delay times.
The LFO or low-frequency oscillator can be used to create a flanging effect where speed is the number of cycles per second, and depth is the amplitude of the modulation.

An LFO section allows for a flanging-esque effect.
In the output section, we have a wet/dry knob while the quality rotary can be used to degrade your signal is desired.
If you’re looking for a great sounding analog-inspired delay that's easy to use and can quickly affect your signal, then try the brigade delay.
If you’re working on a mix that you’d like to hear mastered, send it to us here:
We’ll master it for you and send you a sample to review.
Hysteresis by GlitchMachines
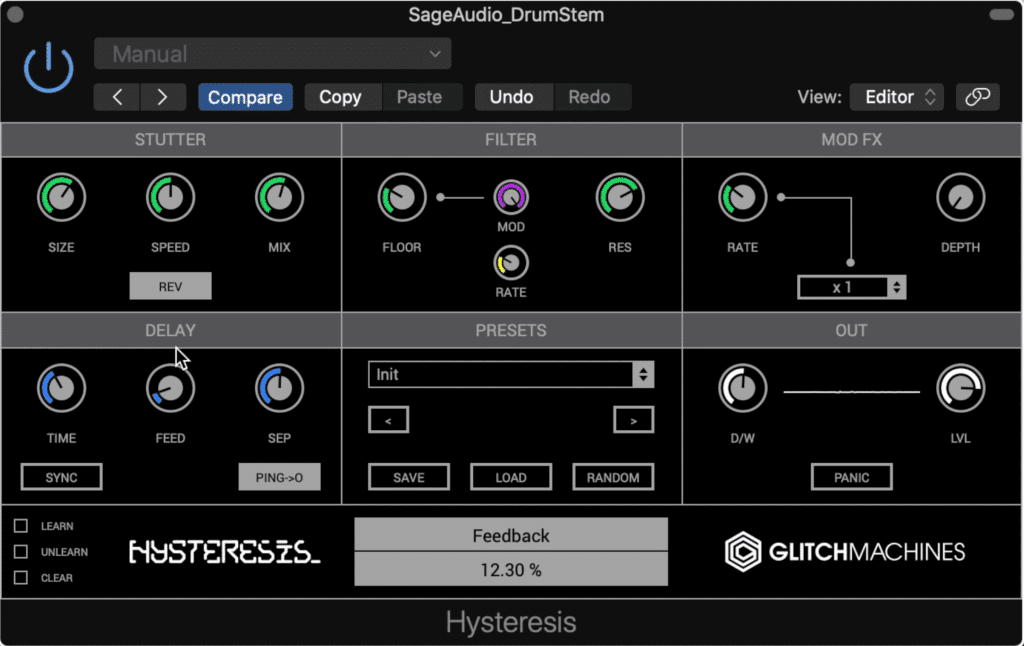
This plugin is used primarily for modulation
Another unique entry on this list, the Hysteresis by GlitchMachines is a delay that can impart strange modulation onto your signal. By controlling the stutter, filter, and mod fx functions, you introduce unique modulation unlike that of any other plugin.
The delay settings directly tie into the modulation, meaning you will need modulation to hear the delay. That is unless you enable this ping out function.
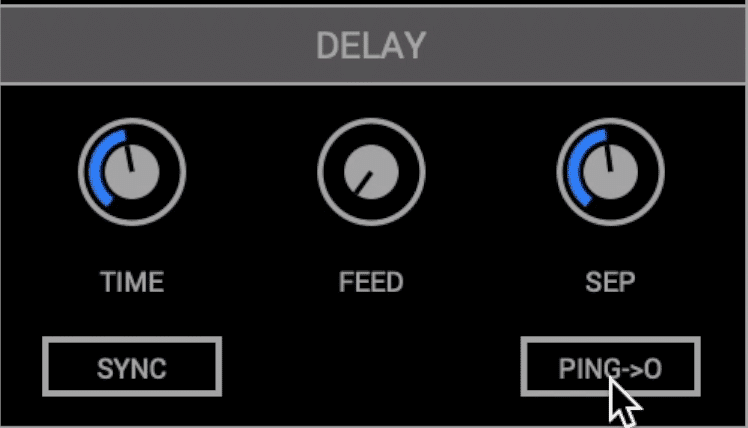
Enable this ping function to have your delay independent of your modulation.
The stutter creates a clip of the audio which is in turn used to create a feedback loop. The size adjusts how long this clip is, the speed is the speed it is looped, and the mix is a wet/dry function. As you can imagine the rev button reverses this loop.
The filter section is a low pass filter and an LFO. The floor is the low-pass filter which ranges from 20Hz to 6kHz. The mod is the amount of LFO modulation, and the rate is the speed of that modulation. The resonance rotary is the amplitude of a resonance bell curve at the cutoff frequency of the low-pass filter.

The stutter, filter, and mod fx sections are responsible for the modulation effects the plugin imparts on your signal.
In the modulation section, you have the rate, depth, and multiplier/divider. The rate rotary controls the rate of the delay time modulation. Lower settings are indicative of a chorus effect, whereas higher settings have more of a noise and ring to them.
The depth controls the output of the modulation delay effect, and the modulation rate multiplier or divider is controlled via this drop-down menu.
In the output section, you have a wet/dry rotary, output rotary, and a panic button in case the signal becomes increasingly and undesirably loud. This button will reset your modulation settings, in turn, cutting out the potentially loud modulation.
If you’re liking this list and want some more free plugins, check out our blog post on free plugins for mastering:
They range from metering plugins to plugins used for compression and limiting.
Speculum Free by Decade Bridge
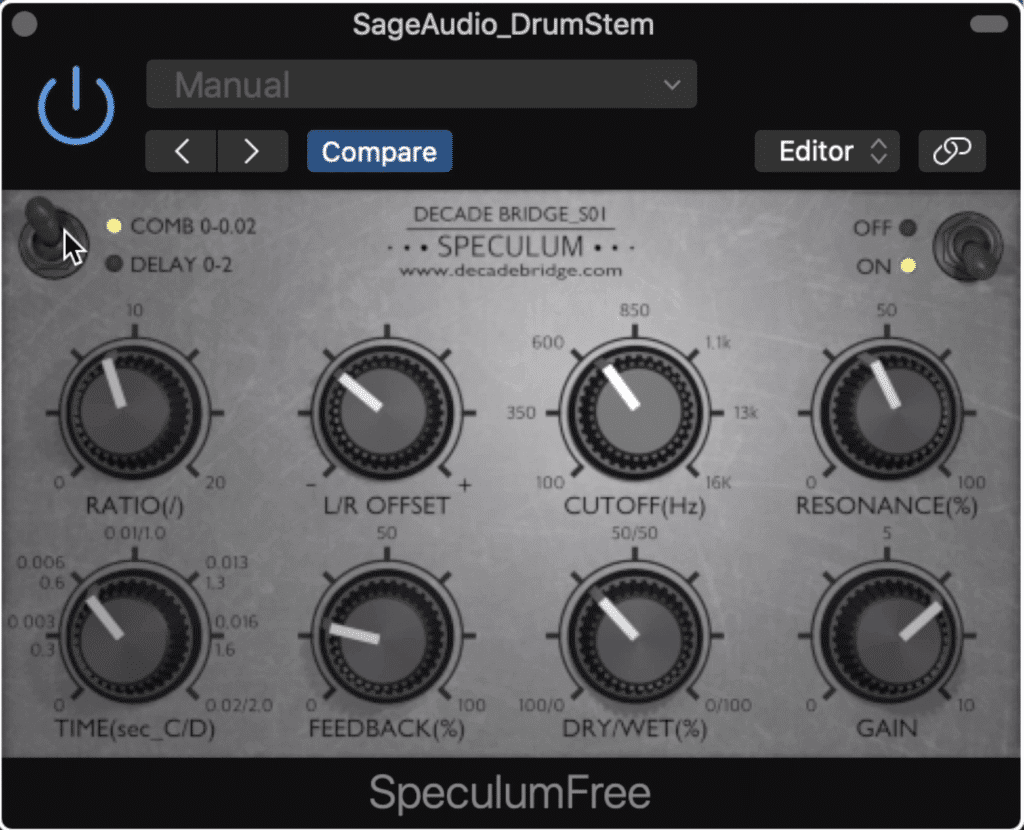
The speculum free plugin is a simple and straightforward delay, with 10 functions.
With only 10 functions , each playing a distinct and easily discernible role, the Speculum Free by Decade Bridge is a straightforwardly simple yet useful delay plugin.
First, you can switch between a comb filter and a delay, giving you easy control over the sound of your signal. For example, using the comb filter will create a chorus effect , while altering the time rotary will change the position of the comb filter, giving the filter a different character.
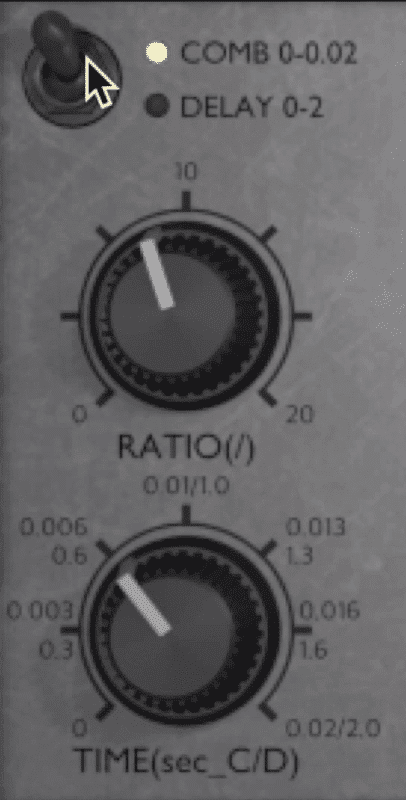
Switch between the comb and delay functions to create either a flanging sound or a delay effect.
By switching to delay, the ratio rotary alters the ratio of the effect to that of your original signal. Time is the length of the delay. Left/Right offset creates minimal or significant timing differences between the left channels delay and the right channels delay.
Feedback is the amount of delayed signal that get reintroduced into your signal. The cutout if a low-pass filter , whereas the resonance is an amplified bell filter on at the edge of that cutoff.
Lastly, the wet and dry functions give you some control over the output, whereas gain is simply the amplitude of the output.
Conclusion
No matter how complex or simplistic you’d like your delay to be, there’s a great option for you on this list.
Some of the simpler plugins include:
- Speculum Free
- Valhalla FreqEcho
- PitchedDelay
Some of the more complex and advanced plugins include:
- Hysteresis
- Lagrange
- HY-Delay
With these plugins, you can create practical delays, or completely foreign sounding modulated delays. Whatever the case may be, try these plugins out for yourself and share your results.
If you have a mix you’re working on, send it to us here:
We’ll master it for you and send you a sample to review.
Have you used any of these free delay plugins?


