How to Pitch Shift Without Losing Quality
Sampling and pitch shifting often go hand in hand. Altering a sample’s pitch to give it a unique characteristic is great in theory.
But, if used excessively, the quality of the sample can degrade quickly. With a bit of planning, and the use of a 96kHz. file, clean pitch-shifting can be accomplished.
Alter Your Session’s Sampling Rate
Building the track or beat first, and then implementing the sample, works for a lot of engineers. For this method, however, you’ll need to do the opposite. That is, make the sample, and then create the track around it.
First, import your audio file. For this method to work, use a high fidelity sample with a sampling rate of 96kHz.
Next, change your session’s sampling rate.
To do this click File > Project Settings > Audio. See the photo below for a visual reference.
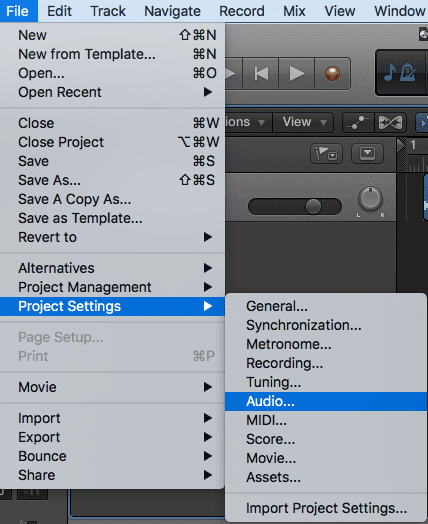
In Logic Pro, this is how to access your session's sampling rate
A window should appear with which you can alter your session’s sampling rate.
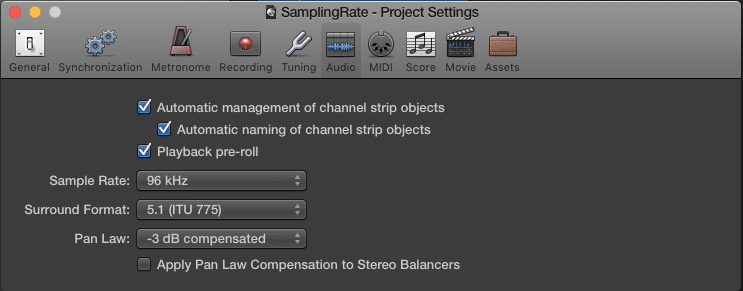
Click on the 'Sample Rate:' tab to alter your session's sampling rate
If you want your sample to be faster and higher in pitch, increase the session’s sampling rate. If you want your sample to be slow and lower in pitch, decrease the session’s sampling rate.
Notice that when you select the 192kHz sampling rate, the track plays exactly twice as fast , and at twice the pitch.
Selecting the 48kHz sampling rate results in playback that’s half the speed and half the pitch.
This is due to these sampling rates being exactly double 96kHz, and half 96kHz respectively.
Why 96kHz?
Most engineers tend to record at a 48kHz sample - this works well for typical songs, but for pitch-shifting it’ll leave you limited.
Notice the options that recording in 96kHz offers. You can slow down your sample without losing quality, and speed up your sample without losing quality.
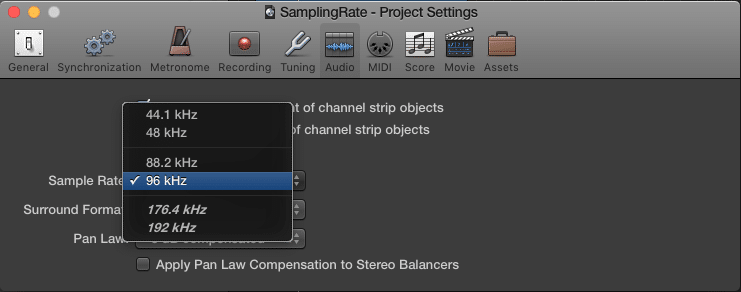
With a 96kHz. recording, you have 3 slower, lower pitch options, and 2 faster, higher pitch options.
If you were to record at a 48kHz. sampling rate, your only options would be to slow down slightly or to speed up your sample.
Additionally, if you change your session’s sampling rate to 48kHz, and your audio is at a 96kHz . sampling rate, the playback will still be 48kHz or 48,000 samples per second.
In other words, you can slow down your sample to half speed, and still be working in the professional standard of 48kHz.
This way, you don't introduce unwanted distortion or aliasing when pitch shifting down.
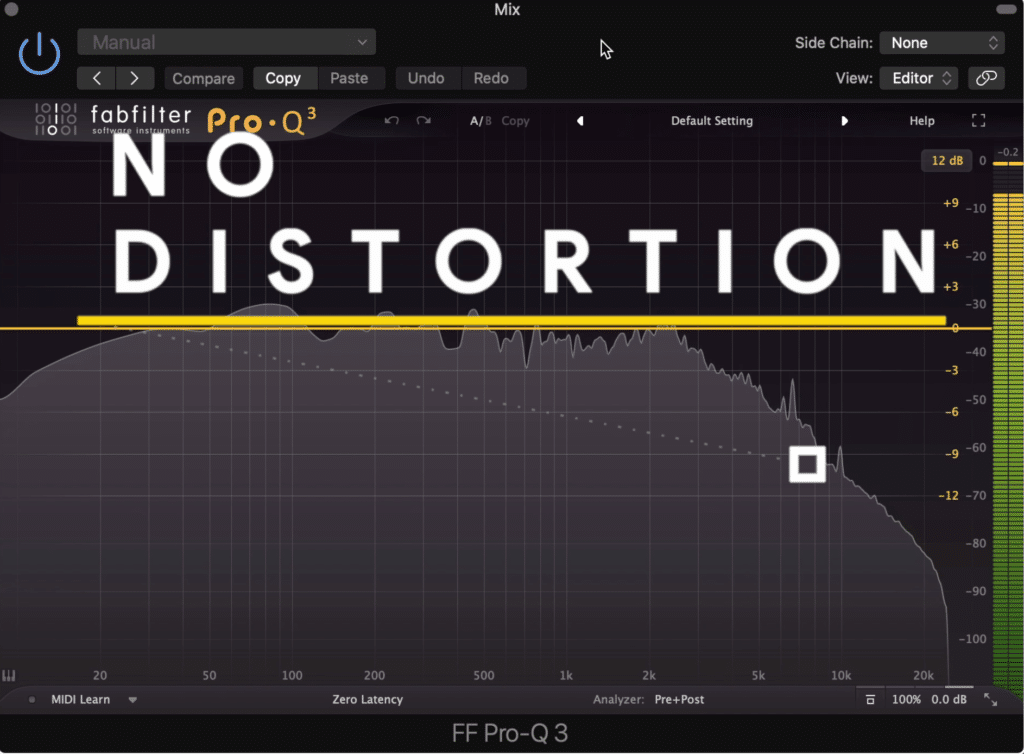
When using a higher sampling rate, decreasing the pitch doesn't cause distortion.
If you had used a lower sampling rate, then reducing the pitch would affect the sampling rate, which would, in turn, decrease the frequency range of your recording.
Simply put, this process would introduce aliasing, which is an unwanted effect that causes distortion.
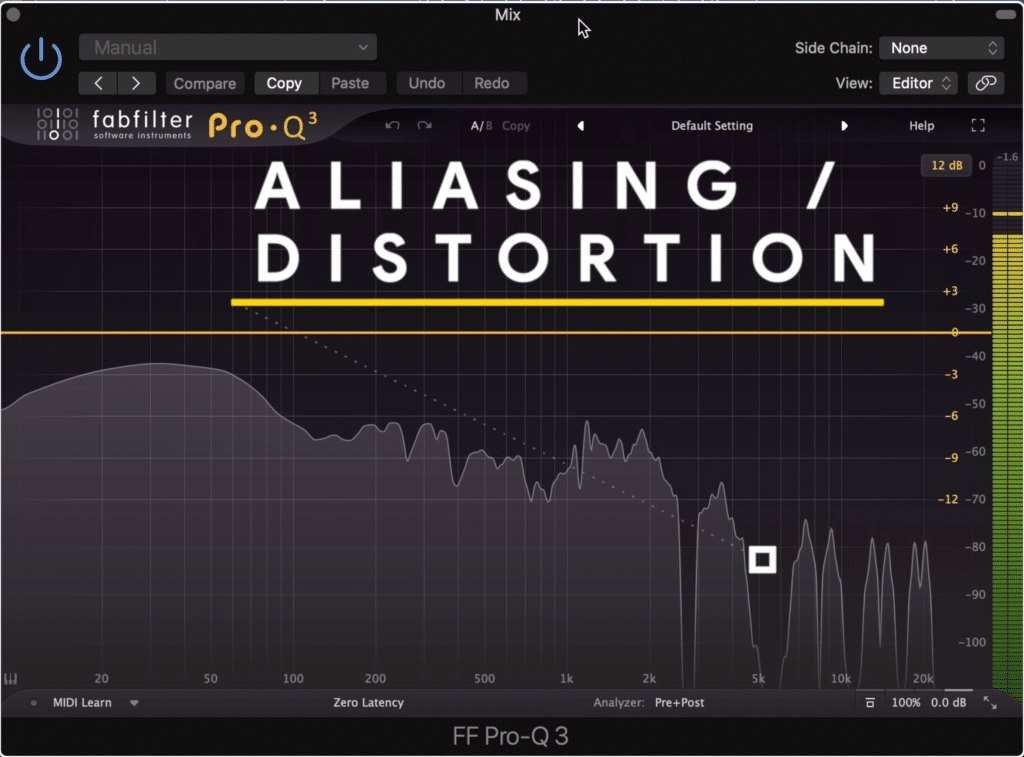
Notice the distortion that occurs when pitch shifting at a lower sampling rate.
Conclusion:
Working in 96kHz, and altering your session’s sampling rate, it a great way to create professional sounding samples. It’s the only way the doesn't lead to signal degradation, will still offering multiple options regarding drastic speed and pitch shifting. Use this method on your next beat, dance track or mix, and see if you notice a difference in the quality of your sample.
How do you sample your music?


